
How to create a new booking in Snad
To create a booking in Snad, open Bookings, then Front desk, and press “New Booking”. Choose a Service and a Customer, set the Date, press a time under Pick a time, then press Save. The booking is recorded as pending.
In this guide8
Steps
Step 1: Open the front desk
In the sidebar, choose Bookings, then Front desk, and press “New Booking” at the top of the page. Details
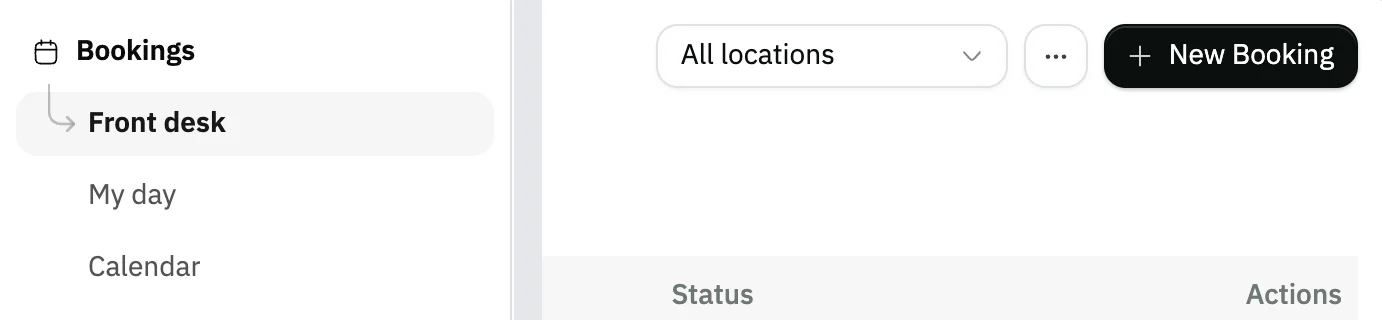
Image key - Front desk in the sidebar
- The “New Booking” button
Step 2: Choose the service
Open Service and choose the service you need. The Price summary shows the price and VAT before you pick a time.
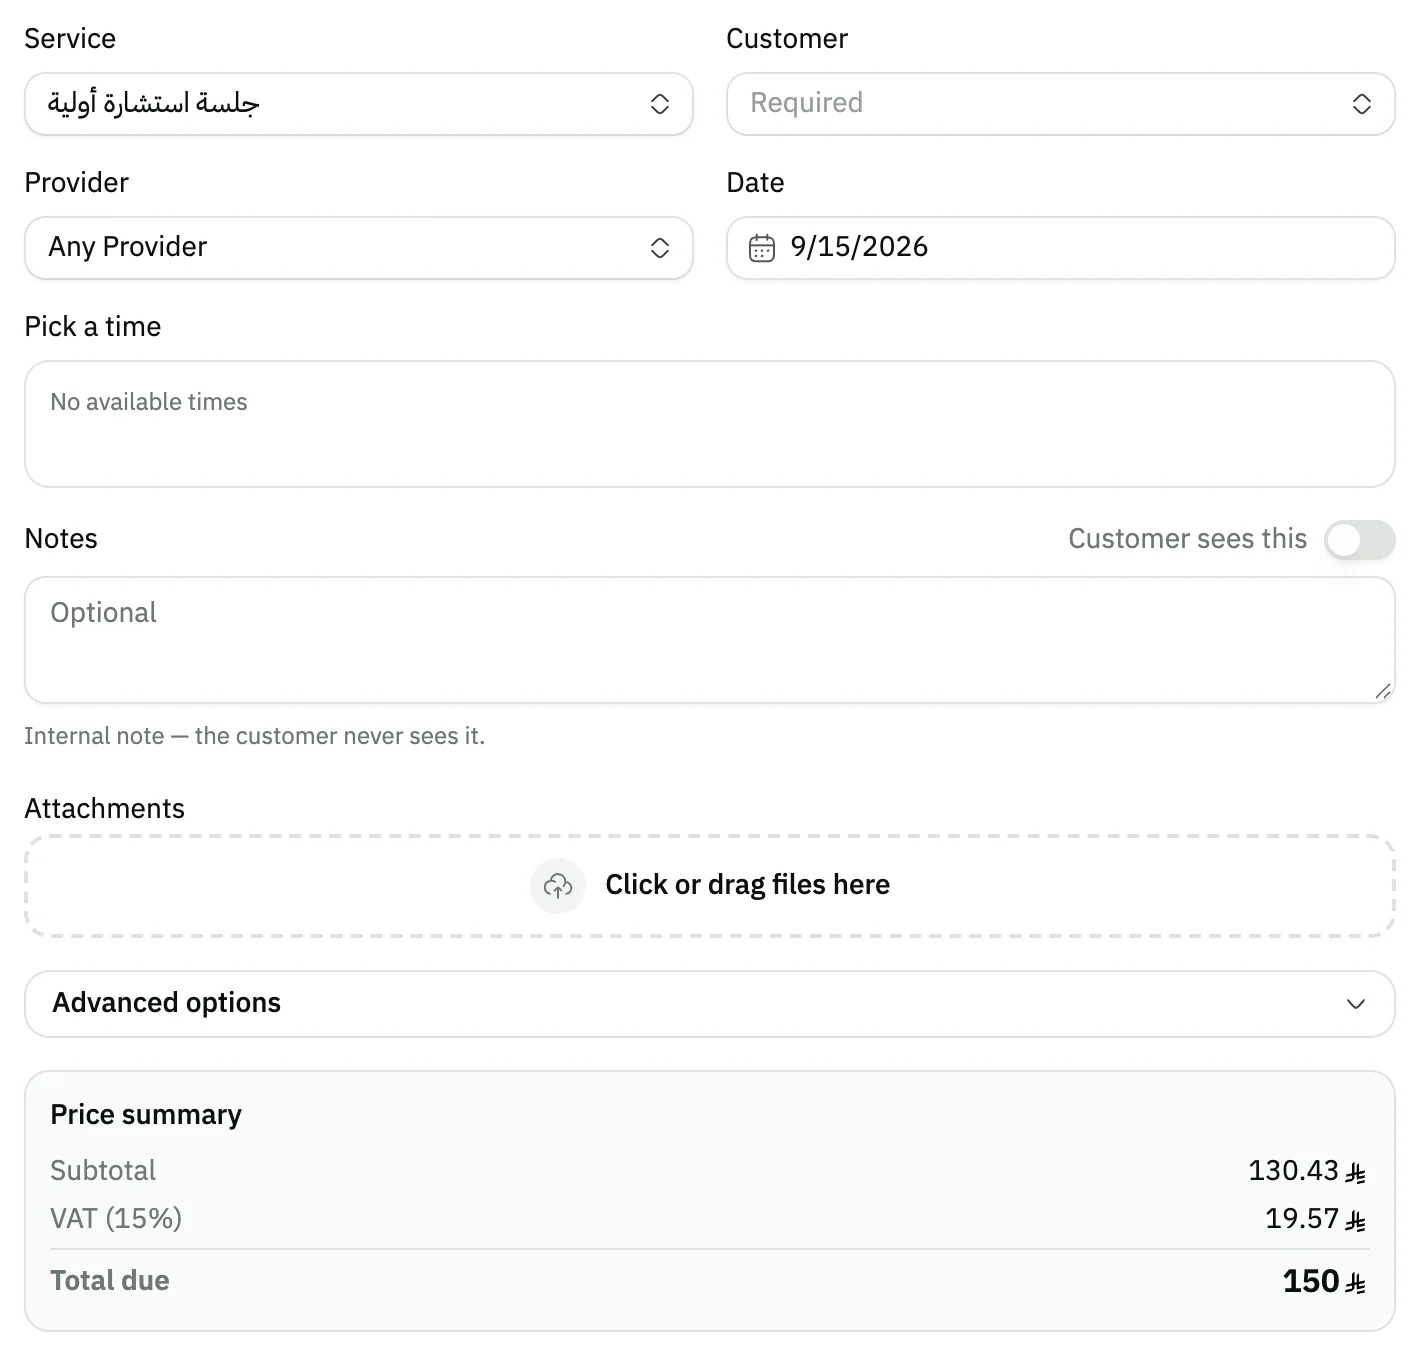
Image key - Service
- Price summary
Step 3: Choose or add the customer
Open Customer and search by name or serial number. If they aren't registered, press Add inside the list to register them here. Details
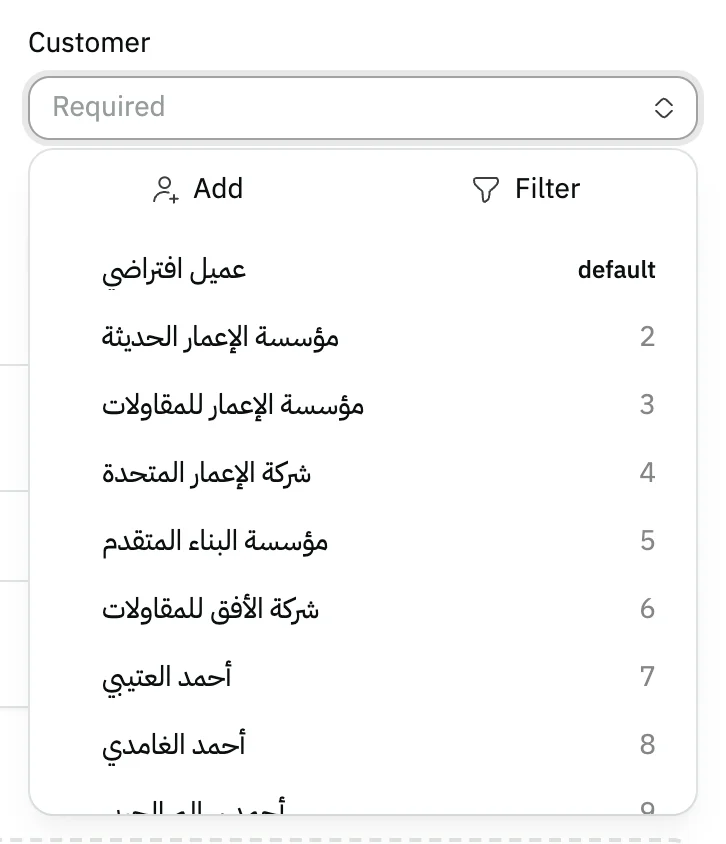
Image key - Customer
- The Add button
Step 4: Set the provider and date
Leave Provider on “Any Provider” to see every provider available, or choose one. The form opens on the day shown on the front desk; change the Date in the calendar, where past days are disabled. Details

Image key - Provider
- Date
Step 5: Press the time you want
Under Pick a time, press the time that suits the customer, or type the exact minute in Time (optional) beside the date. Times are grouped by morning, afternoon and evening, and carry the provider's name when several are free. Details
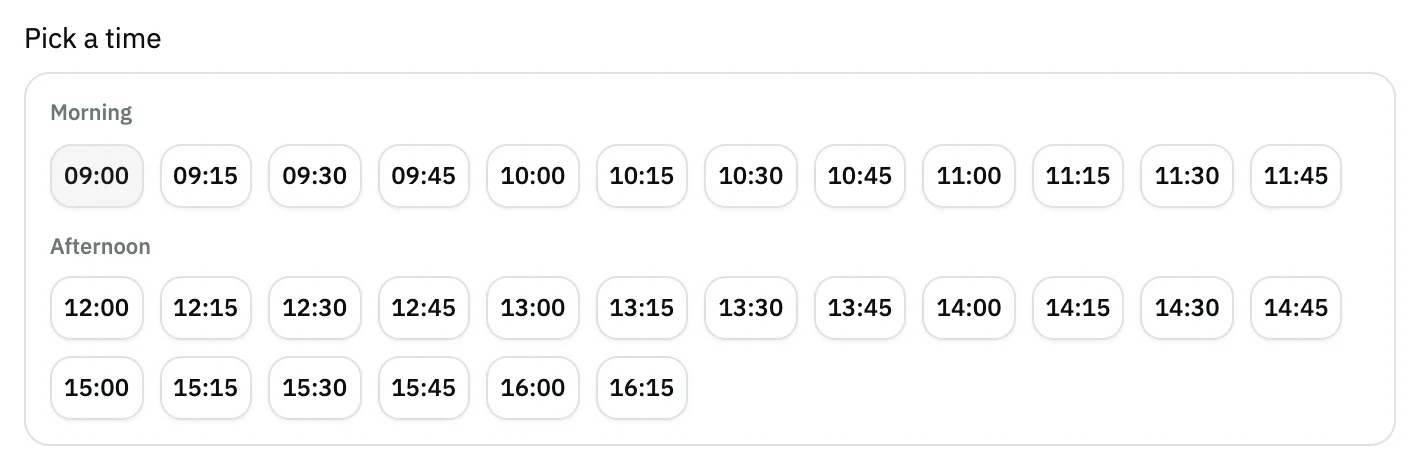
Image key - Pick a time
- The selected time
Step 6: Add a note if needed
Write what you need in Notes. The note is internal, and the customer reads it only if you turn on Customer sees this. Details

Image key - Notes
- The Customer sees this switch
Step 7: Choose the payment method
Under the price summary, choose the Payment method: Cash, Card, Transfer or On credit. It opens on the default from booking settings, and a free service shows no field. Custom payment methods you offered for bookings show under these buttons (custom payment methods). Details
Step 8: Save the booking
Press Save to record the booking as pending on the front desk. Or press Save & print to confirm it and issue its invoice straight away. Details
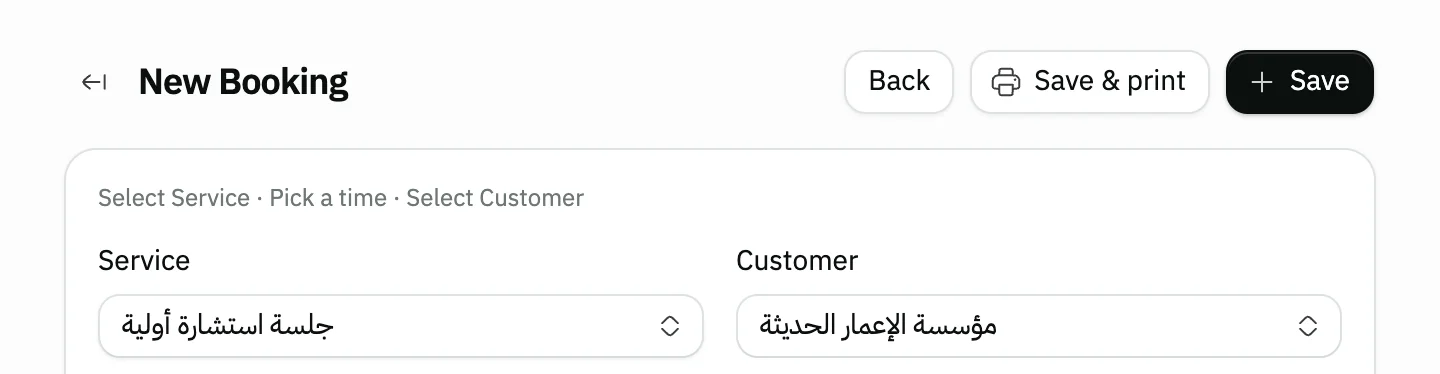
Image key - The Save button
- The Save & print button
Messages that block saving
If saving fails, one of these messages shows next to the field. The table gives the cause and the fix.
| Message | Cause | Fix |
|---|---|---|
| «Select Service» | No Service was chosen before saving. | Open Service, choose one, then pick the time again. |
| «Select Customer» | No Customer was set for the booking. | Choose a customer from the list, or register one with Add. |
| «Pick a time» | No time was pressed among the available ones. | Press a time under Pick a time, then save. |
| «This time is no longer available. Please choose another.» | Another user booked the same time before you saved. | The times refresh on their own; press another time and save again. |
| «Enter amounts for at least two payment methods» | You chose Split payment but entered an amount for only one method. | Spread the total over at least two methods, or choose a single payment method. |
| «The amounts must add up to the invoice total» | The Split payment amounts don't add up to the booking total. | Adjust the amounts until “Fully allocated” appears, then save. |
Advanced details
Each section here explains one point from the steps in depth. Every section has a fixed link you can share.
Booking a recurring series
For sessions that repeat on set weekdays, open More actions next to the New Booking button and choose Session series. Set the service, customer, Number of sessions, Weekdays and Start date.
The preview lists what will be created and what is skipped because of a conflict, then Create series.
Registering a new customer while booking
The Add button inside the customer list opens the same customer form without leaving the booking. The fields are covered in add a customer.
A specific time, and no times showing
When you type a time in Time (optional), Snad shows that exact minute, and if there is exactly one match it selects it for you. If the time isn't available, the message “This time isn't available. Nearest free times:” appears with the six nearest free times under it. Clear the time to get the whole day's list back.
When no times are free, Snad names the cause: the service is inactive, no provider is linked to it, the provider has no working hours that day, the day is outside the booking window, or the day is fully booked. Try another date or provider; a day without shifts counts as closed.
Assign providers on the service and set the hours on the provider.
Choosing the branch and who appears in it
Pick the branch in the Branch field, and only the providers linked to that branch appear, with their times. A provider linked to no branch appears in every branch.
If your account is linked to a branch or you have one branch, Snad picks it for you and hides the field. With no branch picked, every provider appears.
Meeting link, location details and attachments
Open Advanced options to add a Meeting link for a remote appointment and Location details for an in-person one. Both appear to the customer on their page.
Custom booking fields your business adds appear inside Advanced options too (how to add custom fields).
Booking fields do not support the types Multiple choice, Date and time, Time, Amount, Percentage or Rating; those are for customer and supplier fields.
Inside Advanced options too, users with the attachments permission get an Attachments field for a referral letter or consent form.
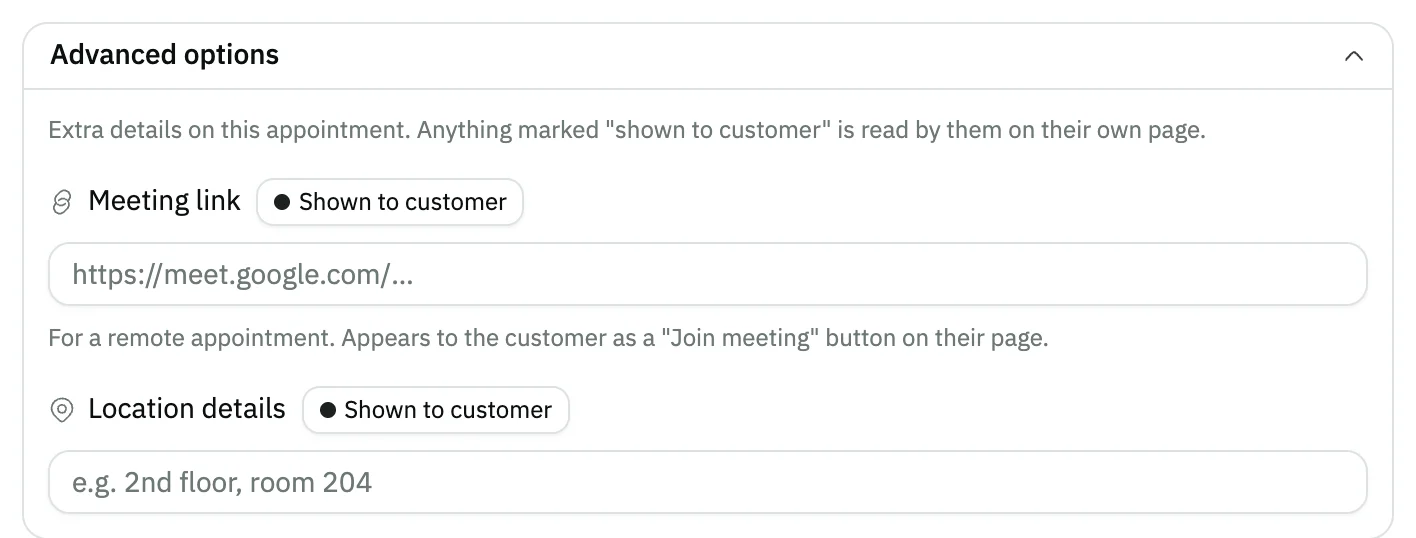
- Meeting link
- Location details
Split payment and what the method does
If your business offers Split payment, a button appears beside the four methods, with amount fields. They must add up to the booking total, and the booking isn't saved until they do.
If you pick a custom payment method with a fee borne by the customer, a read-only fee line shows under it, with a Total after fee line. The fee is worked out on the booking price before VAT, with the same calculation the invoice uses, and the invoice itself is issued when the booking is confirmed. The line is not shown when the method has no fee, or when the store bears it.
Choosing a method doesn't charge anything. It is saved with the booking and its invoice is recorded with it when the booking is confirmed; you can change it later in the booking details panel until the invoice exists.
What happens to the booking after you save
A booking saved with Save is “pending”: no invoice and no accounting entry until you confirm it.
Save & print confirms it at once and creates its invoice. You can confirm bookings later from the front desk.
Common questions
- How do I book an appointment for a customer?
- Open Bookings, then Front desk, and press “New Booking”. Choose the service, customer and time, then press Save.
- Is the booking confirmed as soon as I save it?
- No. Save records it as pending, with no invoice. Save & print confirms it and creates the invoice straight away.
- Does the customer see the note I write?
- No, notes are internal by default. They are shown only if you turn on Customer sees this before saving.
- Can I register a new customer while booking?
- Yes. Open Customer and press Add inside the list. They're registered and chosen for the booking right away.
- Can I type a specific time for the booking?
- Yes. Type it in Time (optional) beside the date. If it isn't available, Snad shows the nearest free times to choose from.
- Why am I asked to pick another time when I save?
- Because another user took that time before you saved. Press a different time on the refreshed list and save.