
How to add an employee in Snad
To add an employee in Snad ERP, open HR, then Employees, and press New employee. Type the Name, pick a Branch and a Work schedule, enter the salary and contract under Financial details, then press Save. The employee page opens.
In this guide6
Steps
Step 1: Open the employee list
In the sidebar, choose HR, then Employees, and press New employee above the list. Details
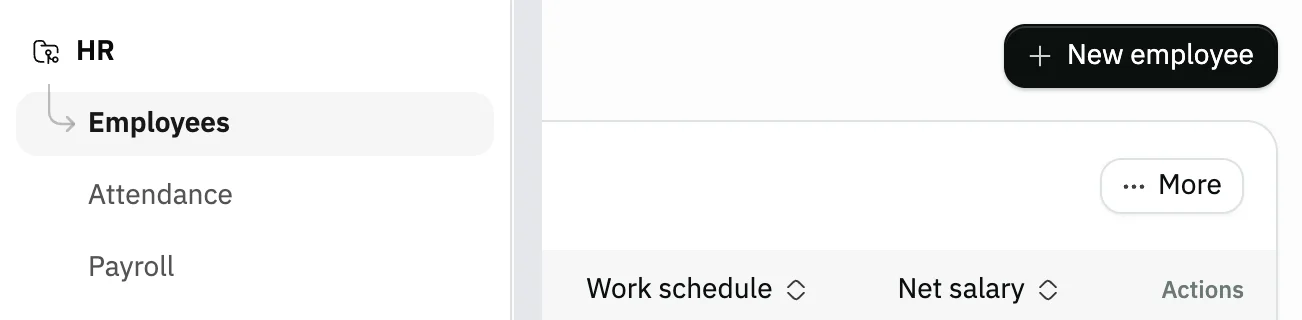
Image key - Employees in the sidebar
- The New employee button
Step 2: Enter the personal details
Type the Name, at least 3 characters. Email, Phone, Nationality, Birth date and Address are all optional. Details
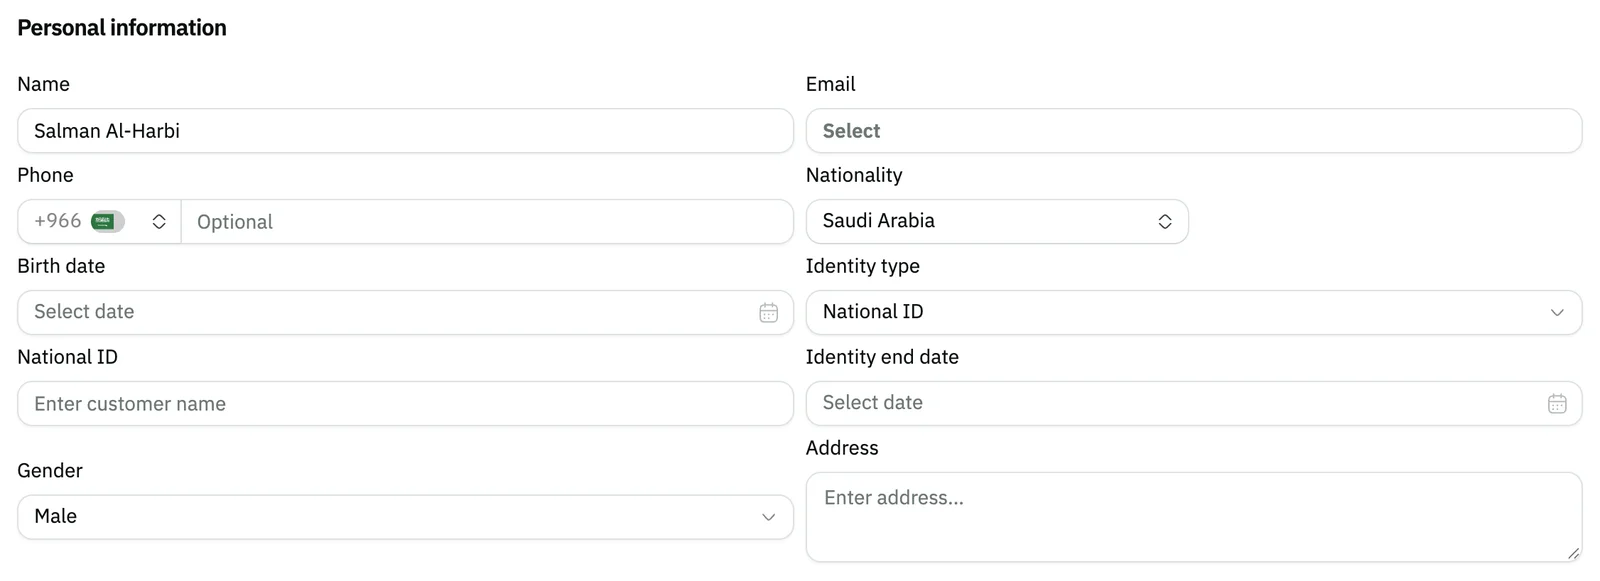
Image key - Name (required)
- Email (optional)
- Identity type and its number
Step 3: Pick the branch and work schedule
Under Job information, pick the Branch and the Work schedule; both are required. Job title and Department are optional. Details
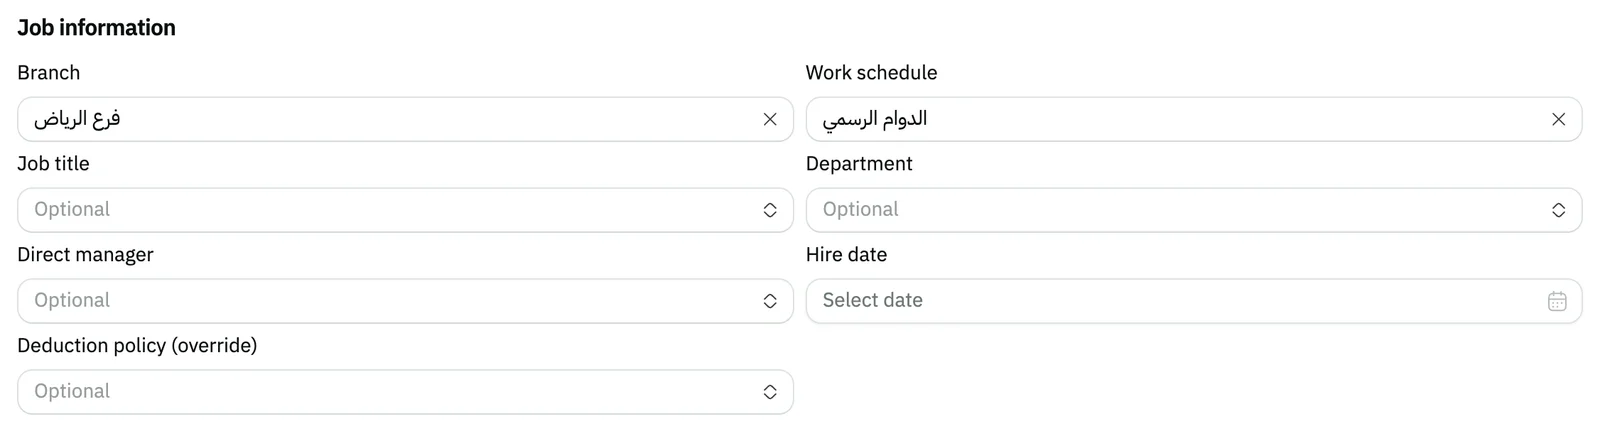
Image key - Branch (required)
- Work schedule (required)
- Job title (optional)
Step 4: Enter the salary
Open the Financial details tab and enter the Basic pay and the allowances. Net salary is added up for you; choose the Payment method. Details
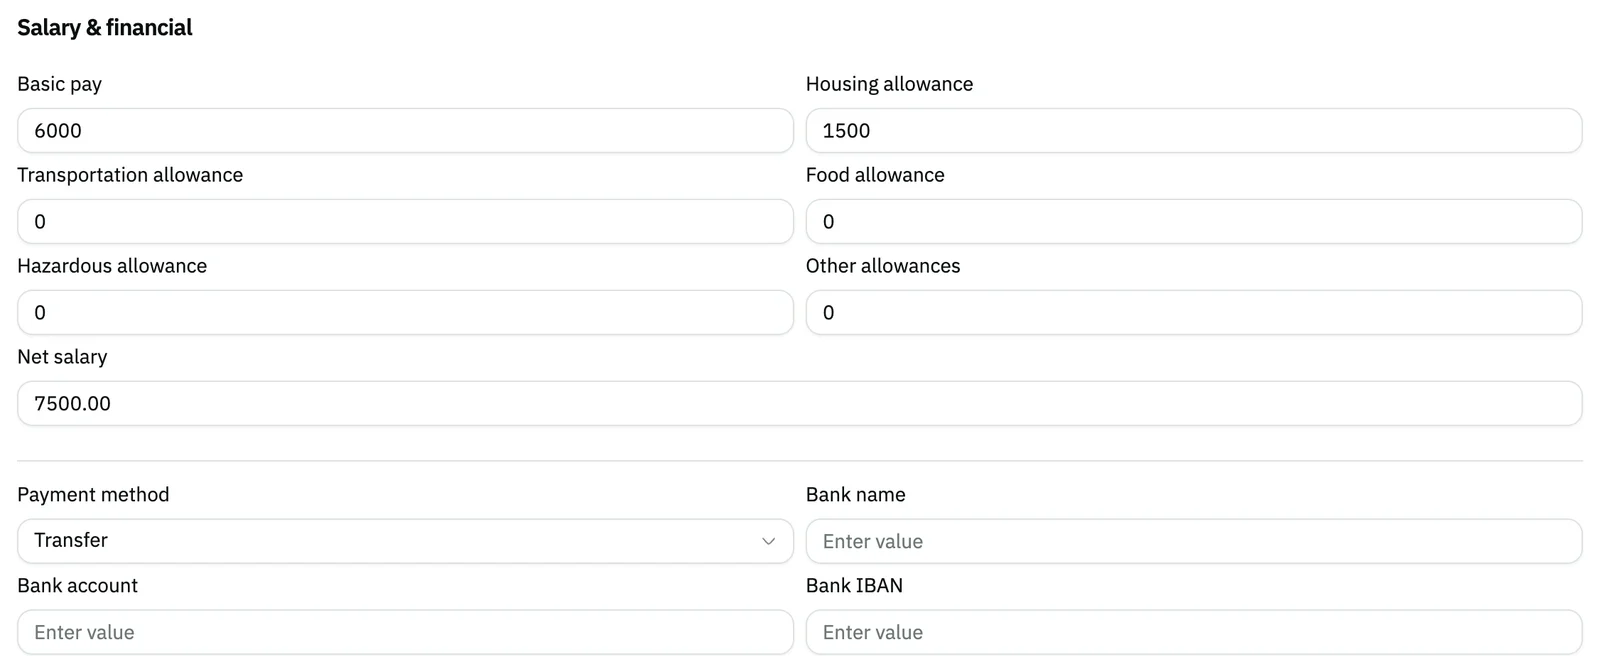
Image key - Basic pay
- Net salary (calculated for you)
- Payment method
Step 5: Check the contract details
Under Contract information, the Contract start date begins at the start of the year and ends at its close, with Contract type on Full time. Edit them if needed. Details
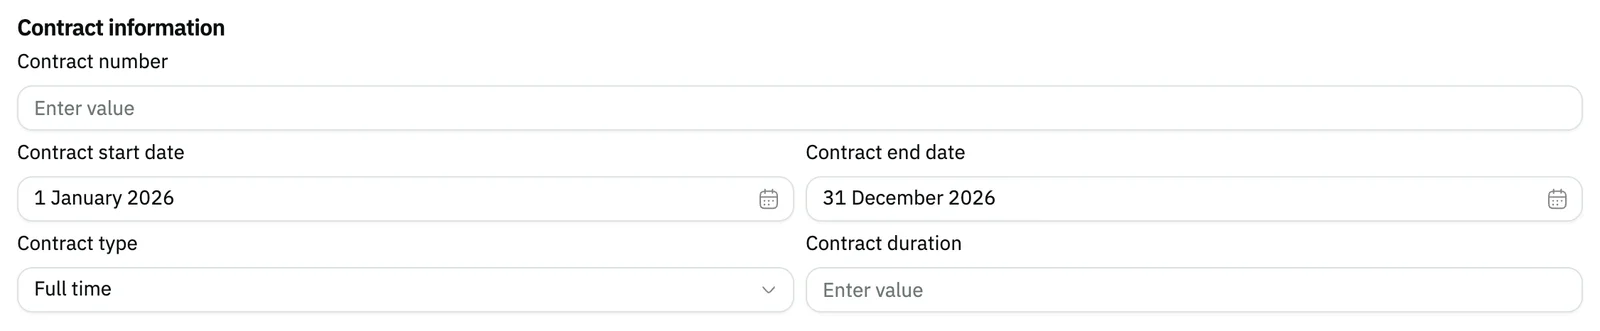
Image key - Contract start date
- Contract end date
- Contract type
Step 6: Save the employee
Press Save at the top of the form. The employee page opens next. Attachments beside it is for the employee's files, and Cancel leaves without saving. Details

Image key - The Save button
- The Attachments button
Messages that block saving
If saving fails, one of these messages shows next to the field. The table gives the cause and the fix.
| Message | Cause | Fix |
|---|---|---|
| «يجب أن يحتوي النص على 3 حرف على الأقل» | The Name is shorter than 3 characters. The message shows in Arabic in both interface languages. | Type a name of 3 or more characters. |
| «مطلوب» | Under Branch or Work schedule: no value is picked. The message shows in Arabic in both interface languages. | Open the field and pick from the list. |
Advanced details
Each section here explains one point from the steps in depth. Every section has a fixed link you can share.
National ID, residence or passport
Identity type starts on National ID. Choose Residence or Passport and the number field below switches to match.
Identity end date stays an optional date field.
Create a job title or department from the field
Job title or department not there? Open the field and press Add at the top of the list, type the Name (at least 3 characters), then save.
The new job title is selected in the field right away, so you carry on with the form.
Next to them are Direct manager and Hire date, all optional.
Bank transfer and bank details
Payment method starts on Transfer, and you can change it to Cash. Below it are Bank name, Bank account and Bank IBAN.
On the first tab, Deduction policy (override) starts on No override (use default). Change it for an employee under a special policy, and follow its effect in payroll.
Contract number, duration and types
Type the Contract number and Contract duration as free text. Contract type is one of Full time, Part time and Contract.
On save, Snad creates an active contract for the employee from these details, and it shows in the contracts report.
Link a user account to the employee
Under Job information you see User account. Press Select a user and pick the account. The link is made when you save the record.
An employee linked to an account uses the employee account. Create the account first with add a user, or from Manage users.

- Select a user
- Linking happens after saving
Custom fields for an employee
If your business added custom fields for employees, they show in the Custom fields card under Job information (how to add custom fields). With no field added, the card does not show.
A field marked Required blocks saving until you fill it. A field you marked Show in list appears as a column in the employee list. Custom fields are information for your team: they never change salaries or accounting entries.
For employee details that not every user should see, such as a card number or an internal note, choose Hide unless the viewer has permission in the field's options and then the right permission. A user without it sees neither the field nor its value.
After saving: what Snad creates
The employee gets an Employee number automatically, and Snad opens a child account for them under the employees account in the chart of accounts.
Then they show in attendance according to their work schedule. To add many at once, use import employees from a file.
No New employee button?
The button shows only to users allowed to add employees. Ask your Snad account admin to grant it (roles and permissions).
Common questions
- Which fields are required to add an employee in Snad?
- Three: Name, Branch and Work schedule. The rest is optional or has a default value.
- Do I add the branch and work schedule before the employee?
- Yes. Both fields are required and are picked from existing lists. Add the branch first, and the work schedule from HR settings.
- How do I add several employees at once?
- From an Excel file, instead of the single form. The steps are in import employees from a file.
- Can I link the employee to a login account?
- Yes, from User account under Job information. The link is made after you Save the employee. Create the account first with add a user.