
How to add a user in Snad
To add a user in Snad, press Settings, choose Users, then press Create user. Enter the Email and Name, choose a Permission, then press Save. The user gets a link by email to set their password.
In this guide6
Steps
Step 1: Open the users screen
Press Settings at the bottom of the sidebar and it turns into the settings menu. Then choose Users from the list. Details
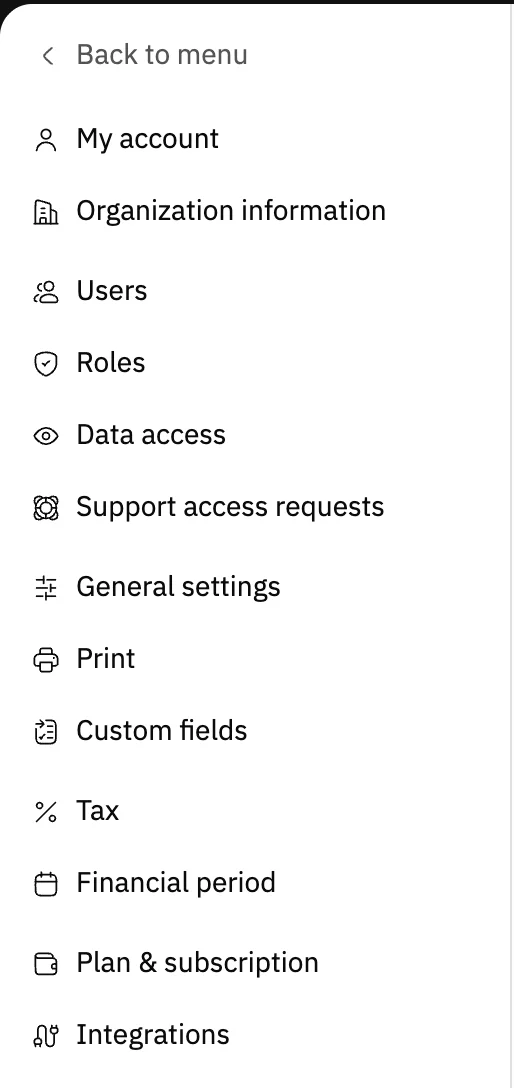
Image key - Users in the settings menu
Step 2: Check the free seats
The top of the page shows how many users you have out of the Available users in your plan. If a seat is left, press Create user; at the limit the button is disabled. Details
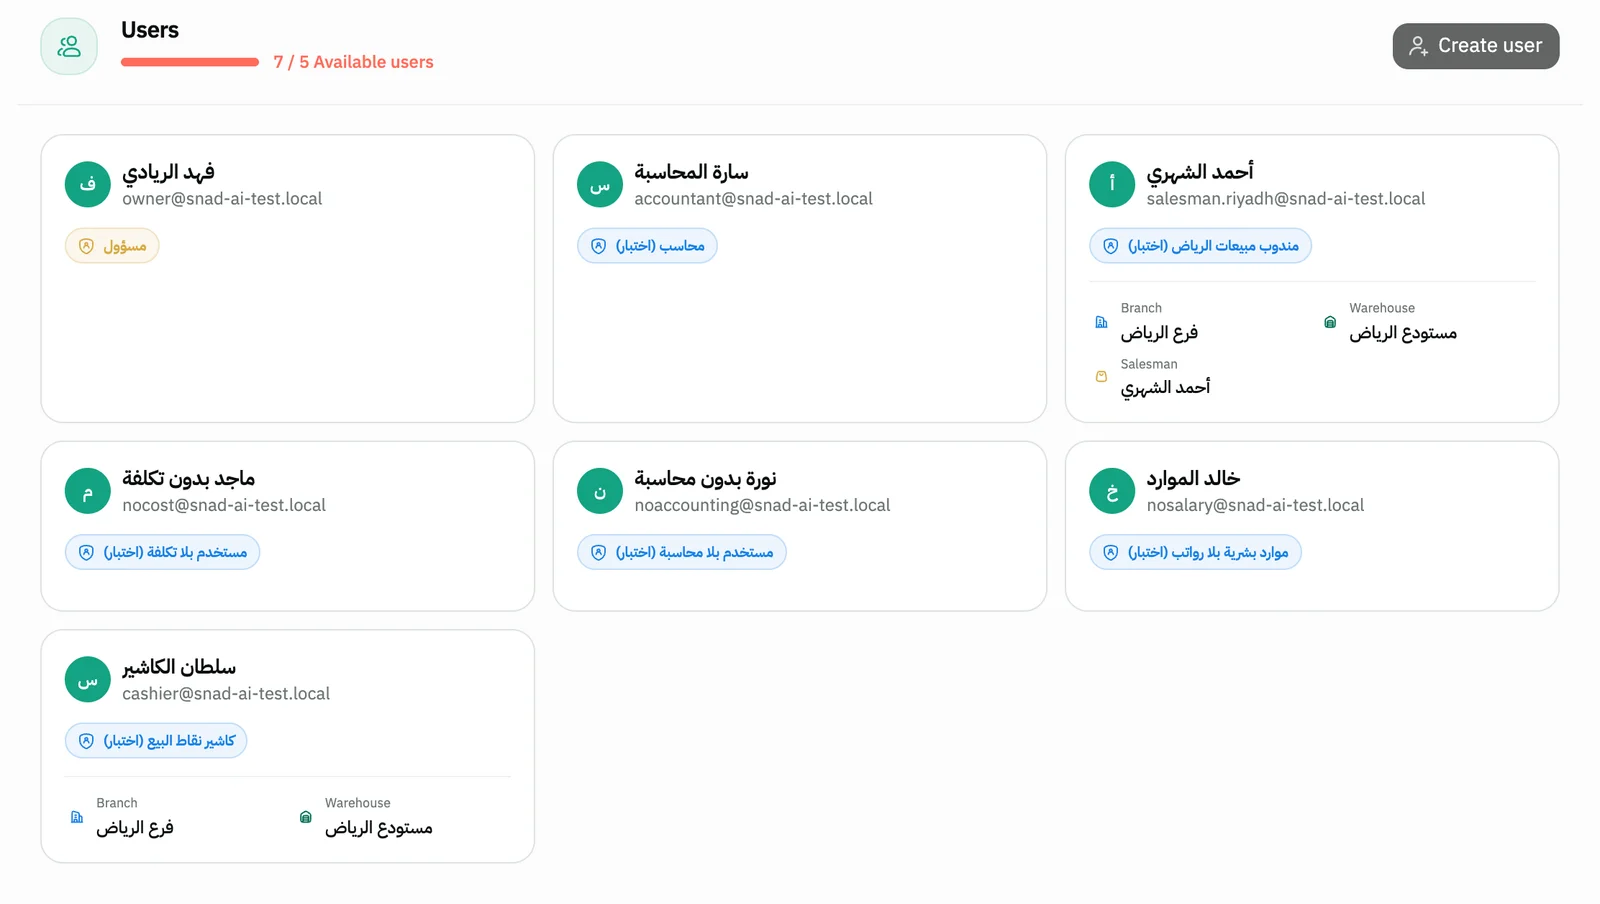
Image key - The Available users counter
- The Create user button
Step 3: Enter the email and name
In the Create user window, type the user's Email, then their Name with at least three characters. Details
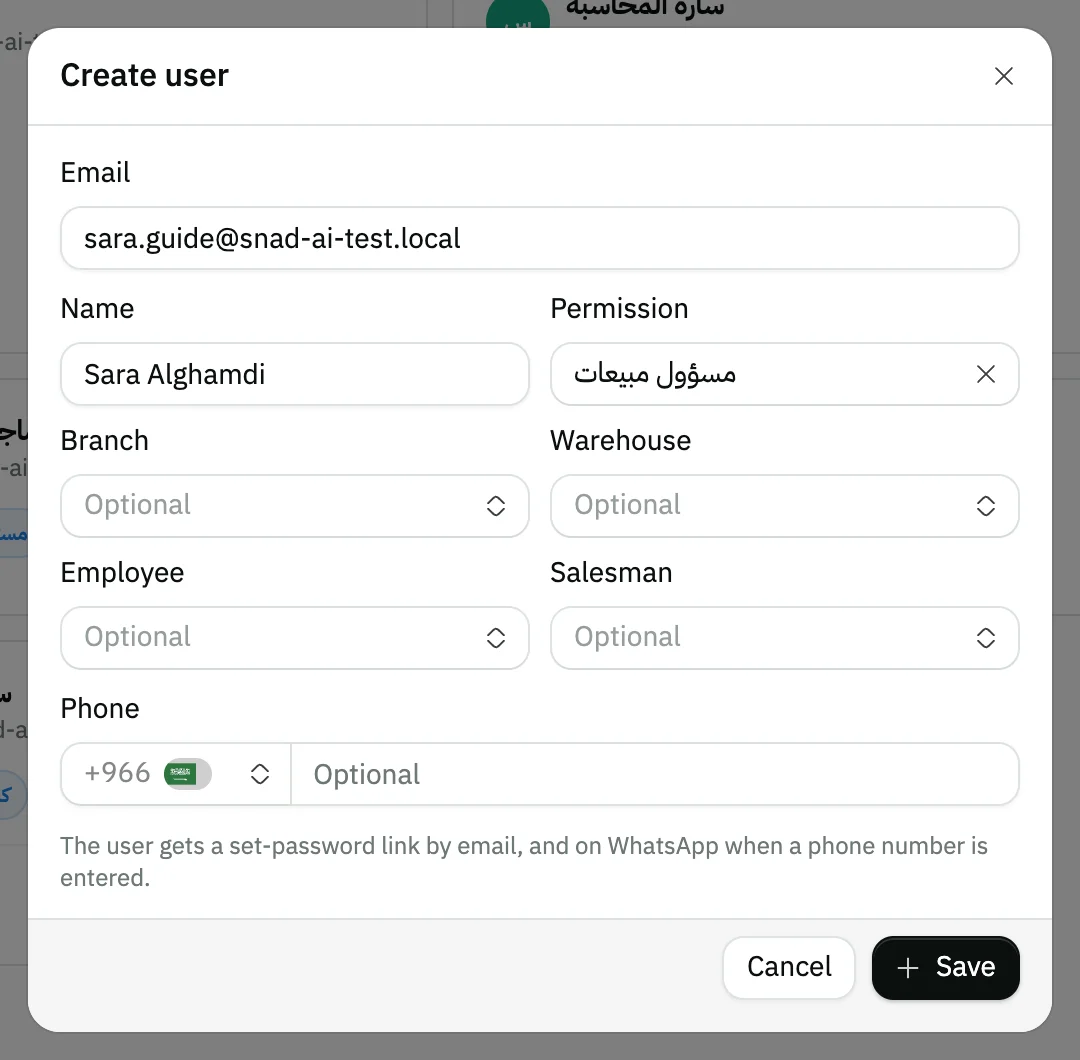
Image key - The Email field
- The Name field
Step 4: Choose the permission
Click the Permission field and pick the role the user will hold. The field starts on the first role in the list, so check it is the one you mean.
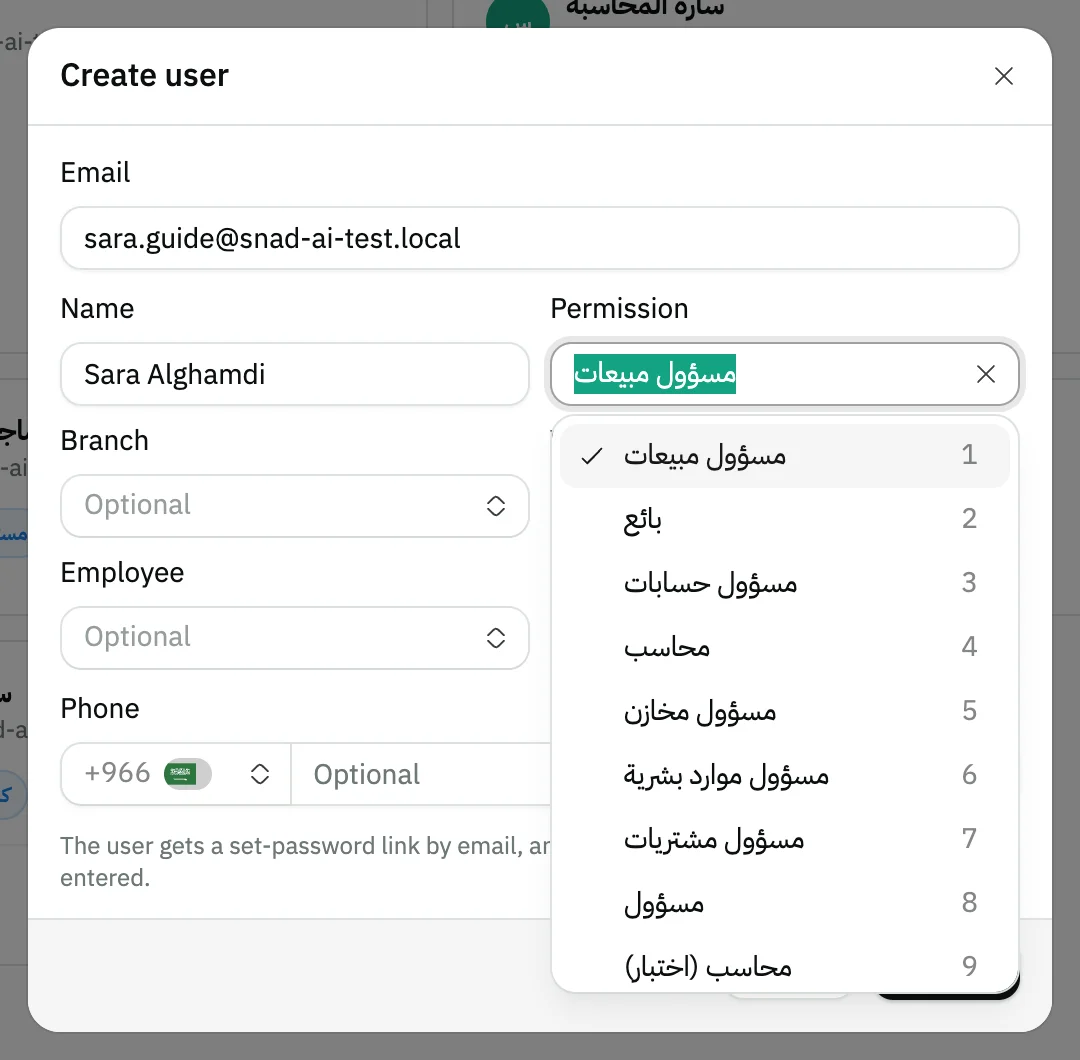
Image key - The Permission field
- Your business roles
Step 5: Link a branch or phone (optional)
Optionally, set the user's Branch (add a branch), Warehouse (add a warehouse), Employee and Salesman, and enter a Phone so the link also reaches them on WhatsApp. Details
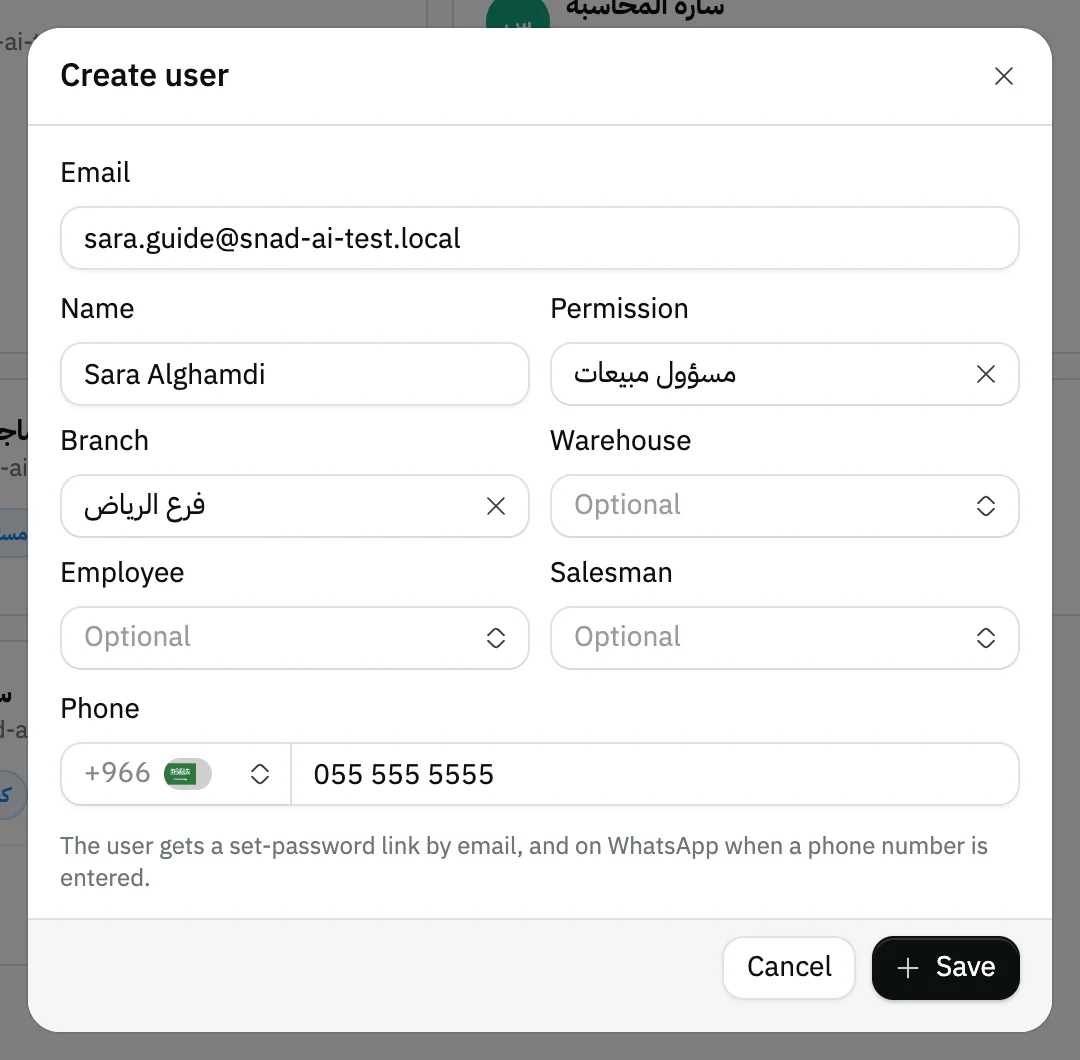
Image key - The Branch field
- The Phone field
- The invitation note
Step 6: Save the user
Press Save. A message says the user was created and the set-password link was sent, and their card shows on the page. Details
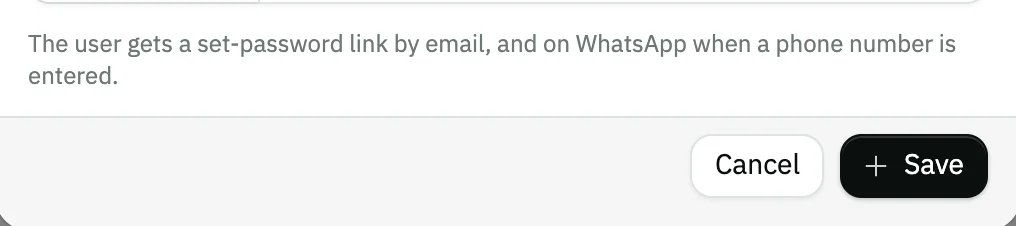
Image key - The Save button
Messages that block saving
If saving fails, one of these messages shows next to the field. The table gives the cause and the fix.
| Message | Cause | Fix |
|---|
Advanced details
Each section here explains one point from the steps in depth. Every section has a fixed link you can share.
What does the user get after you save?
You do not set a password for the user. They get a link by email to set their own, and on WhatsApp too if you entered a Phone.
If the invitation could not be sent, the message tells you and the user stays on the page. Open the Actions menu on their card and choose Resend invitation.
The resend option shows while the user's account is not yet activated.
Cannot create a user?
When your users reach the limit, the Create user button is disabled. If your plan allows extra seats, a Buy additional users button shows.
If the subscription is not active or the plan does not allow users, a message asks you to renew or upgrade. The details are in the manage your subscription guide.
If the users screen does not show at all, it is for the account admin or users allowed to manage users. Ask your Snad account admin for it (how to grant permissions).
Errors when you save
If the email is already in use, the message “Email already in use!” shows under its field, so enter another email.
If the email is not valid or the name is shorter than three characters, a message shows under that field and nothing is saved.
Linking a user to an employee or salesman
The Employee and Salesman fields list people you already registered, and anyone who already has a user is disabled. Add the employee first in the add an employee guide and the salesman in the add a salesman guide.
After creating the user you can change the permission, branch and warehouse: click the user's card to open Update user.
What data they see across branches and warehouses is set in the data access guide.
Common questions
- How do I add a new user in Snad?
- Press Settings and choose Users, then Create user. Enter the Email and Name, choose the Permission, then Save.
- Do I set the user's password?
- No. The user gets a link by email, and on WhatsApp if you entered their phone, and sets their own password from it.
- Can I change a user's permission after creating them?
- Yes. Click the user's card to open Update user and pick the new role in the Permission field. The field is disabled for the account admin.
- Why is the Create user button disabled?
- Because your users have reached the limit of your plan. Check the seats at the top of the page, then add seats or change your plan.