
How to add a product in Snad
To add a product in Snad ERP, open Products in the sidebar and press New product. Pick the Product type, enter the Name, Price and Cost, then the Quantity in each warehouse. Organize it with a Category and Brand, then press Save. The product page opens.
In this guide8
Steps
Step 1: Open the new product screen
In the sidebar, choose Products under General, then press New product above the product list. Details
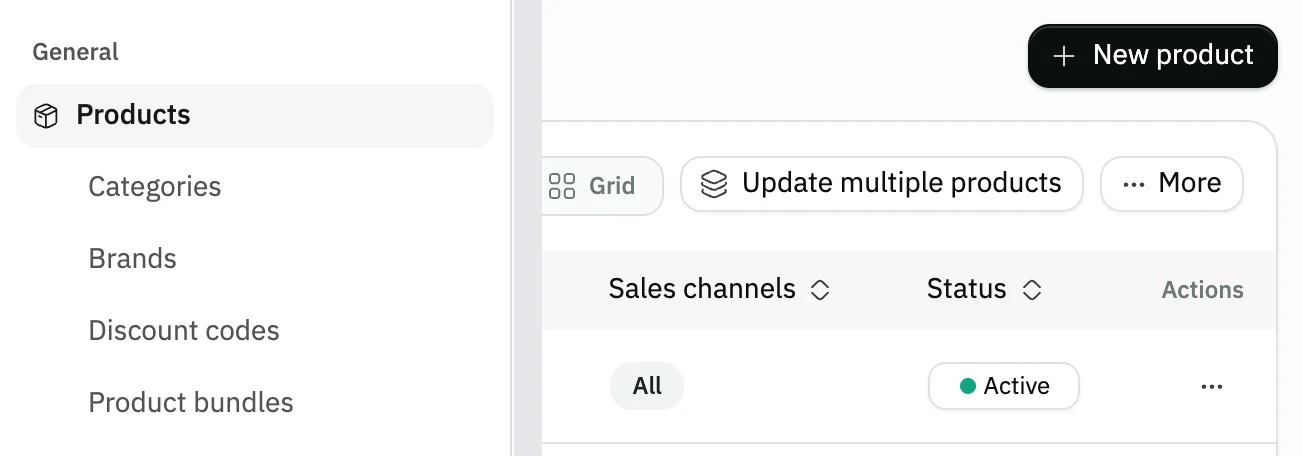
Image key - Products in the sidebar
- The New product button
Step 2: Choose the product type
Product type starts on Standard product, which fits most products. Pick another type now if you need one, because it can't change after saving. If you sell work or time with no stock, pick Service (how to create a service). Details
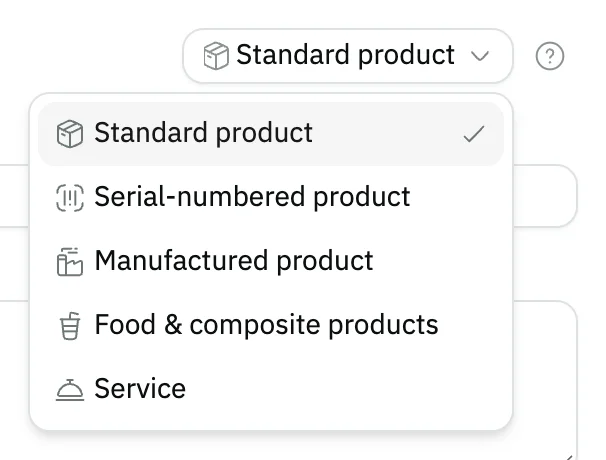
Image key - The Product type list
- The five types
- The What's the difference? button
Step 3: Enter the name and description
Enter the Name with at least three characters; it is required. Add a Description if you like; it is optional.
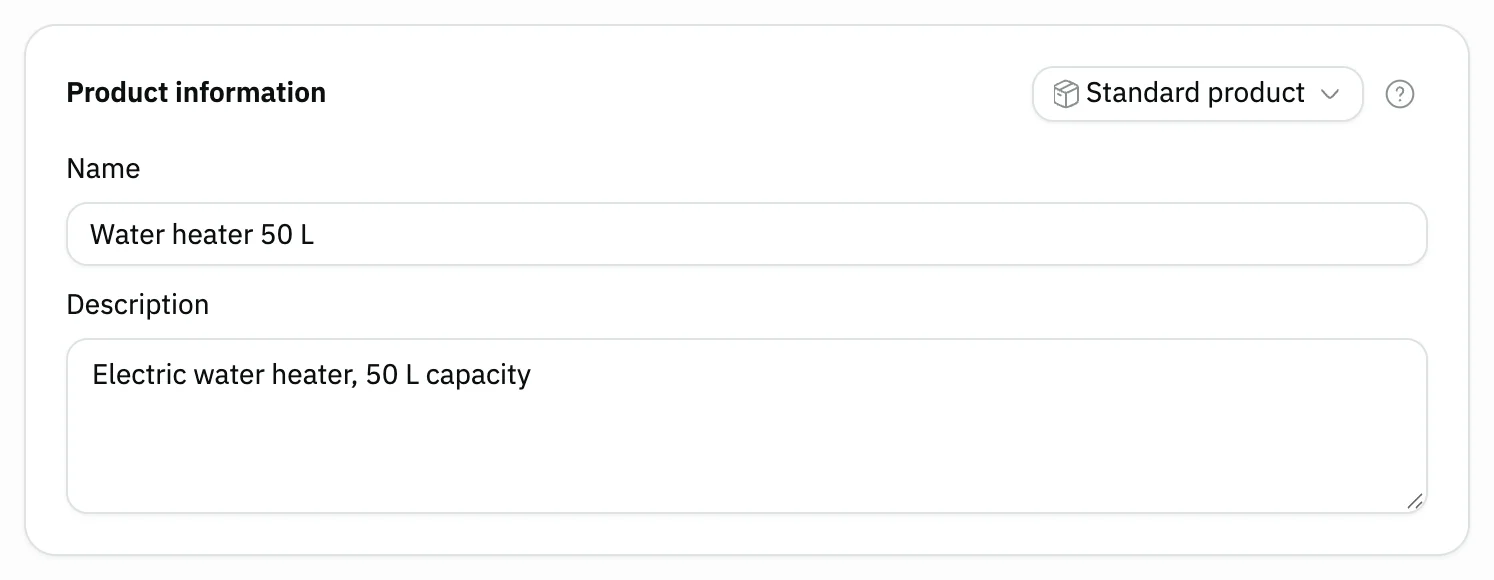
Image key - Name
- Description
Step 4: Set the price and cost
Enter the Price and the Cost, then check the Margin and Profit at the bottom of the card. Add Wholesale price, Retail price and Discount if you use them. Details
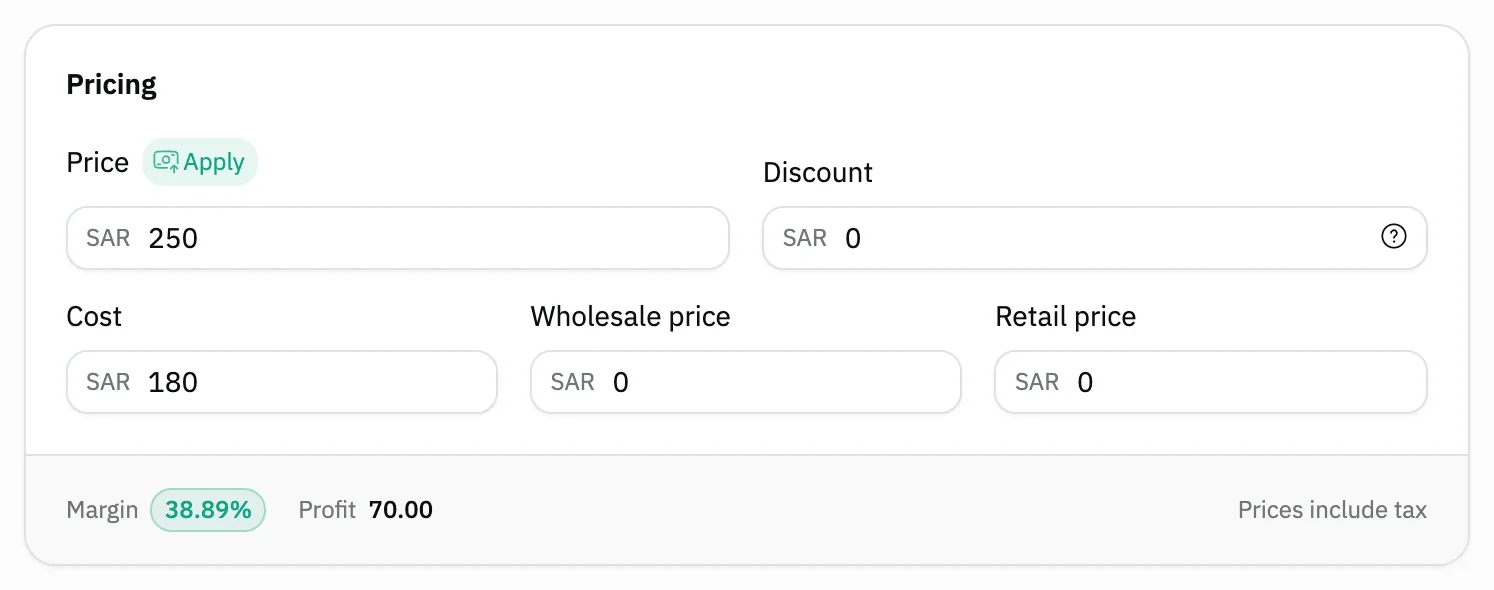
Image key - Price
- Cost
- Margin and Profit
Step 5: Enter the stock in warehouses
In Inventory, enter the opening Quantity next to each Warehouse, and check the Unit of measurement. A service holds no stock, so it has no Inventory card.
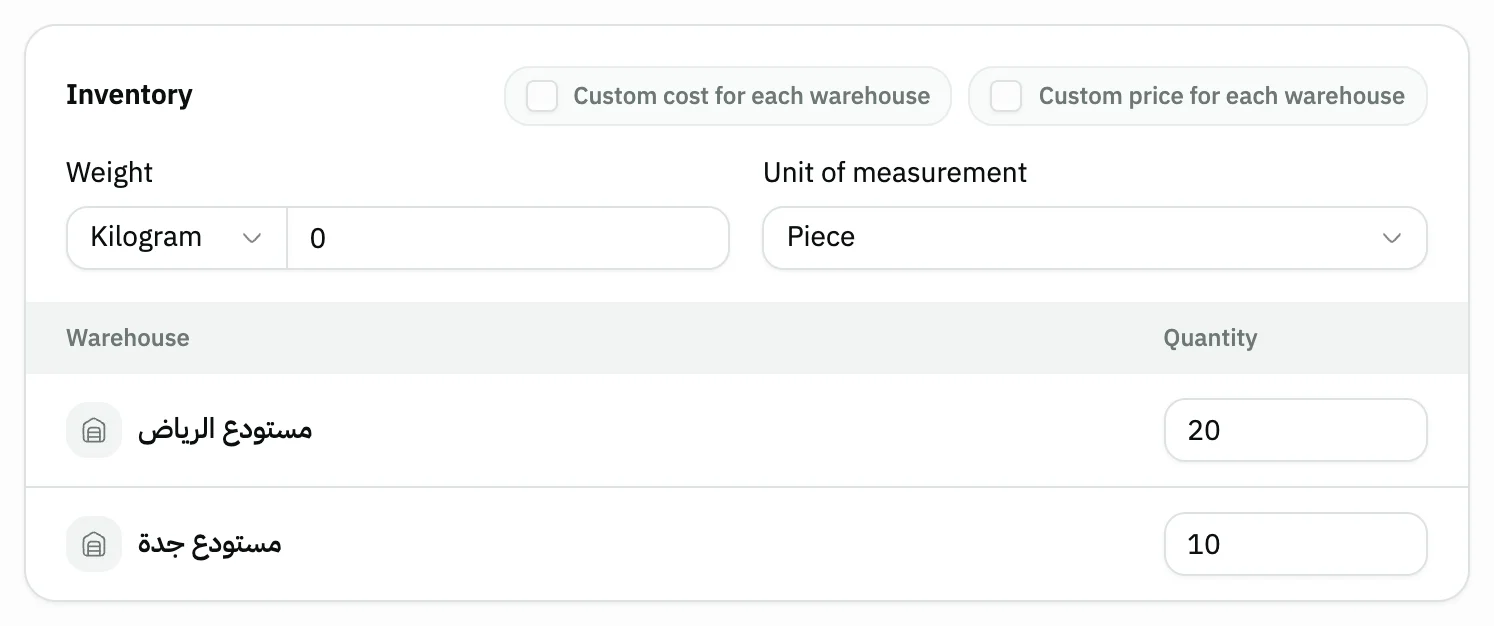
Image key - The Quantity in a warehouse
- Unit of measurement
- The warehouses table
Step 6: Organize the product
In Product organization, check the Status and Sales channels, then pick a Category, Brand and Supplier. Details
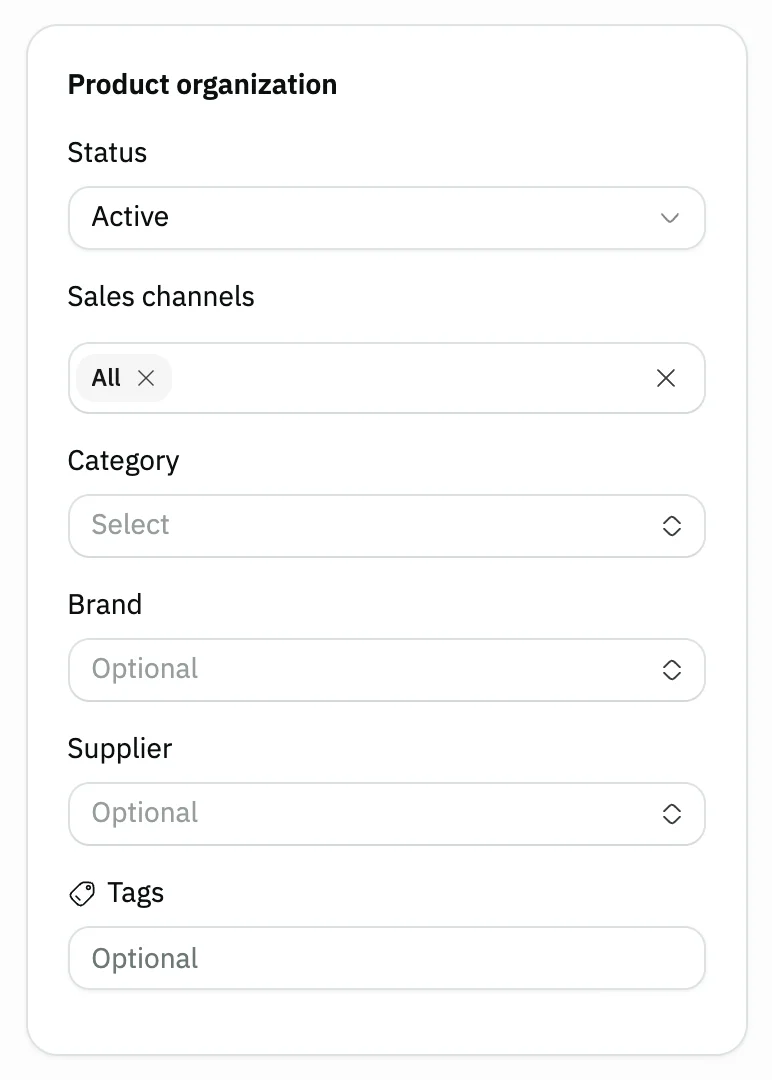
Image key - Status
- Sales channels
- Category
Step 7: Add the SKU and barcode
In Identifiers, press the dice button Generate random SKU or type your own code, and add a Barcode the same way with Generate random barcode. Add product photos in Media.
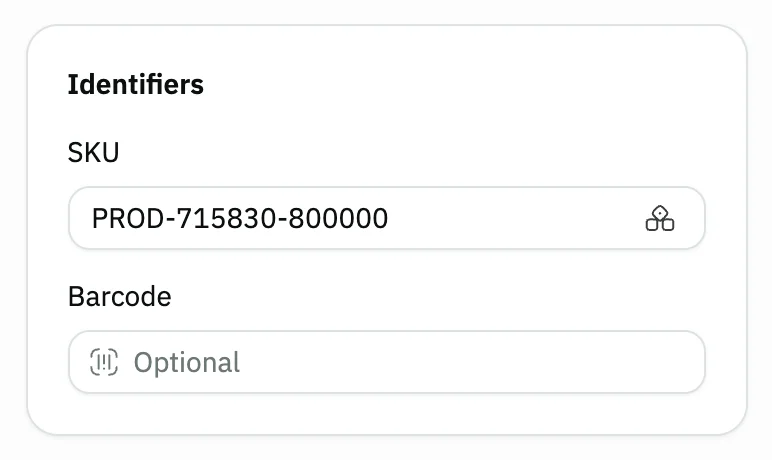
Image key - The SKU field
- The Generate random SKU button
- Barcode
Step 8: Save the product
Press Save at the top of the form, or Ctrl + S (⌘ + S on Mac). The saved product page opens next. Details

Image key - The Save button
- The Back button
Messages that block saving
If saving fails, one of these messages shows next to the field. The table gives the cause and the fix.
| Message | Cause | Fix |
|---|
Advanced details
Each section here explains one point from the steps in depth. Every section has a fixed link you can share.
Product types and variants
Press What's the difference? to compare the types in one window: a tab for each type and a comparison tab. The type is set at creation and can't change after saving.
If you change the type after typing data, Snad asks “Change the product type?” because the change resets the form to its defaults.
In variants, each row has a dice button for the SKU and one for the barcode, and above the list Fill empty codes fills only the empty SKU and barcode fields and leaves what you typed.
- Standard product: you buy it, stock it and sell it as is. It is the default type.
- Serial-numbered product: each unit has its own number, tracked from purchase to sale. It has no variants.
- Manufactured product: you buy it in bulk and sell it in different sizes. All its stock sits on the parent and it is never sold directly.
- Food & composite products: you sell it, but its stock lives in its components, so its recipe is deducted on every sale.
- Service: work or time you deliver to your customer, sold and bought with no stock, and its cost is for reports only (how to create a service).
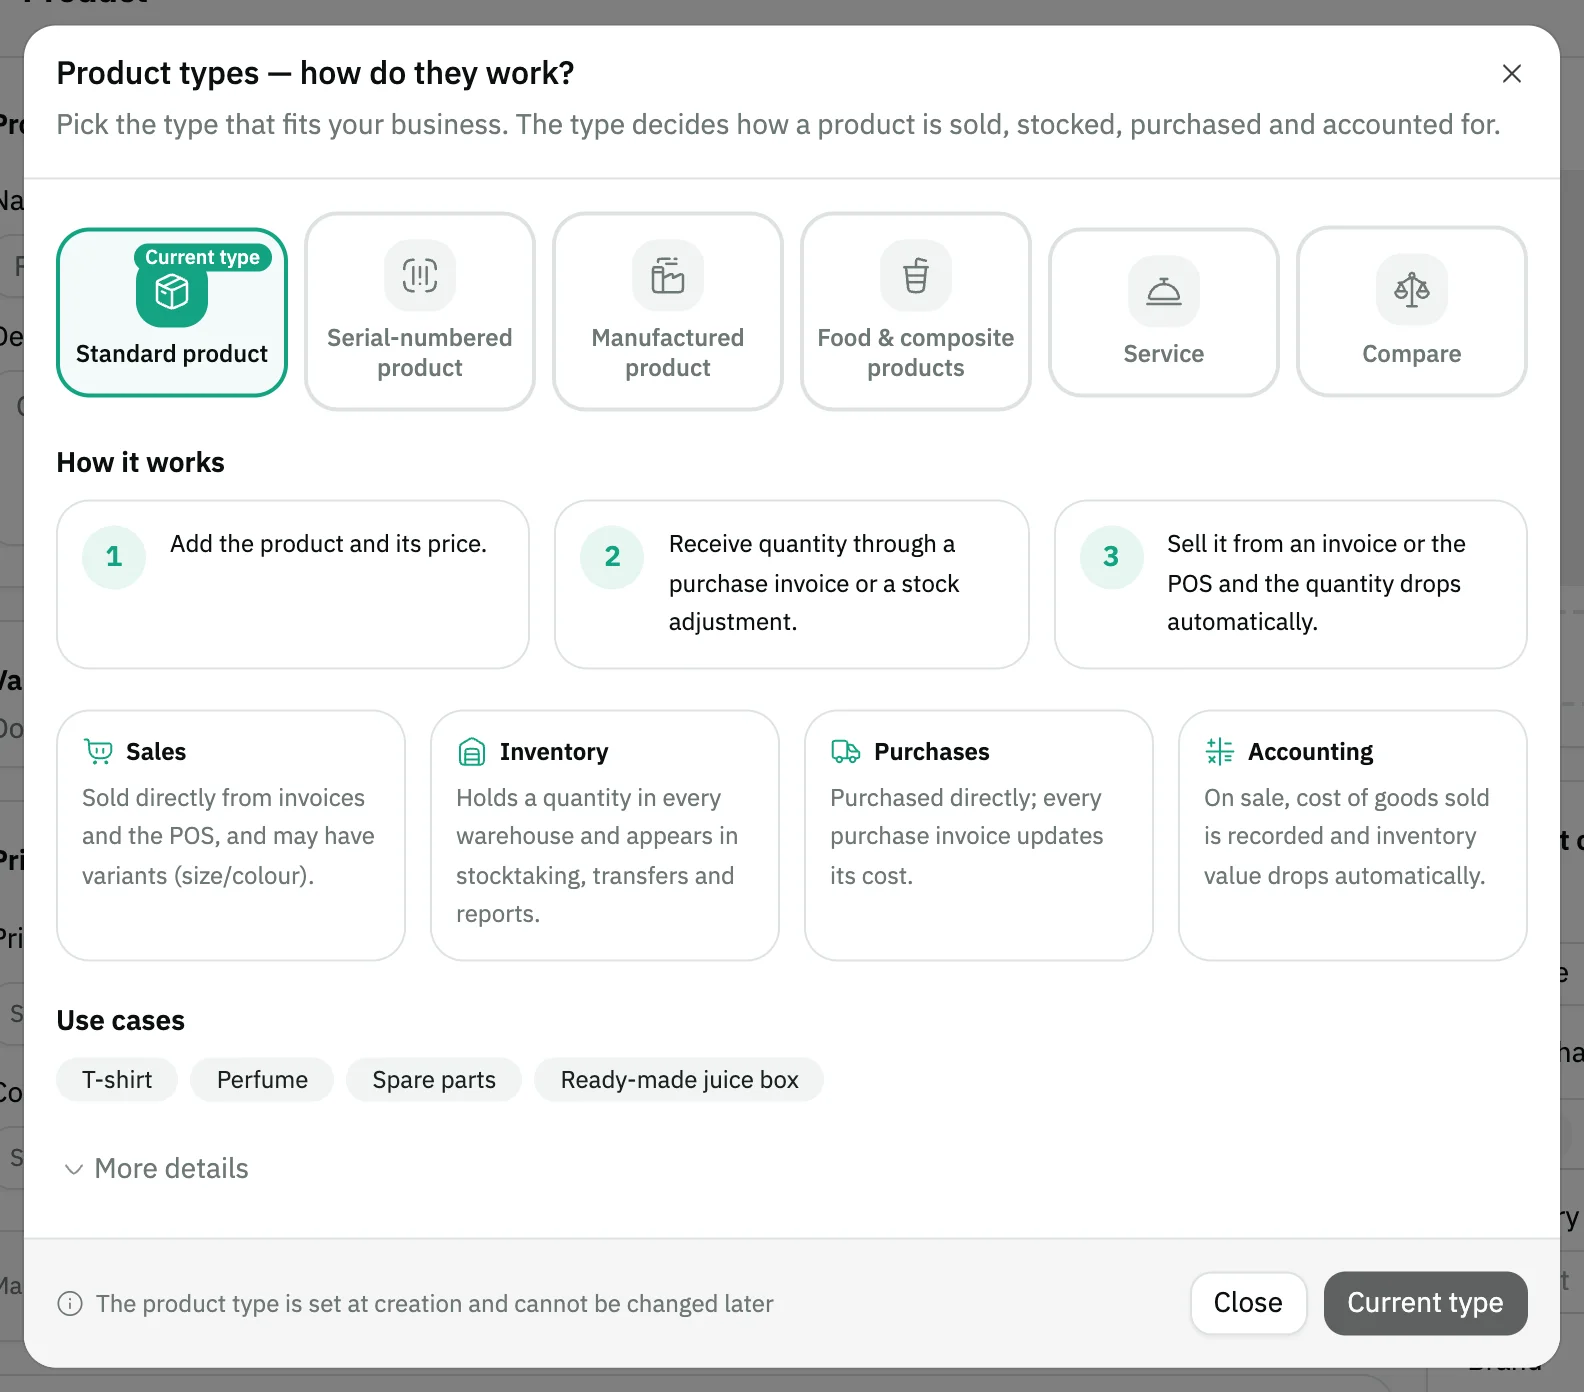
- The type and comparison tabs
Price from cost and per-warehouse prices
Press the small button next to Price to open Calculate price from cost. Pick the Base and the Markup type, enter the Markup value to see the Calculated price, then press Apply.
If cost or price differs between warehouses, turn on Custom cost for each warehouse or Custom price for each warehouse in Inventory, and a column for each is added beside Quantity.
Margin is the profit as a percentage of the cost. The card shows Prices include tax or Prices don't include tax depending on the Product price/cost include tax setting in the general settings. Set up the tax itself in tax settings.
If you want a discount customers enter as a code, create a discount coupon. For a different price per delivery app, use delivery prices.
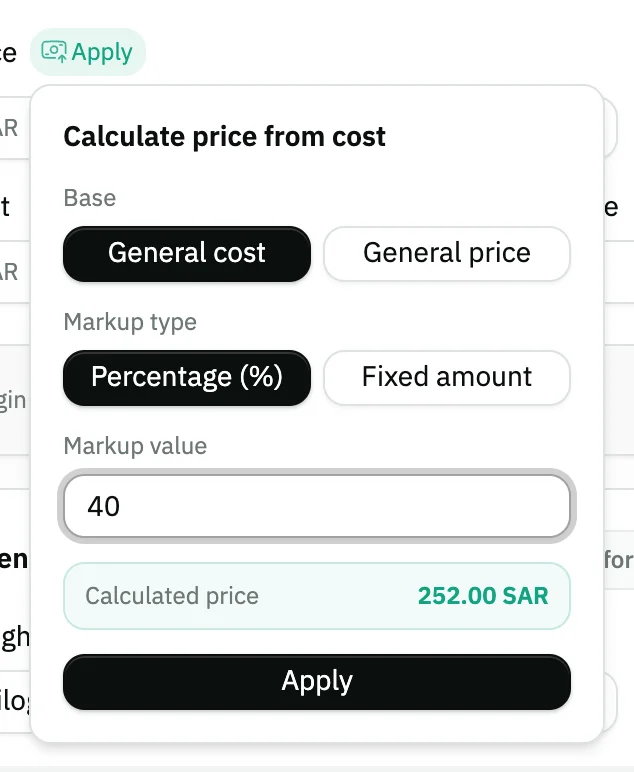
- The small button next to Price
- Calculate price from cost
Sales channels, categories and custom fields
Sales channels stays on All so the product shows on every screen, or pick Point of sale or Sales. Hidden everywhere hides it from sales invoices, quotations, sale orders and the POS, and it still shows in purchases and inventory.
Status starts on Active, and you can choose Inactive or Draft.
Can't find the right Category or Brand? Create it from the same list if you have permission, or from manage product categories and manage brands.
The Category list shows the categories in tree order, and a sub-category appears with its path, such as “Clothes › Men”. You can pick a main category or a sub-category.
If your business added custom fields for products, they show in the Custom fields card at the bottom of the form (how to add custom fields). A field with Show in list ticked shows as a column in the product list. A product field never changes a price, stock or an accounting entry.
The card shows on the parent product only, so it doesn't show when you open a single variant, and its values are saved with the parent product.
After saving and shortcuts
After saving, the product page opens. From there you can edit it, print its label and move to the previous or next product. Then sell it on a sales invoice and follow its stock in the stock reports.
To add dozens of products at once, import an Excel file instead of adding them one by one (how to import products). To update many quantities from Excel, use import stock quantities.
To change the prices of several products at once, use bulk price editing; to sell products at one price, create a product bundle.
- Alt + N on the product list: New product.
- Ctrl + S (⌘ + S on Mac) on the form: Save.
- The command palette, Ctrl + K: type “Add product” from any screen.
Common questions
- How do I add a new product in Snad?
- Open Products and press New product, enter the Name, Price and Cost, enter the Quantity in Inventory, then press Save.
- Can I change a product's type after saving it?
- No. The Product type is set only at creation, so if you picked the wrong type, create the product again with the right one.
- How do I record a product's first quantity?
- Enter the Quantity next to each Warehouse in the Inventory card when you add the product. After that, the quantity is updated by a purchase invoice or a stock adjustment.
- How do I set the shape of the SKU and barcode Snad generates?
- Press the gear next to the button to open SKU generation settings or Barcode generation settings. Choose the Method, the Prefix and the Next number (sequential), and for barcodes a format such as EAN-13 (13 digits). The gear shows to users with the system settings permission, and the settings apply to the whole organization. Snad never generates a code another product already uses, but saving a product with a duplicate code you typed is not blocked.
- Why don't I see the New product button?
- The button shows only to users allowed to create products. Ask your account admin to grant it (how to set roles and permissions).
- How do I hide a product from invoices?
- Choose Hidden everywhere in Sales channels under Product organization. It disappears from sales and the POS and stays in purchases and inventory.