
How to add a supplier in Snad
To add a supplier in Snad ERP, open Purchases, then Suppliers, and press New supplier. Enter the Name, the only required field, and add the phone, address, tax ID and bank details if you want. Then press Save, and the supplier page opens with its linked account.
In this guide7
Steps
Step 1: Open the suppliers screen
In the sidebar, choose Purchases, then Suppliers, and press New supplier above the list. Details
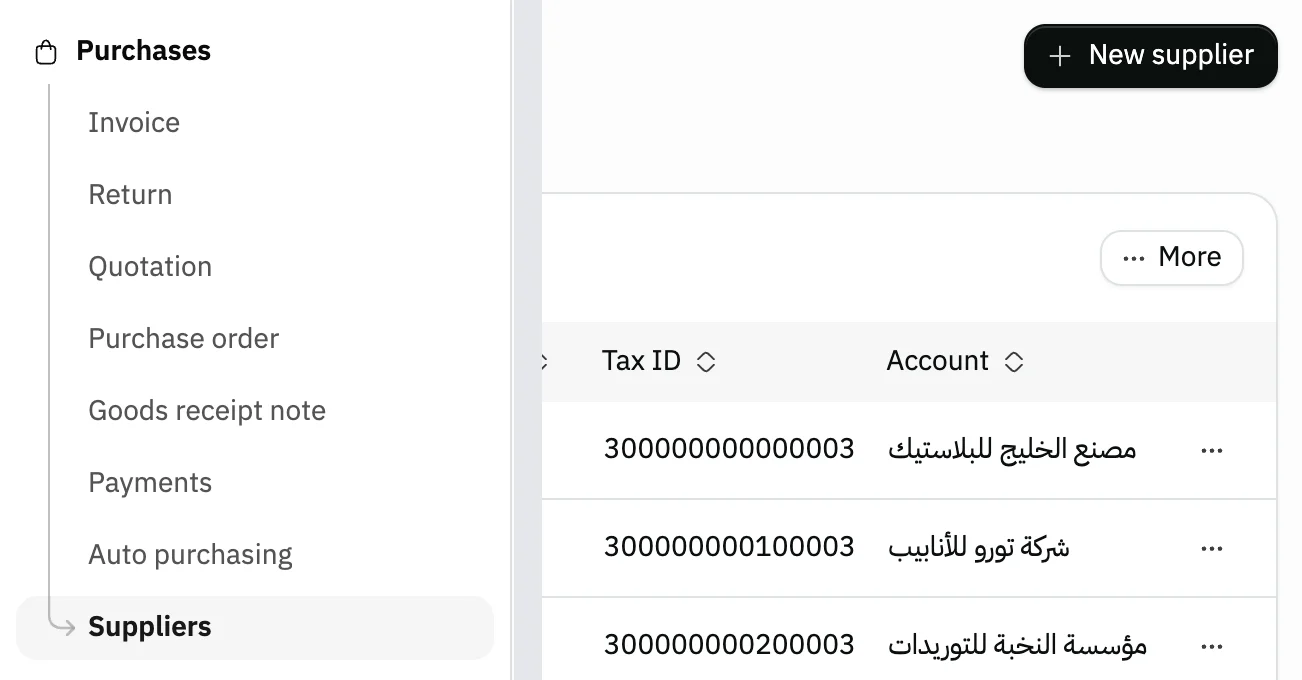
Image key - Suppliers in the sidebar
- The New supplier button
Step 2: Enter the name and contact details
Under Main information, enter the Name, the only required field, with at least 3 characters. Add the Phone and Email if you have them.
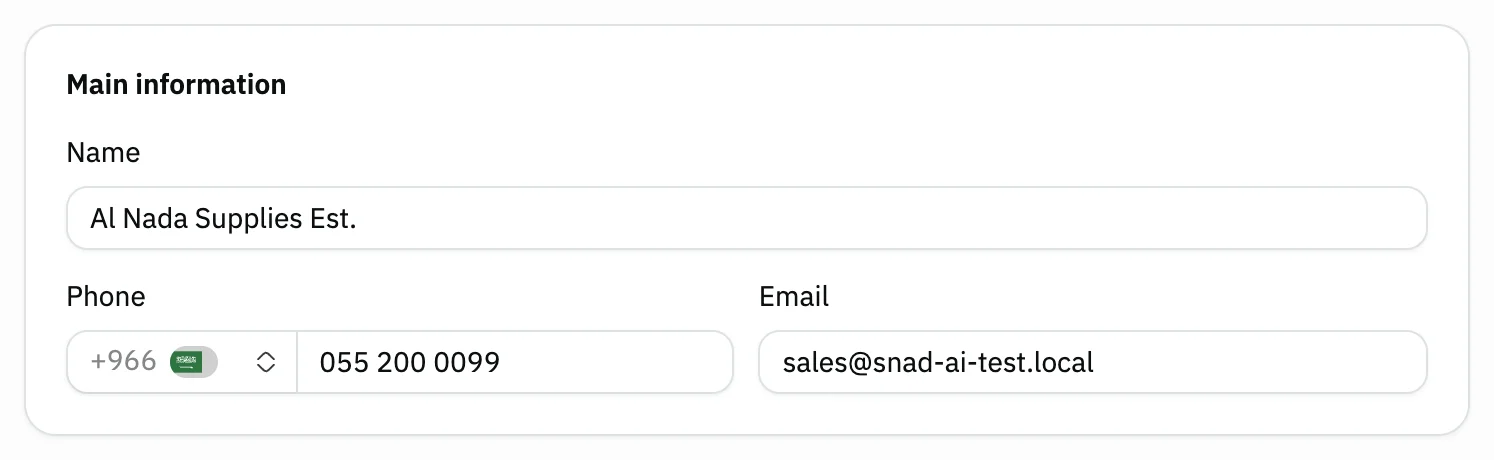
Image key - Name (required)
- Phone (optional)
- Email (optional)
Step 3: Add the address and tax details
Pick the Country and City, and write the Address. Then enter the Commercial record and Tax ID if the supplier has them.
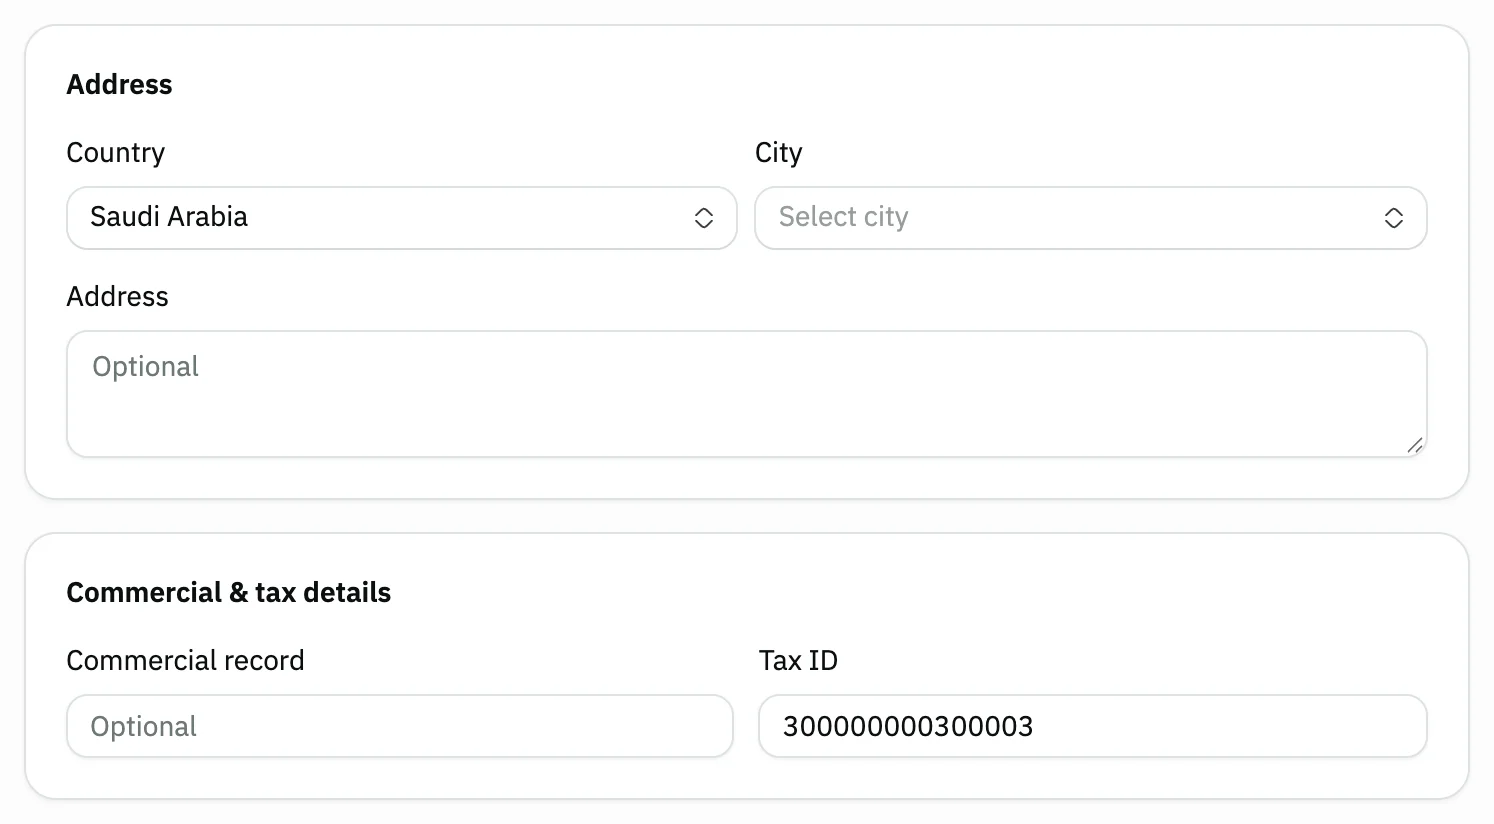
Image key - City
- Commercial record
- Tax ID
Step 4: Add the bank details
Under Bank details, enter the Bank and the IBAN so you know where to pay the supplier. All of it is optional.
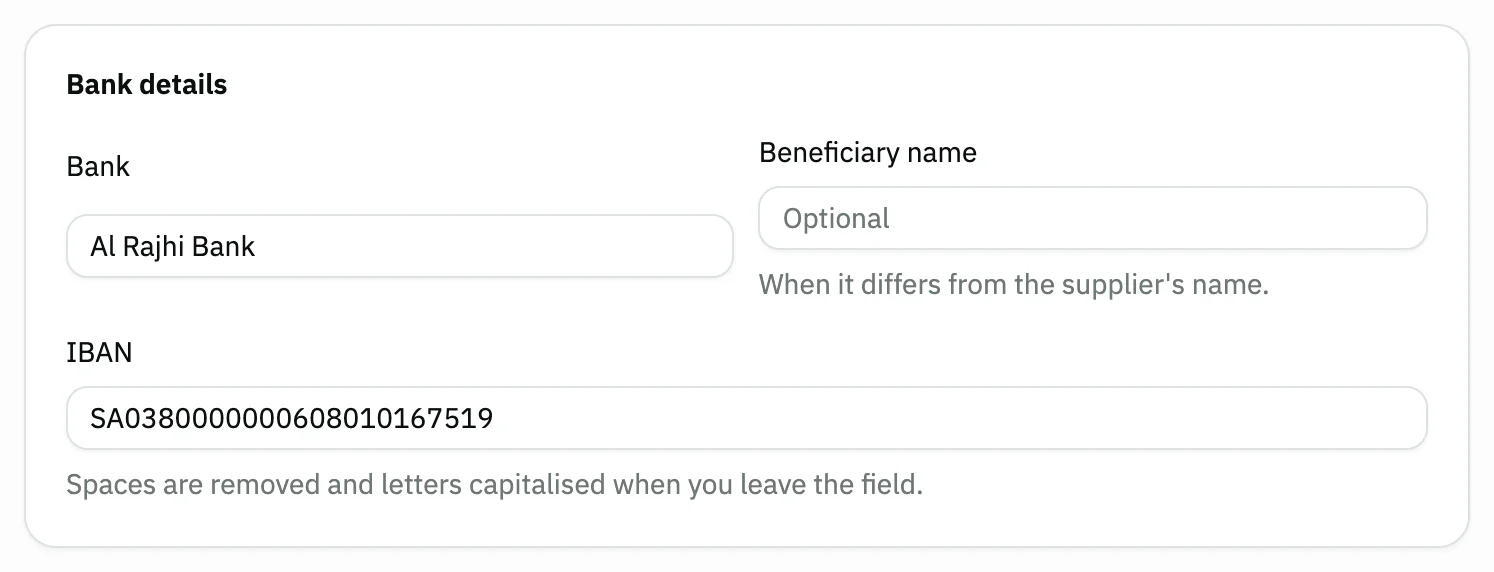
Image key - Bank
- IBAN
Step 5: Set the payment terms
Under Financial terms, enter the Payment terms (days). A credit purchase invoice takes its due date from these days. Details
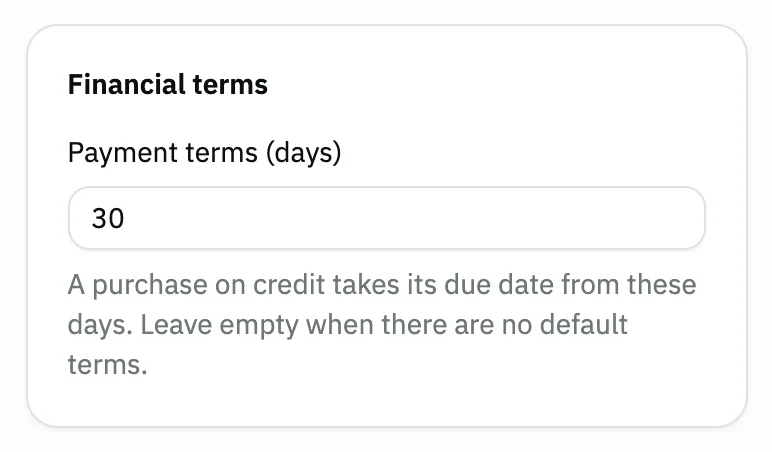
Image key - Payment terms (days)
Step 6: Save the supplier
Press Save at the top of the page. Snad saves the supplier and creates an account for it in the chart of accounts. Details
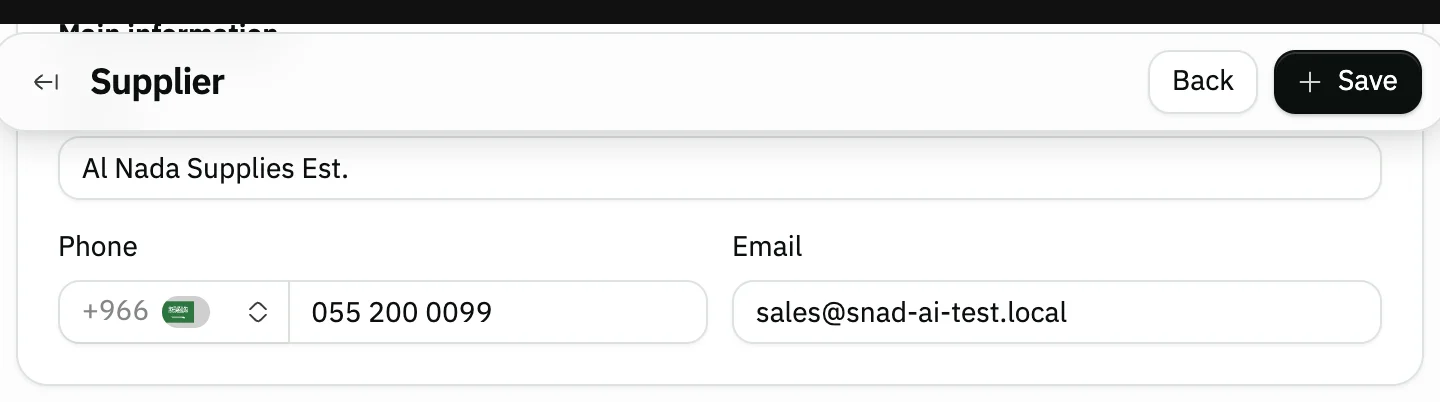
Image key - The Save button
Step 7: Review the supplier page
The supplier page opens with its number and the Linked account Snad created for it. You also get Transactions, Products and Notes tabs. Details
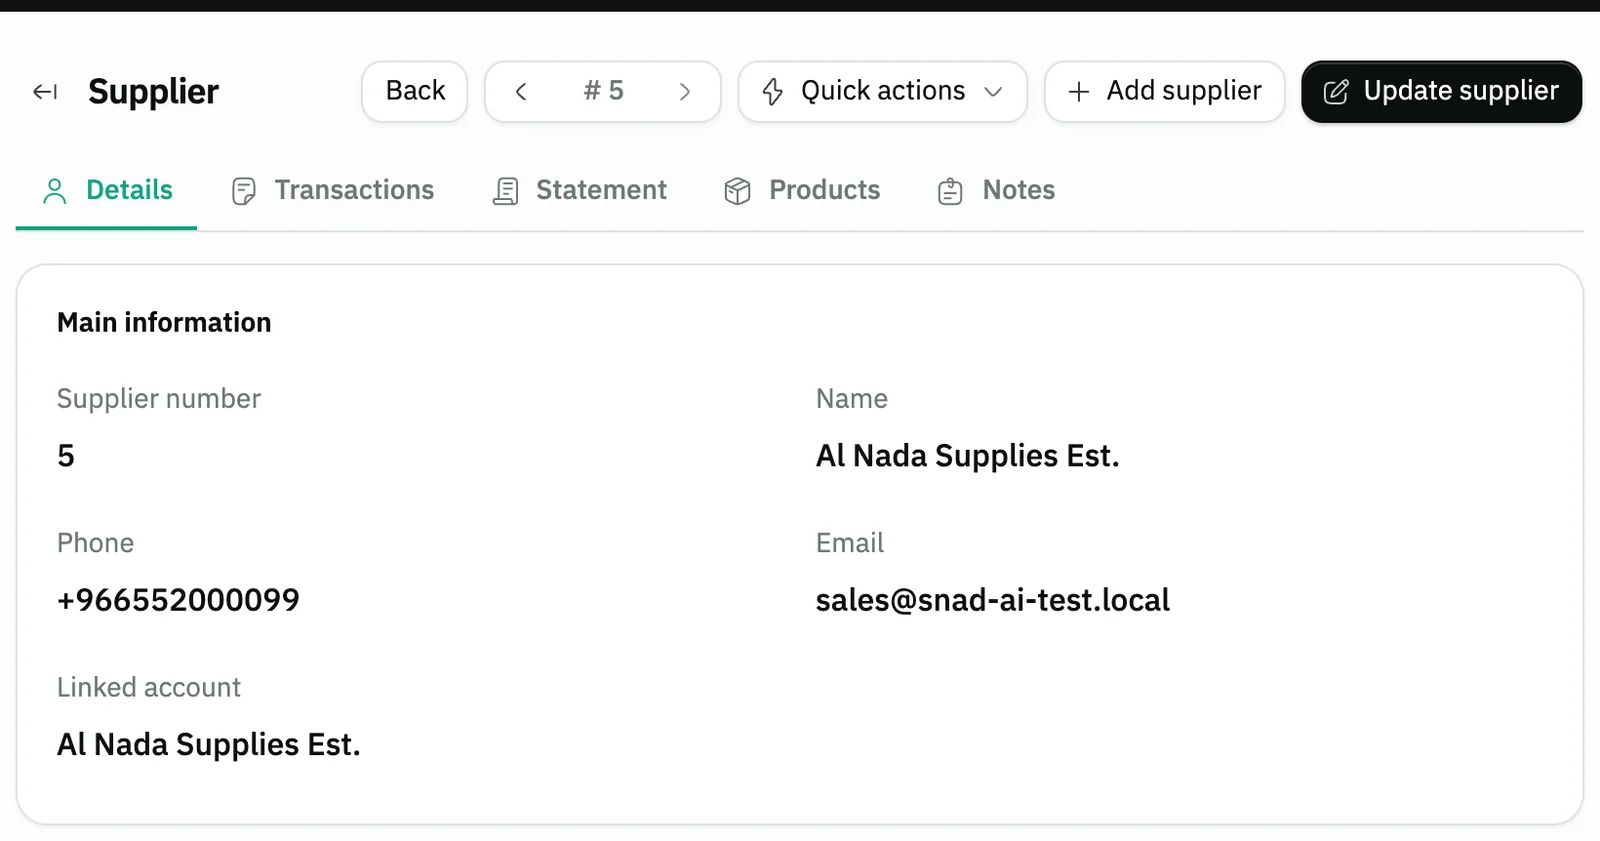
Image key - Supplier number
- Linked account
- The page tabs
Messages that block saving
If saving fails, one of these messages shows next to the field. The table gives the cause and the fix.
| Message | Cause | Fix |
|---|---|---|
| «This IBAN is not valid: a Saudi IBAN is SA followed by 22 digits; any other is 15–34 letters and digits.» | The IBAN does not match the format. | Correct the number, or empty the IBAN field if you don't have it. |
| «Check the custom fields.» | A custom field required for suppliers is empty, or its value is not valid. | Fill the flagged field, then save. |
Advanced details
Each section here explains one point from the steps in depth. Every section has a fixed link you can share.
Auto purchasing from the supplier
The Auto purchasing card sets how Snad contacts this supplier. The Allow automatic orders to this supplier switch starts on, and when you turn it off Snad never sends this supplier an automatic purchase order.
Fill WhatsApp number or Purchase-order email only if they differ from the phone and email above. You can also set Lead time (days), Minimum order value and Correspondence language, which starts on Arabic.
To see how Snad suggests orders to suppliers, read how to reorder low-stock products.
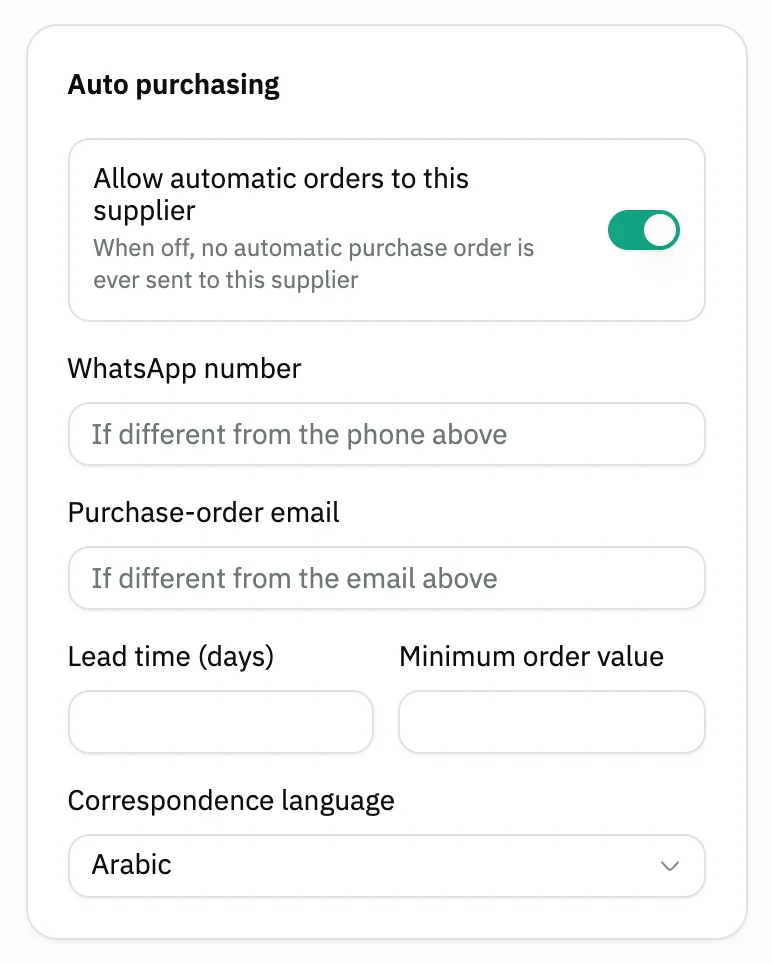
- Allow automatic orders to this supplier
- Lead time (days)
- Correspondence language
How some fields are stored
The IBAN field removes spaces and capitalises letters when you leave it, and the number is checked when you leave the field and again on save.
Further down, Tags and Attachments let you label the supplier and attach its files.
If your business added custom fields for suppliers, they show in an extra card, and a required one blocks saving until it is filled (how to add custom fields).
A supplier field can be Multiple choice, Date and time, Time, Amount, Percentage or Rating. Date and time shows in your business's time zone, and Amount in your business's currency with no conversion; if the supplier trades in another currency, the field is just a number.
It can also be Linked record, where you pick a customer, supplier, branch, warehouse or user from your own business; Location (map), where you mark a place on a map; or File or Image, where you upload one file up to 10 MB. These types are for your team only and never show on public pages, and a File or an Image is never printed.
Add a supplier from a purchase document
On a purchase invoice or purchase order, open the Supplier field and press Add. A short form opens where you enter the Name and whatever else you know.
The button shows only to users allowed to create suppliers. For the full record, use the suppliers page as in the steps above, then return to the purchase invoice or the purchase order.
Import suppliers from an Excel file
Already have a list of suppliers? On the suppliers list, press More, then Import. In the Import data window, get the template with Download Excel template, fill it in, then upload it. You can also upload the file through AI Mode import.
Only the name is required in the template, with at least 3 characters, and rows without a name are skipped. The template columns are name, email, phone, country, city, state, address, commercial record and tax ID.
Editing, deleting and archiving
Open the supplier from the list and press Update supplier to change its details. The Delete button at the bottom of the page removes it after you confirm.
A supplier with documents or transactions can't be deleted, and the refusal message offers Archive instead. An archived supplier is no longer offered in new purchase documents and gets no automatic orders.
No New supplier button?
The button shows only to users allowed to create suppliers. Ask your Snad account admin to grant it.
If you see “This app is not included in your plan”, Purchases is outside your current plan.
Common questions
- What is required to add a supplier?
- Only the Name, with at least 3 characters. Phone, address, tax ID and bank details are all optional.
- Does Snad create an account for the supplier?
- Yes. When you save the supplier, Snad creates an account with its name and links it, shown as Linked account on the supplier page and in the Account column of the list. You follow its entries in the supplier statement and pay it with a supplier payment, and review your purchases from it in purchase reports.
- Do I add the supplier before the purchase invoice?
- Not necessarily. Press Add inside the Supplier field on the document and create it with just a name. Then create the purchase invoice.
- Why won't Snad delete the supplier?
- Because it has documents or transactions. Use Archive instead in the refusal message, and it disappears from new documents while its records stay.
- How do I import a list of suppliers at once?
- On the suppliers list, press More, then Import, download the Excel template, fill it in and upload it. Only the name is required.