
How to create a sales invoice in Snad
To create a sales invoice in Snad ERP, open Sales, then Invoice, and press Create invoice. Pick the customer, add products with Add product, and check the quantity and price. Choose the Payment method, then press Save. The saved invoice page opens.
In this guide7
Steps
Step 1: Open the invoice screen
In the sidebar, choose Sales, then Invoice, and press Create invoice above the invoice list. Details
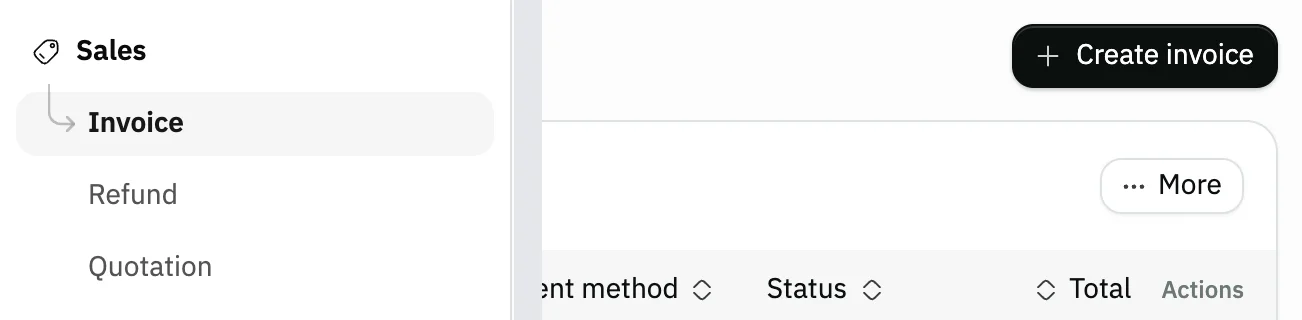
Image key - Invoice in the sidebar
- The Create invoice button
Step 2: Pick the customer
Click the Customer field, type part of the name, and pick it from the list. Not there? Press Add in the same list and create it without leaving the invoice. Details
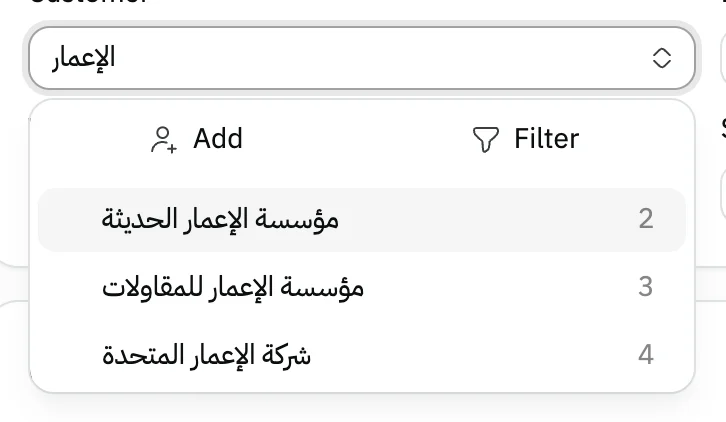
Image key - Search by customer name
- The matching customer
- Add for a new customer
Step 3: Check the invoice details
Invoice type starts on Tax invoice; check the Date. If the Branch, Warehouse and Salesman fields show, pick their values (branches, warehouses, salesmen). Details
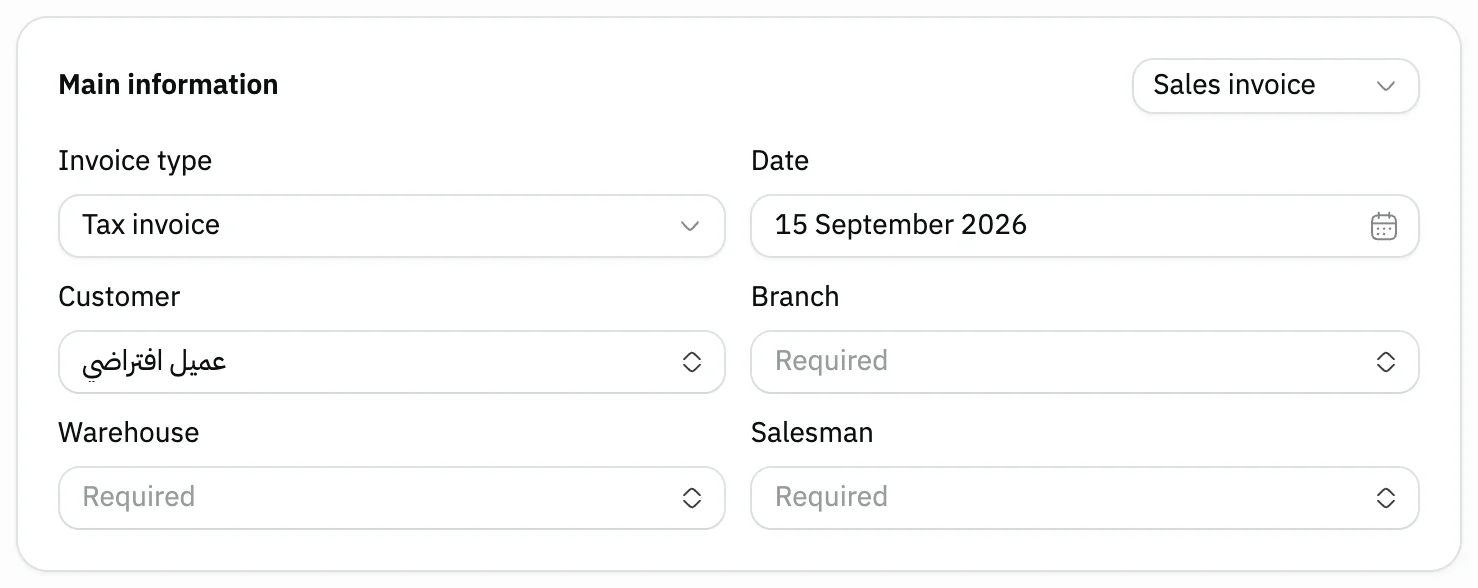
Image key - Invoice type
- The invoice Date
Step 4: Add the products
Press Add product, search by name or barcode, tick the products you need, then press Apply. Details
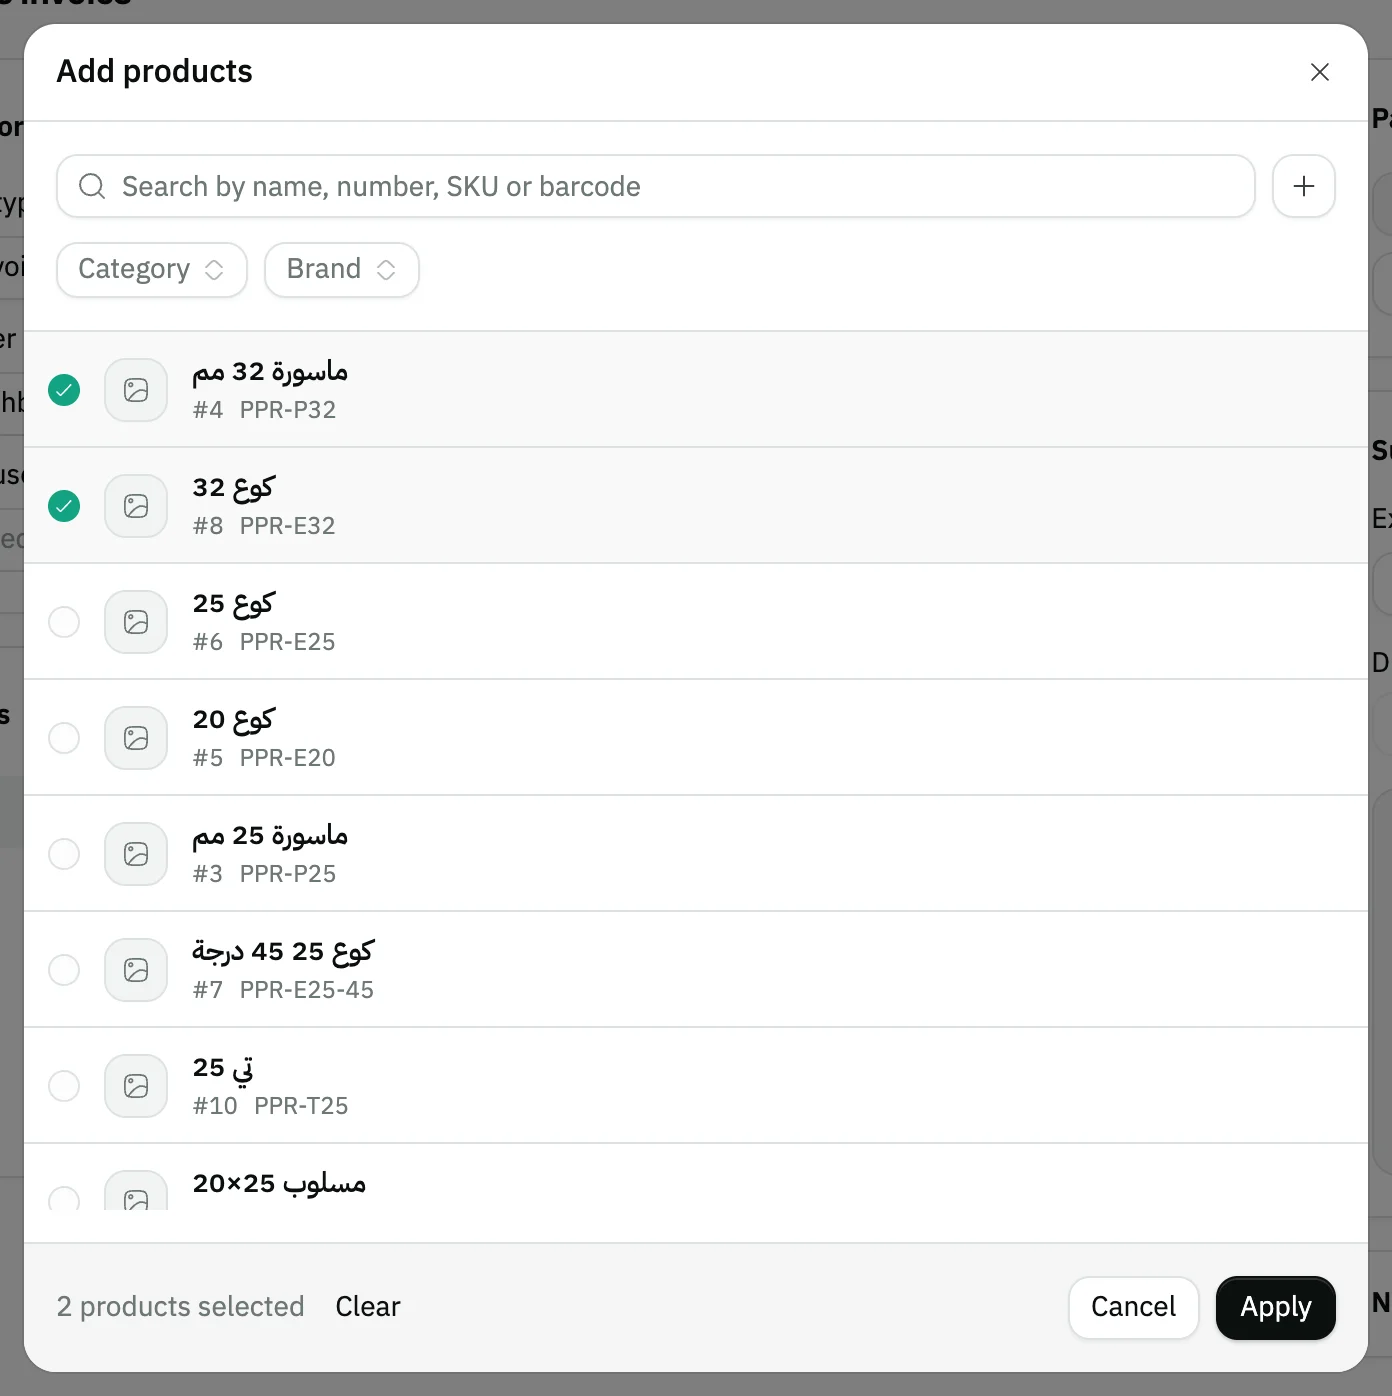
Image key - Search by name, number, SKU or barcode
- A ticked product
- The Apply button
Step 5: Set quantity and price
On each line, enter the Quantity and check the Price. A discount on one product goes in that line's Product discount. Details
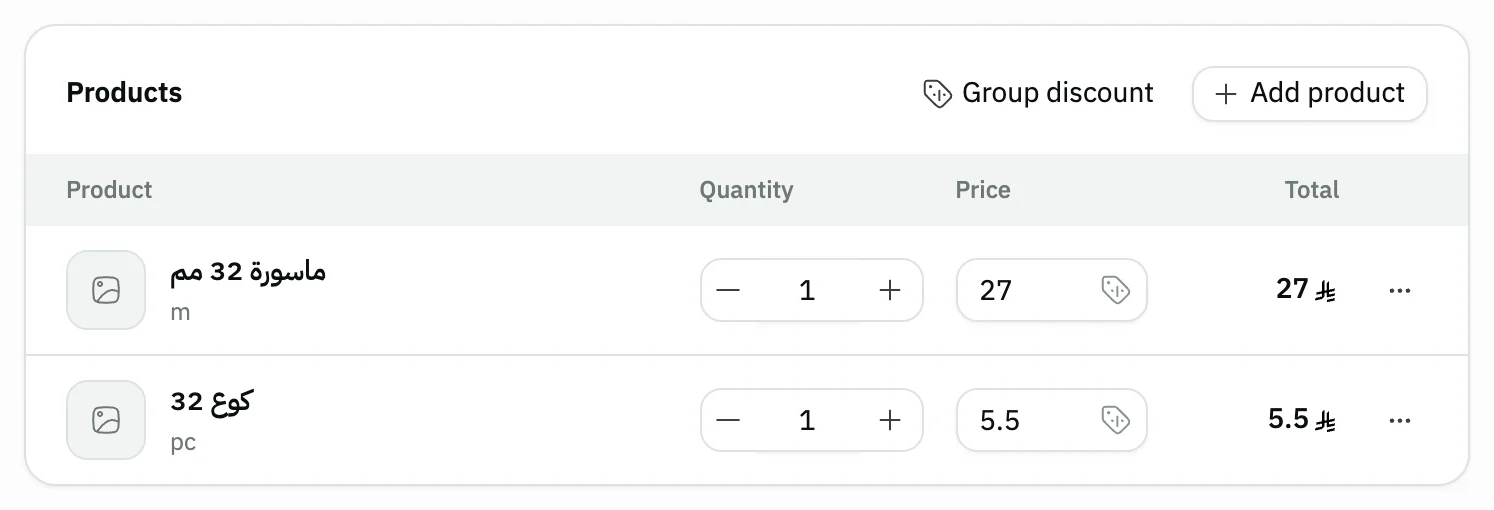
Image key - Quantity
- Price
- Line menu: product info, notes, remove
Step 6: Choose the payment method
Under Payment method, choose Cash, Card, Transfer or On credit, and check the Total in the Summary (tax setup). If the customer pays with two or three methods, choose Split payment and enter the amount for each method until they add up to the Total. If you added custom payment methods for invoices, they show under these buttons with your own names and do not take part in Split payment (custom payment methods). Details
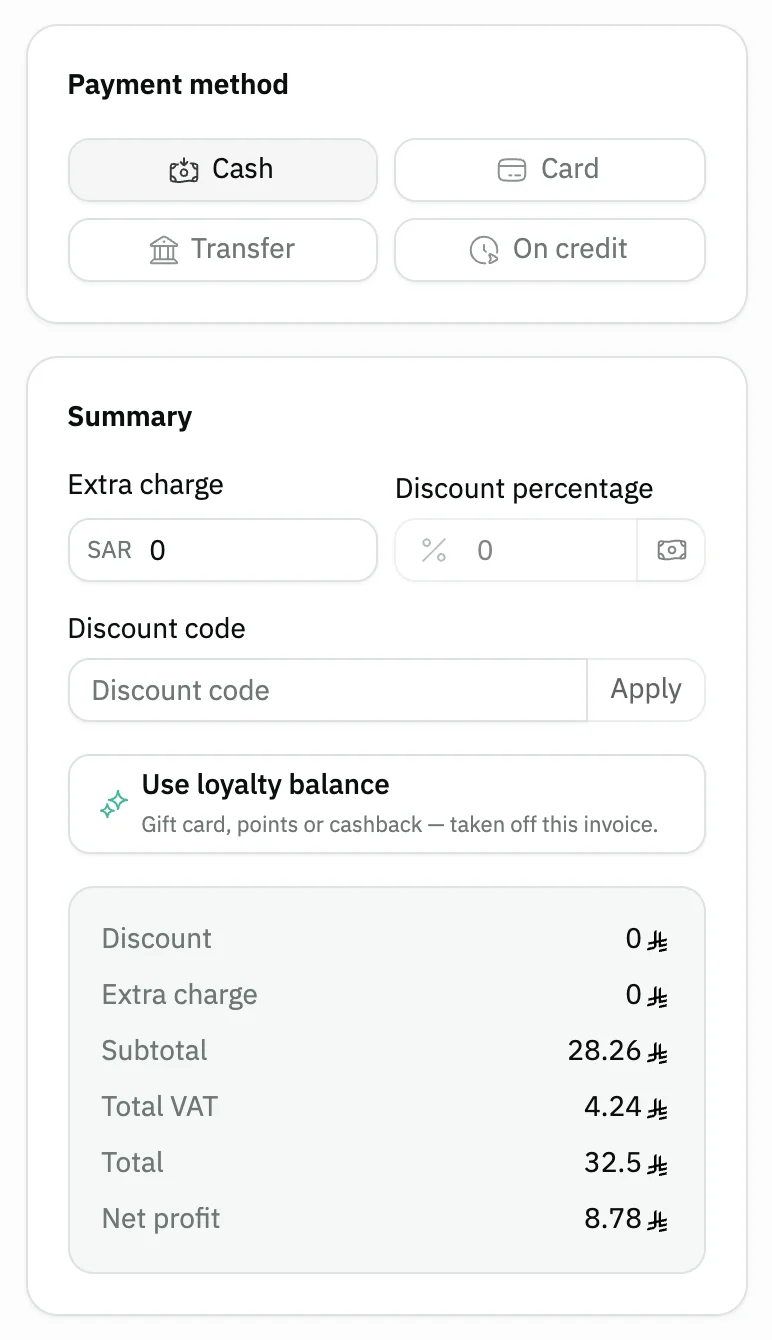
Image key - Payment methods
- Summary: tax and Total
Step 7: Save the invoice
Press Save, or Save & print to print it right away. The saved invoice page opens next. Not ready yet? Press Save as draft (details). Details
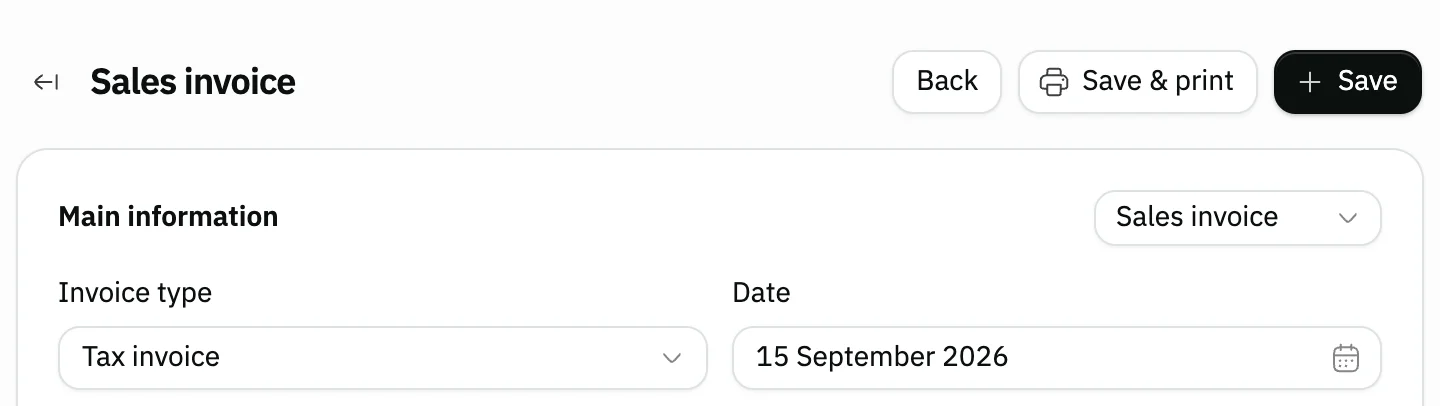
Image key - The Save button
- The Save & print button
Messages that block saving
If saving fails, one of these messages shows next to the field. The table gives the cause and the fix.
| Message | Cause | Fix |
|---|---|---|
| «Pick a product first» | The invoice has no products. | Add at least one product with Add product. |
| «Enter a quantity · Enter a price» | A line has no quantity or no price. | Fill the missing value on the flagged line. |
| «Select a payment method» | No payment method is chosen. | Choose Cash, Card, Transfer, On credit or Split payment. |
| «Enter a due date» | You chose On credit without a due date. | Set the Due date below the payment methods. |
| «Product quantity not available» | The quantity is more than the product's stock in the chosen warehouse. | Lower the quantity, pick a warehouse that has stock, or transfer stock to it. |
| «Product price is less than the cost · The invoice cannot be sold at a loss» | The price after discount is below the product cost. | Raise the price or lower the discount. |
Advanced details
Each section here explains one point from the steps in depth. Every section has a fixed link you can share.
Create a customer from the customer field
You don't need to leave the invoice to add a new customer. Open the Customer field and press Add at the bottom of the list.
A short form opens. Only Name is required, with at least 3 characters. The rest is optional, including Phone, Email, Tax ID, Credit limit and Address.
Press Save. The new customer is selected on the invoice right away, and you carry on where you stopped.
The Add button shows only to users allowed to create customers. For the full customer record, use the customers page.
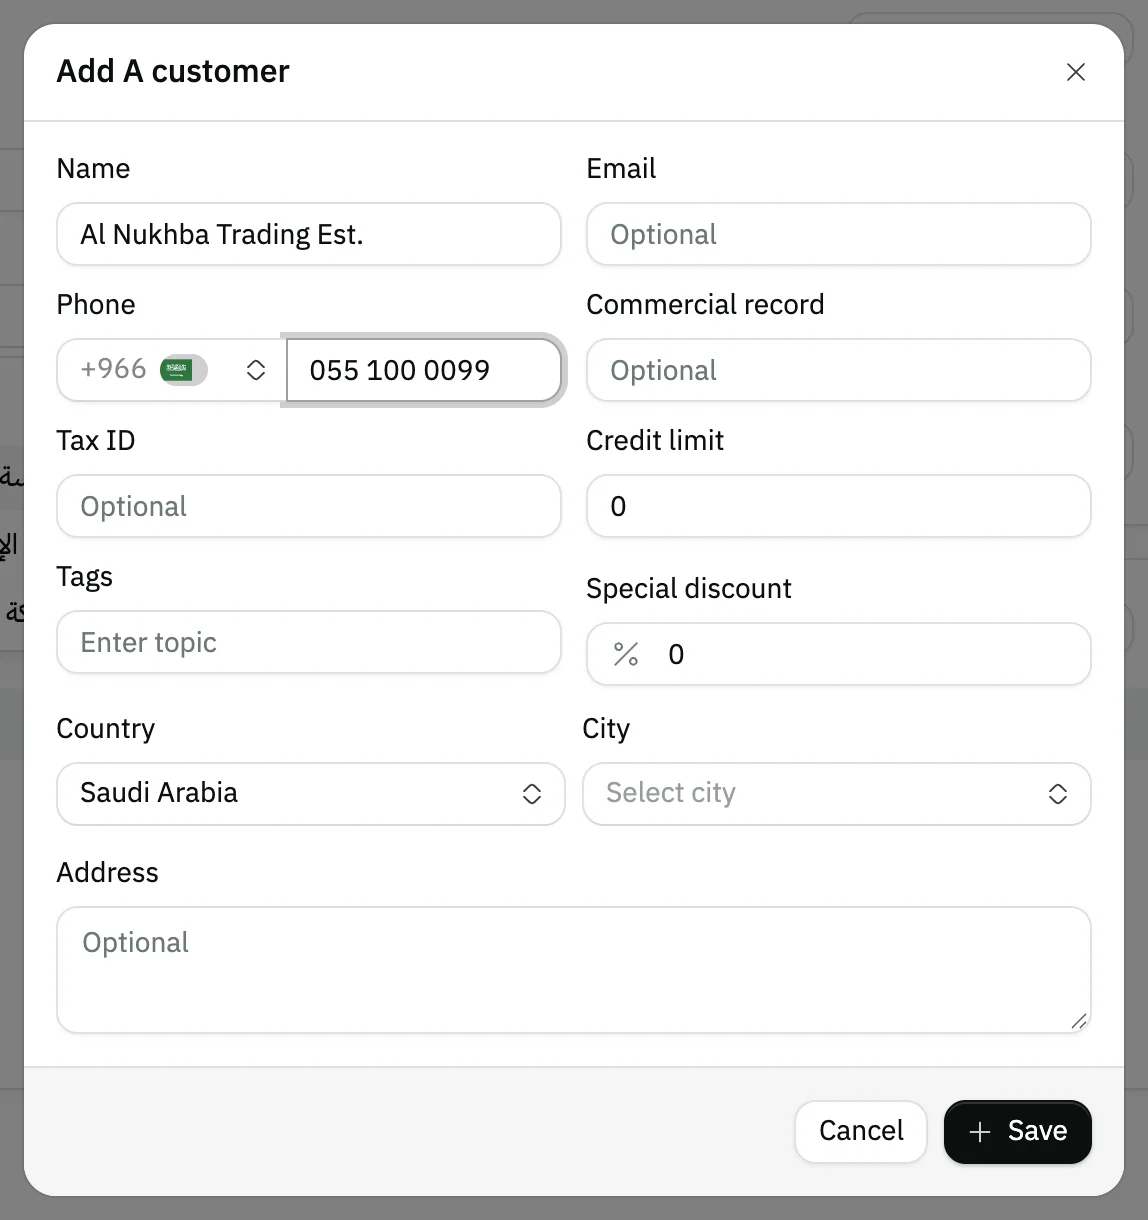
- Name (required)
- Phone (optional)
- The Save button
Create a product from the Add products window
Product not there? Press the + button next to search in the Add products window. The New product form opens.
Product name is required, with at least 3 characters. Next to it are Price, Cost, Quantity, Unit of measurement, Category, Brand and Barcode.
The SKU and Barcode fields each have a dice button that generates the code from your organization's settings. Details are in how to add a product.
Press Save and the product shows ticked in the window. Then press Apply to add it to the invoice.
The + button shows only to users allowed to create products. For the full product record, use the products page.
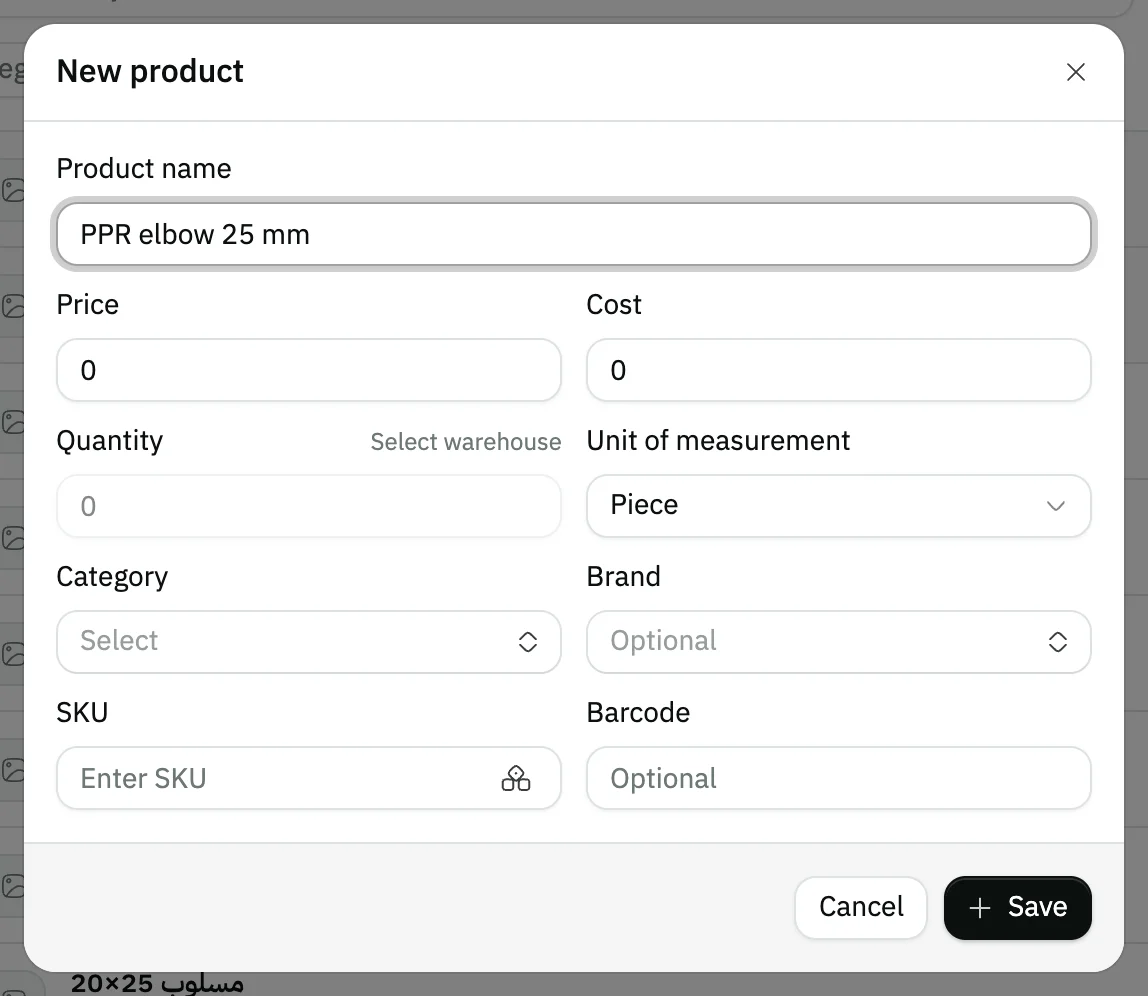
- Product name (required)
- The Save button
Selling on credit with a due date
Choose On credit under Payment method, and a Due date field appears below it. Set the day the customer pays.
Saving stops without this date, with the message “Enter a due date”.
Follow what the customer owes in the customer statement, and record the payment with a receipt voucher.
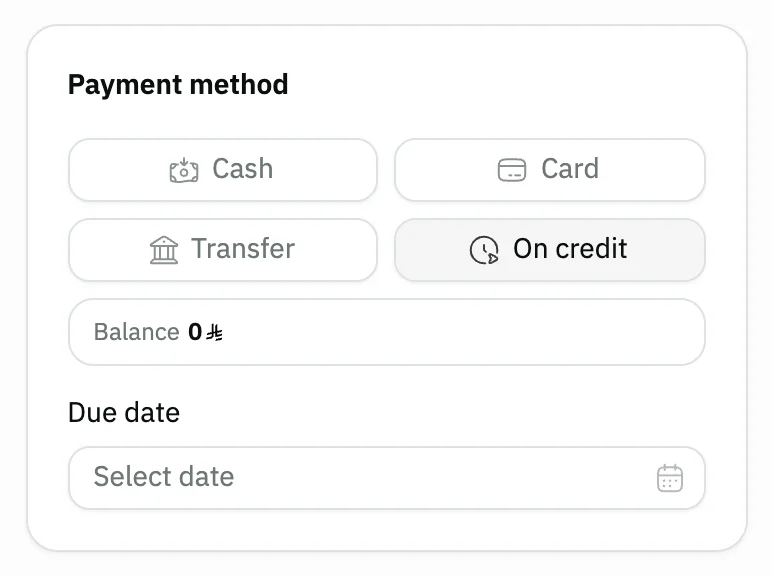
- On credit
- Due date
Discounts and extra charges
There are two kinds of discount: on one product, in that line's Product discount, and on the whole invoice, in Discount inside the Summary.
The invoice discount needs a Salesman on the invoice, and it can't exceed that salesman's discount limit (add a salesman).
Extra charge in the Summary adds an amount to the total, such as a delivery fee.
For a discount by code typed on the invoice, see create a discount code; for a gift card balance, see gift cards.
Tax invoice or simplified invoice
Choose Tax invoice when you sell to a business, and Simplified invoice when you sell to an individual consumer. This is how ZATCA e-invoicing splits invoices.
The ZATCA link is covered on the Snad e-invoicing page, and its steps in connect e-invoicing with ZATCA.
A quotation or sale order instead of an invoice
The Type field at the top of the form starts on the sales invoice. Change it to Quotation or Sale order to create either one with the same form.
Each has its own steps: create a quotation and create a sale order.
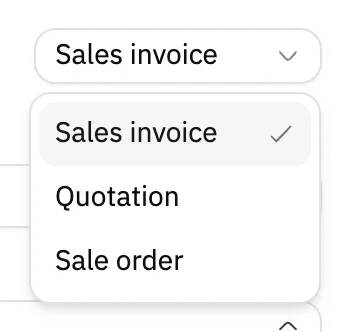
- Document types
Reference, notes and attachments
In Notes and attachments, you write the invoice Reference, such as the customer's purchase order number, add Notes, and edit the Customer address.
You can attach up to 10 files, each up to 10 MB.
Extra columns on the invoice lines
If your account admin added fields to the invoice lines from the Customizer (invoice line fields), each field shows as a column in the lines table and as a field in the line card on a phone, and a Required field must be filled in on every line when you create the invoice.
Save the invoice as a draft and come back to it
Save an invoice that isn't ready with the Save as draft button at the top of the form. It needs at least one product, and after saving you land on the invoices list with the Drafts filter on.
A draft is not an invoice: it takes no invoice number, reserves no stock, posts nothing to the accounts and is not sent to ZATCA until you turn it into an invoice.
Narrow the drafts list with the Created by filter or the status (Open or Converted to invoice). Its date is the draft's Last updated, not the day it was created. The Total column shows the draft's amount.
To return, open Sales, then Invoice, and press the Drafts filter next to the other filters at the top of the table to list all drafts, then choose Create invoice from the ⋯ menu on the draft's row. Or type “drafts” in the command palette, Ctrl + K. The top of the form then shows Update draft and Save as invoice.
To review a draft without opening the form, choose View from the ⋯ menu on its row, or press the row itself. A read-only page opens with the draft number, status, customer, salesman, branch, warehouse, lines, estimated total and notes, with buttons for Create invoice and Delete and a way back to the drafts. On a phone, press the draft's card to open this page and start from it.
To print a draft, choose Print from the ⋯ menu on its row, or press Print on its page, and an A4 sheet prints. The sheet carries the title your organization chose (Invoice draft, Proforma invoice or Quotation) and the line “This is a draft, not a final invoice” always. It shows the draft number, not an invoice number, and has no tax QR code. Its amounts are estimates, finalized when the invoice is issued. A draft that was converted to an invoice can be printed too.
Your account admin sets what the sheet shows and how it looks in draft print settings. Register drafts print as a receipt with Print receipt from the Orders list (point of sale drafts).
Update draft saves your changes and keeps it a draft. Save as invoice turns it into an invoice with the usual checks, such as available quantity and selling at a loss.
The coupon, gift card, points and cashback are not saved with the draft, and Snad warns you when you save. Apply them again after you open the draft.
The invoice date is not saved, so the invoice gets the date of the day you convert it. A due date that has passed is cleared when you open the draft. Prices and discounts stay as you saved them.
To delete a draft, choose Delete from the ⋯ menu on its row, or press it on its page. No invoice is affected.
The Save as draft button does not show when you edit a saved invoice, or to users without permission to create sales invoices.
At the register, drafts work in the point of sale too (point of sale drafts).
After saving: print and edit
After saving, the invoice page opens. Print, edit or send it to the customer on WhatsApp from there. Set how it prints in print settings and the print template.
Afterwards, follow the customer's account in the statement and record a payment with a receipt voucher.
For goods coming back, create a sales return; to record their delivery, create a delivery note.
An invoice already sent to ZATCA can't be edited or deleted, so its edit and delete buttons disappear.
An invoice that has a sales return can't be edited either: the edit button disappears, and a try from the server shows a message asking you to delete the returns first, then edit the invoice.
You can print the customer review QR code on the invoice, and review all your invoices in the sales invoices report.

Keyboard shortcuts and barcode
The keyboard cuts the most repeated steps (keyboard shortcuts):
- Alt + N on the invoice list: Create invoice.
- Alt + A on the form: Add product.
- Ctrl + S (⌘ + S on Mac): Save.
- The command palette, Ctrl + K: type “Create new invoice” from any screen.
- AI Mode: ask for the invoice in chat, and it prepares a draft you review and confirm (run operations with AI Mode).
- Barcode reader: scan a product while the form is open, and its line is added to the invoice.
No Create invoice button?
The button shows only to users allowed to create sales invoices. Ask your Snad account admin to grant it (roles and permissions).
If you see “This app is not included in your plan”, Sales is outside your current plan (manage your subscription).
If your user is tied to a branch, warehouse or salesman, those fields are hidden on the form and filled with your values.
Common questions
- How do I make a tax invoice in Snad?
- Open Sales, then Invoice, and press Create invoice. Keep Invoice type on Tax invoice, add the customer, products and payment method, then press Save.
- Can I edit an invoice after saving it?
- Yes, from the invoice page, as long as it hasn't been sent to ZATCA and has no sales return. After it is sent, edit and delete disappear. With a return, delete the returns first, then edit.
- Do I need to create the customer before the invoice?
- No. Press Add inside the Customer field and create it with just a name. It is selected on the invoice right away.
- How do I save an invoice and finish it later?
- Press Save as draft at the top of the form. Later, open Sales and Invoice, press the Drafts filter, then Create invoice to continue, then Save as invoice. A draft reserves no stock and takes no invoice number.
- How do I sell on credit?
- Choose On credit under Payment method, then set the Due date that appears below it.
- Why won't Snad accept the invoice discount?
- The invoice discount needs a Salesman, and it can't exceed that salesman's discount limit.