
How to use the booking front desk in Snad
To use the front desk in Snad, open Bookings, then Front desk. Pick the day, read the summary counts or search by name and phone. Then press the next-status button on the booking row, such as Confirm or Check in, and confirm a cancellation if needed.
In this guide8
Steps
Step 1: Open the front desk
In the sidebar, choose Bookings, then Front desk. The day board opens with all of its bookings; to add one, use create a booking. Details
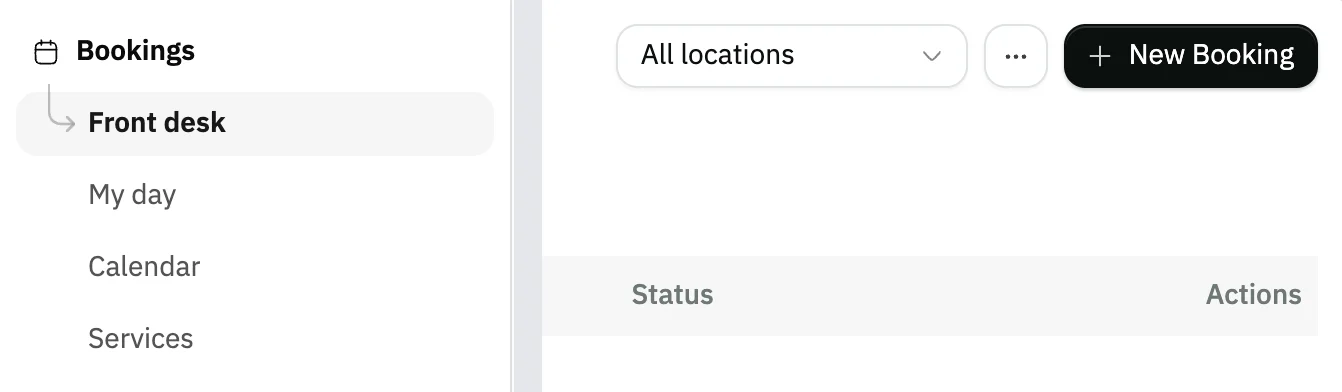
Image key - Front desk in the sidebar
- The new booking button
Step 2: Pick the day
Press Next day or Previous day, or open the date button and pick a day in the calendar. The Today button brings you back to today. Details

Image key - Previous day
- The date button
- Next day
- Today
Step 3: Read the day summary
Below the toolbar are the day's counts per status: All, Awaiting confirmation, Confirmed and more. On today, a Next card shows the nearest appointment. Details

Image key - All
- Confirmed
- Cancelled / no-show
Step 4: Search or filter bookings
Press a count in the summary to filter the table by that status, or type in Search by name or phone. Clear filters removes every condition.
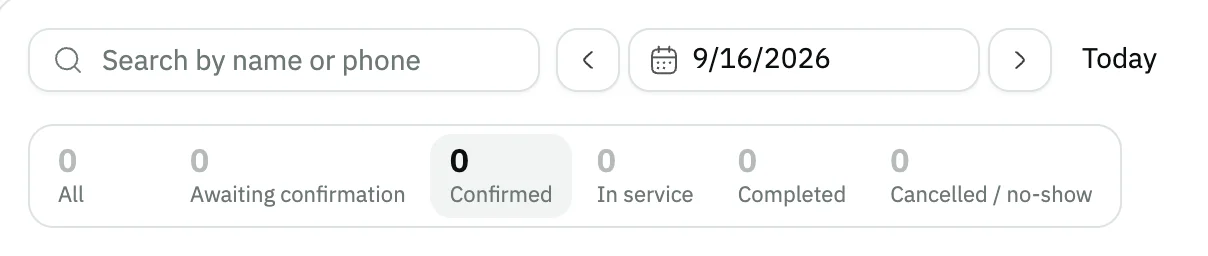
Image key - Search by name or phone
- The status selected in the summary
Step 5: Move a booking to its next status
The Actions column shows the next-step button: Confirm for a booking awaiting confirmation, Check in for a confirmed one. Users allowed to update bookings see it. Details

Image key - The Confirm button: the next step
- The Actions menu with the other steps
Step 6: Cancel or mark a no-show
Open the Actions menu on the row and choose Cancel booking or Mark no-show. Write the Reason (optional), then confirm, or press Back. Details
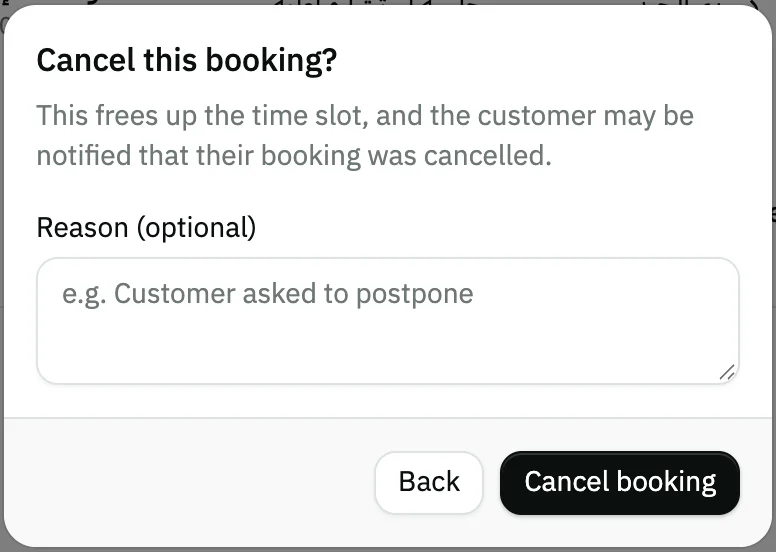
Image key - Reason (optional)
- Back, with no change
- Cancel booking to confirm
Step 7: Open the booking details
Click the booking row to open a side panel with Details, Notes & files and Activity. From there you change the status or use Reschedule. Details
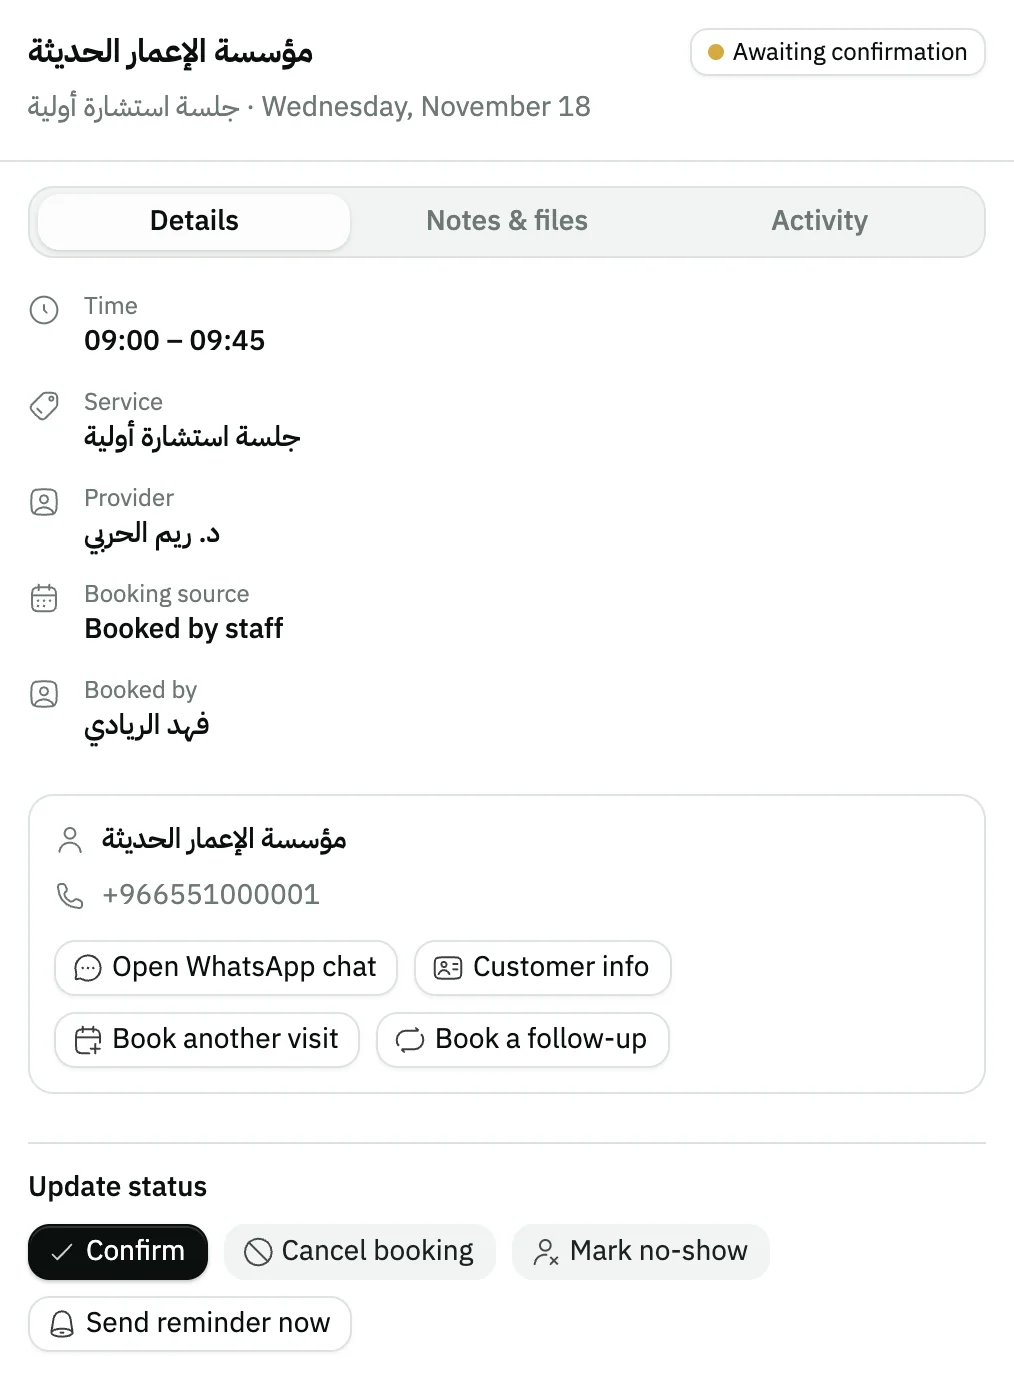
Image key - The Details tab
- The Notes & files tab
- The Activity tab
- Update status, with the step buttons
Step 8: Print the day sheet
Press More actions above the table and choose Print day sheet, which shows only when the day has bookings. The same menu holds Session series for recurring sessions. Details
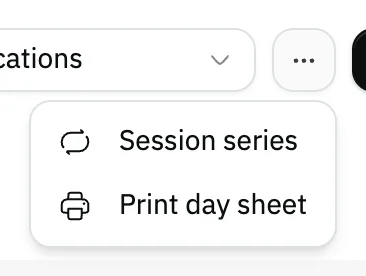
Image key - The More actions button
- Print day sheet
- Session series
Messages that block saving
If saving fails, one of these messages shows next to the field. The table gives the cause and the fix.
| Message | Cause | Fix |
|---|---|---|
| «This time is no longer available. Please choose another.» | Another booking took the slot before you saved, or it clashes with an existing booking. | Pick another time among the available Reschedule times, then save. |
| «You don't have permission to do this.» | Your user's role does not allow updating bookings. | Ask your account admin to grant the update permission (roles and permissions). |
Advanced details
Each section here explains one point from the steps in depth. Every section has a fixed link you can share.
The Next card and board refresh
The Next card shows the nearest booking still to be seen, on today only. If its time has passed, its title changes to Late.
The board refreshes every minute while it shows today, and when you return to the browser window. A booking your colleague made appears without a reload.
The summary counts cover the whole day, not just the page of the table you are on.
The day grid, the week calendar and the printed sheet load every booking in the range shown. If a day holds more than 5,000, a note says only the first 5,000 are shown (the week view has a similar note). The table opens at 10 rows per page.
Statuses and the steps allowed
Snad offers only the valid steps for each status. The first step is the button on the row, and the rest sit in the Actions menu.
- Awaiting confirmation: Confirm, Cancel booking or Mark no-show.
- Confirmed: Check in, Complete, Cancel booking or Mark no-show.
- Checked in: Complete is the button on the row, with Start and Mark no-show in the Actions menu.
- In progress: Complete only.
- No-show: Check in or Complete, if the customer turns up late.
- Completed and Cancelled are final and have no steps.
- Cancel, no-show and Complete pass through a confirmation. A no-show counts toward the customer's record and may affect their online booking.
What the details panel holds
Under Details you see the booking time, the service, its provider and the customer's data, with Open WhatsApp chat and the Update status buttons.
For an upcoming booking that is awaiting confirmation or confirmed, Send reminder now shows. Send official confirmation sends an approved WhatsApp template from the business number.
In Reschedule, pick a day and a time, then press Save new time. The service stays the same. A booking already in progress, completed or cancelled can't be moved.
Reschedule also has the Time (optional) field from the booking form: type the exact minute, and if it isn't free the nearest free times appear. Past days are disabled in the calendar.
Times shown are for the booking's current provider only. To see other providers' times, turn on the “Show times for every Provider” switch; each time then carries its provider's name.
While a booking has no invoice and isn't cancelled or a no-show, the Details tab shows a Payment method field for a priced service. Change the method and press Save payment method; its invoice is then recorded with it when the booking is confirmed. If none was chosen, the field names the default from settings that will be used. The field also offers the custom payment methods you added for bookings (custom payment methods).
Once the invoice exists the field disappears, and the Invoice card shows its payment method next to its number. If the invoice failed because the saved split amounts no longer match the booking total, the card asks you to choose the method again, save it, then retry.
Activity holds the status history, and Notes & files holds the session notes and attachments.
A recurring session series
Session series opens a window where you pick the customer and service, then Number of sessions, Every (weeks), Start time, Weekdays and Start date.
Press Preview first to see which sessions fit and which clash, then Create series. Only the free sessions are booked, and the ones that failed show with their reason.
This option shows only to users allowed to create bookings.
Keyboard shortcuts
The front desk is worked all day, so it has its own shortcuts (keyboard shortcuts):
- Alt with the left or right arrow: previous or next day (the direction flips in the Arabic interface).
- Alt + T: back to today, when you are on another day.
- /: jump to the search field.
- Alt + N: a new booking, for users allowed to create.
A booking from the public page
A pending booking with no customer on file, such as a public-page booking, shows Approve on the row. Confirm is in the Actions menu. After you press it, “Approved” appears.
Booking settings control the public page and whether its bookings wait for your review.
If a completed booking has no invoice, or its invoice failed, Retry invoice appears in the Actions menu.
Branches and sector names
If your business has more than one branch, a branch picker appears above the table, set to All locations (add a branch).
The names for booking, customer, service and provider follow the sector preset in booking settings, so you may read other nouns than “Booking” and “Customer”.
No front desk, or no buttons?
If you see “This app is not included in your plan”, Bookings is outside your plan (manage your subscription).
The add button needs the create permission and the status buttons need the update permission. Ask your account admin (roles and permissions).
Common questions
- How do I check a customer in?
- Open Bookings, then Front desk, and on the confirmed booking row press Check in. Its status changes to Checked in.
- How do I cancel a booking from the front desk?
- Open the Actions menu on the booking row and choose Cancel booking, write a reason if you like, then confirm. The slot is freed and the customer may be notified.
- Can I see yesterday's or tomorrow's bookings?
- Yes. Use Previous day and Next day, or pick a day in the calendar, and return with Today.
- Why don't I see the Next card?
- It shows on today only, and only when a booking has not started yet. On any other day it is not shown.
- Can I print the day's bookings?
- Yes. From More actions, choose Print day sheet. It works when the day shown has at least one booking.