
How to set data access in Snad
To set data access in Snad, press Settings then Data access, and press Add. Type the Data access name, pick the users in Assign users, then choose the allowed Branches, Warehouses, Salesman and Employees, and press Save.
In this guide7
Steps
Step 1: Open the data access screen
Press Settings at the bottom of the sidebar and it turns into the settings menu. Then choose Data access, under Users. Details
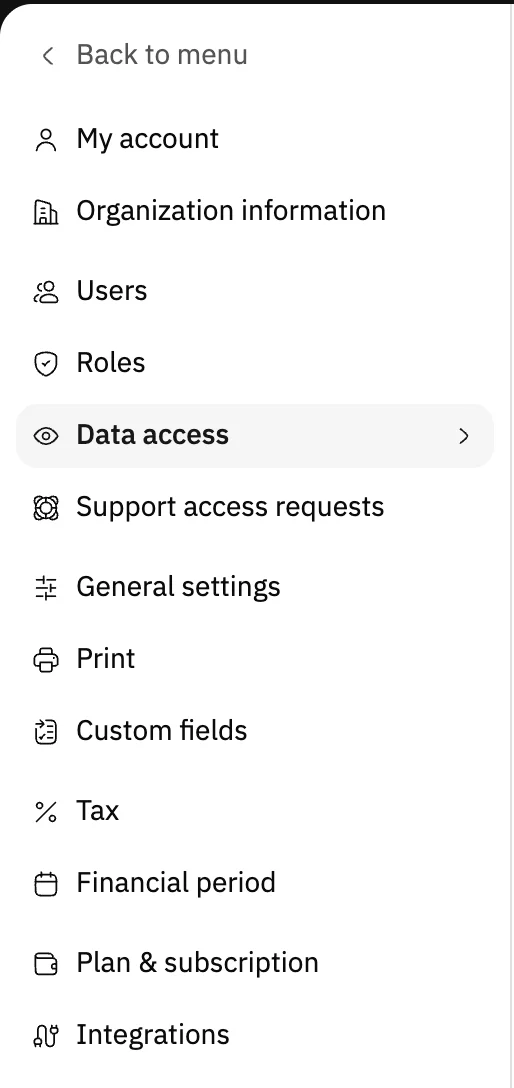
Image key - Data access in the settings menu
Step 2: Press Add
The table lists the current rules, with the number of Users, branches and warehouses in each. Press Add for a new rule. Details

Image key - The Add button
- The rules table header
Step 3: Name the rule
Type the Data access name with at least three characters, and make it describe the scope, such as “Jeddah branch supervisors”.

Image key - The Data access name field
- The Assign users field
Step 4: Assign the users
Open Assign users and pick at least one user, and their names show in the field. Select all and Clear all change the whole list at once. Details
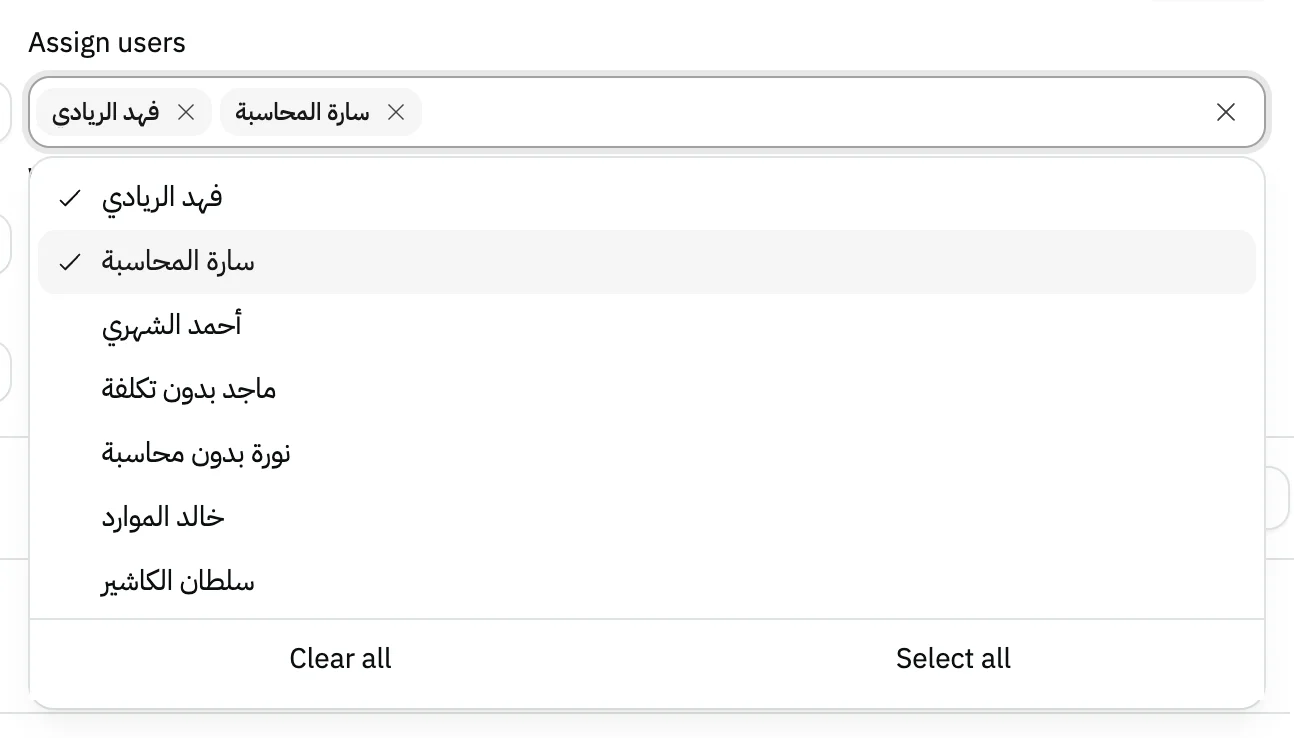
Image key - The Assign users field with the chosen names
- A ticked user
- The Select all button
Step 5: Choose branches and warehouses
Pick what these users can see from Branches, Warehouses, Salesman and Employees. A list you leave empty puts no limit on that kind. Details

Image key - The Branches field
- The Warehouses field
- The Salesman field
- The Employees field
Step 6: Choose products (optional)
In Add products, press Select next to each allowed product, or Select all. With no choice, users see all products. Details
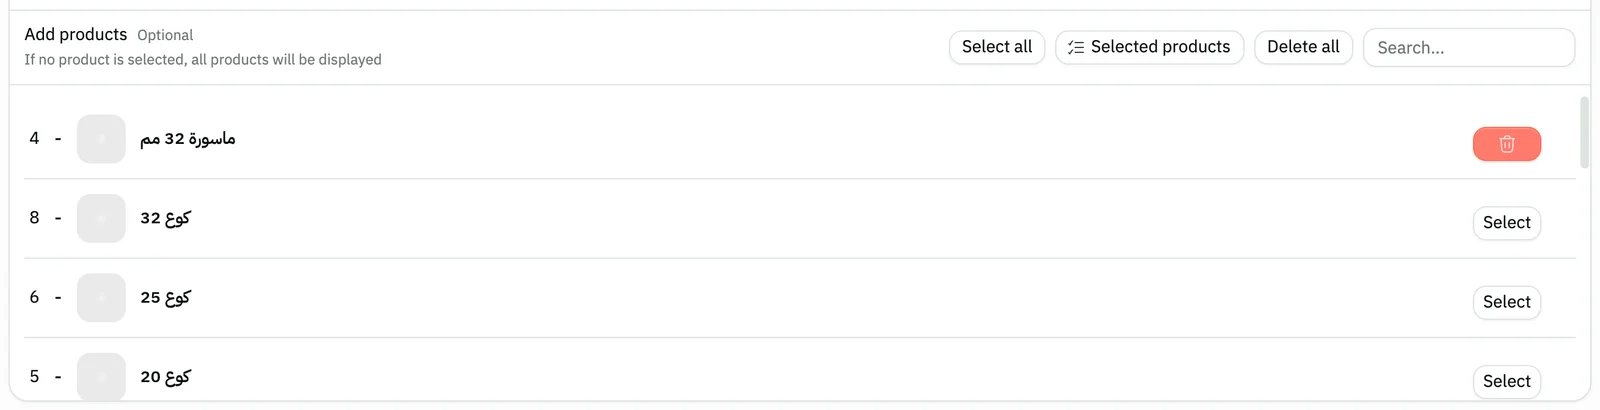
Image key - Search for a product
- The Select all button
- The Selected products button
Step 7: Save the rule
Press Save at the top of the form, or Cancel to back out. After saving you return to the table and the rule shows in it. Details

Image key - The Save button
- The Cancel button
Messages that block saving
If saving fails, one of these messages shows next to the field. The table gives the cause and the fix.
| Message | Cause | Fix |
|---|---|---|
| «يجب أن يحتوي النص على 3 حرف على الأقل (shown in Arabic)» | The rule name is shorter than three characters. | Type three characters or more in Data access name. |
| «Users array cannot be empty» | You saved the rule with no user. | Pick at least one user in Assign users. |
Advanced details
Each section here explains one point from the steps in depth. Every section has a fixed link you can share.
What a rule limits
A rule limits which data a user sees, not what they can do. What they can do is set by their role (roles and permissions).
In sales tables, such as invoices, the user sees only what belongs to the branches, warehouses and salesmen you set, even if they edit the page address.
Create the branches, warehouses and salesmen first so they show in the lists (add a branch, add a warehouse, add a salesman, add an employee).
One rule per user
Each user follows one rule only. If you assign them to a new rule, they move there from the previous one.
A user with no rule is not limited by one. Add users on the users page before you assign them.
- A ticked user
Limiting products and variants
The Add products box is optional. Type part of the name, or the number, SKU or barcode, in the search to find a product fast.
On an account with many products, Snad loads the list in batches: a line “Loaded N of M products” and a Stop loading button show, and Retry shows if the load fails. If you press Select all before the load finishes, a message says “Available after all products have loaded”, so wait and press it again.
If you pick a product that has variants, Snad adds its variants too, so no variant is left outside the limit. Removing the product removes its variants.
Create products first on the products page so they show in the box.
Edit or delete a rule
Click any row in the table to edit its rule, or open the Actions menu at the end of the row and choose Update or Delete.
When you Update a rule, its users become exactly the ones you pick now. When you Delete a rule, its users are freed from the limit.

- Update
- Delete
Can't open the page?
The page is for the account admin or anyone allowed to manage users. Otherwise you see a no-access message, so ask your admin to grant it (roles and permissions).
Common questions
- How do I let a user see only their own branch in Snad?
- Create a rule in Data access, assign the user in Assign users, pick their branch in Branches, then press Save.
- What is the difference between permissions and data access?
- Permissions in a role set what the user can do, and data access sets which branch, warehouse or salesman data they see (roles and permissions).
- What happens if I leave the branches list empty?
- The user isn't limited to any branch. The same goes for warehouses, salesmen and employees, and for products the screen says all products are shown.
- Can a user follow more than one rule?
- No, each user has one rule. Assigning them to a new rule moves them there.
- How do I remove the limit from a user?
- Open the rule by clicking its row, remove the user from Assign users and press Save, or delete the whole rule from Actions then Delete.