
How to add booking resources in Snad
To add a booking resource in Snad, open Bookings, then Providers, and press “Add Provider”. Enter the Name, choose the Type, set the Working hours for each day, then press Save. Then link it to a service on the Services screen so it can be booked.
In this guide6
Steps
Step 1: Open the providers list
In the sidebar, choose Bookings, then Providers, and press “Add Provider” above the list. Details
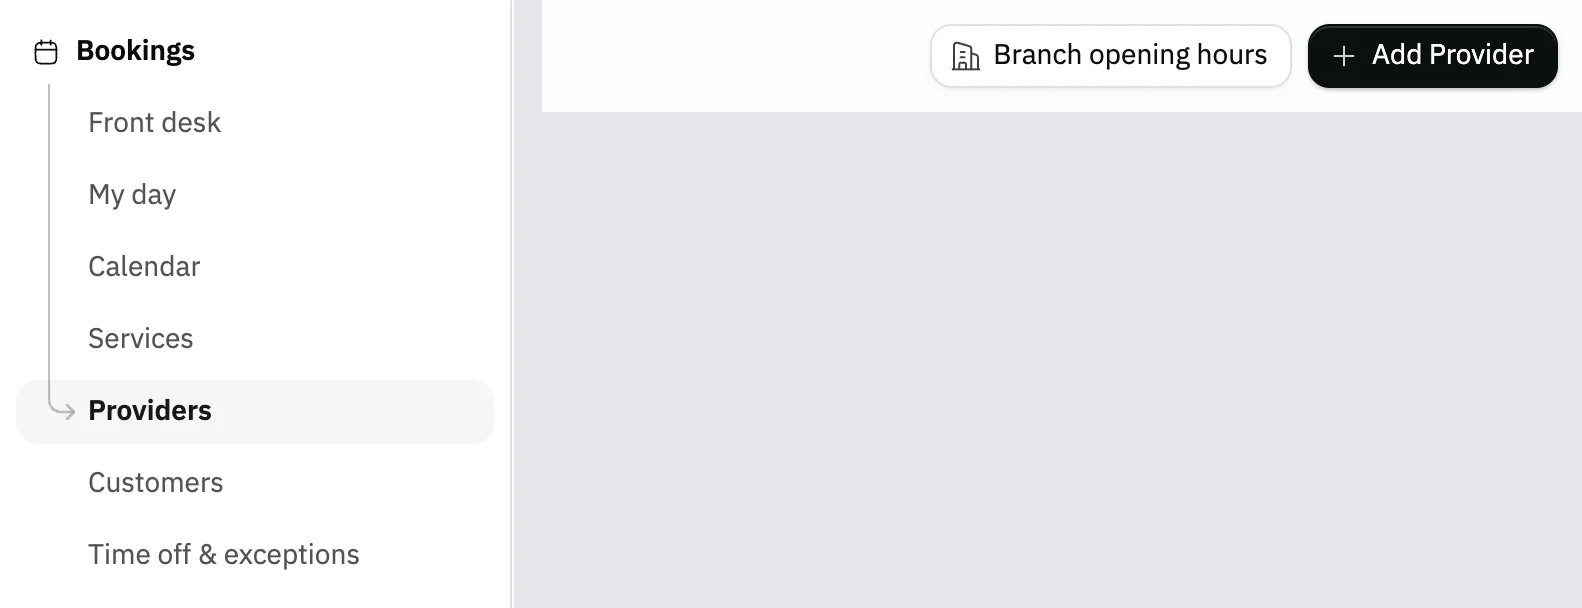
Image key - Providers in the sidebar
- The “Add Provider” button
Step 2: Enter the name and type
Enter the Name and choose the Type: person, space or equipment. Keep Capacity at 1 for one-to-one appointments, and pick the Branch if the resource belongs to a branch. Details
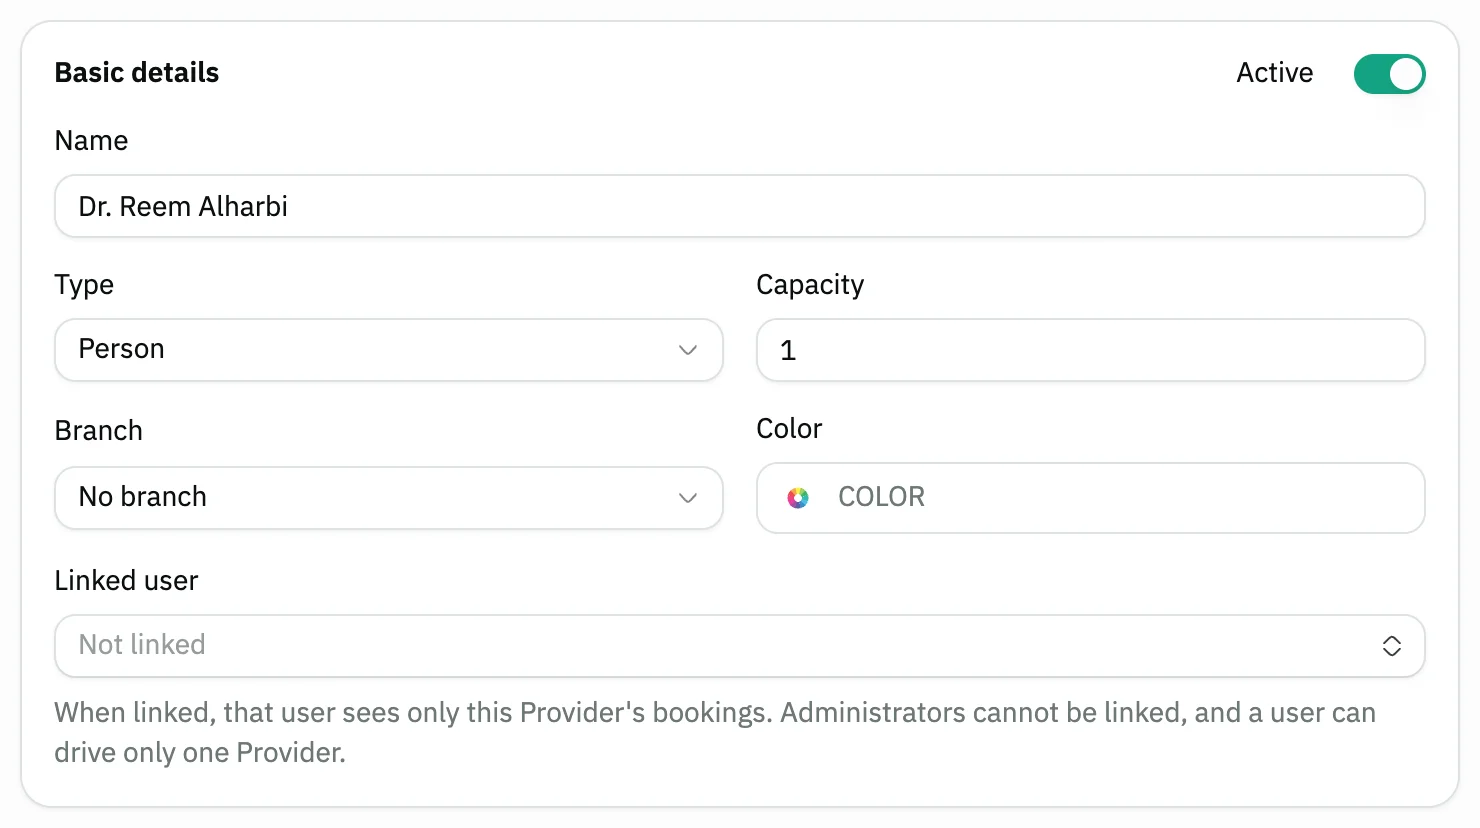
Image key - Name
- Type
- Capacity
- Branch
Step 3: Link a user if needed
In Linked user, pick the employee who delivers the service, so they see only their own bookings. Leave it on “Not linked” if the resource has no user. Details
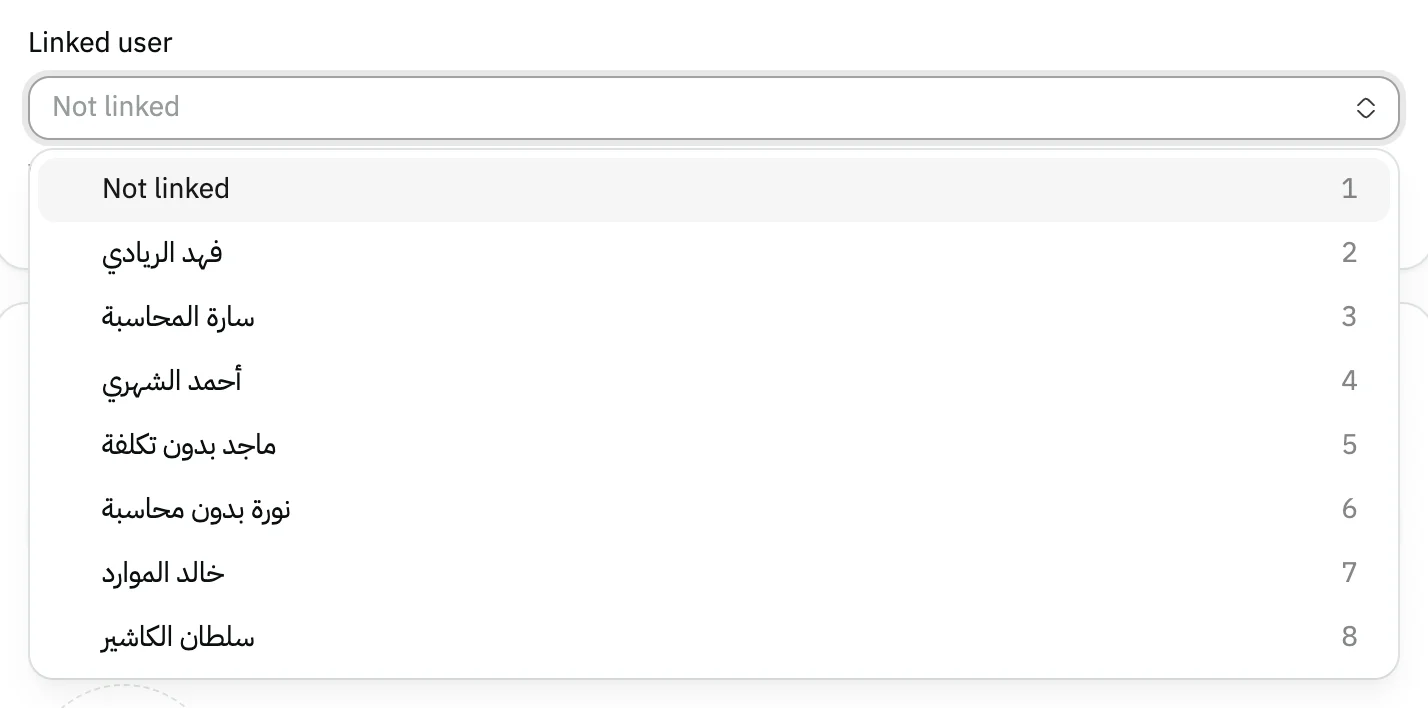
Image key - Linked user
Step 4: Set the working hours
Under Working hours, press Add shift for each day the resource works and set the start and end. Copy to all days repeats a finished day across the week. Details
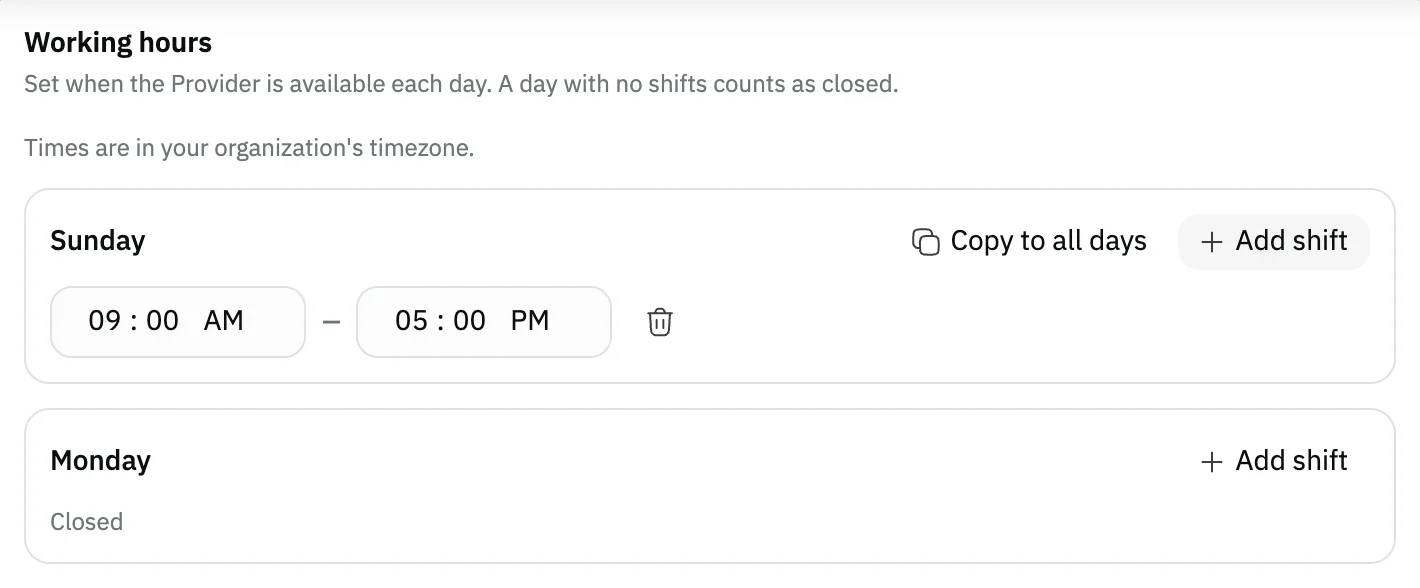
Image key - The Add shift button
- The Copy to all days button
Step 5: Add a public profile if you like
In Public profile, enter the Title / specialty and a Short bio, and add a Photo. Visitors see them only if the booking page lists providers first. Details
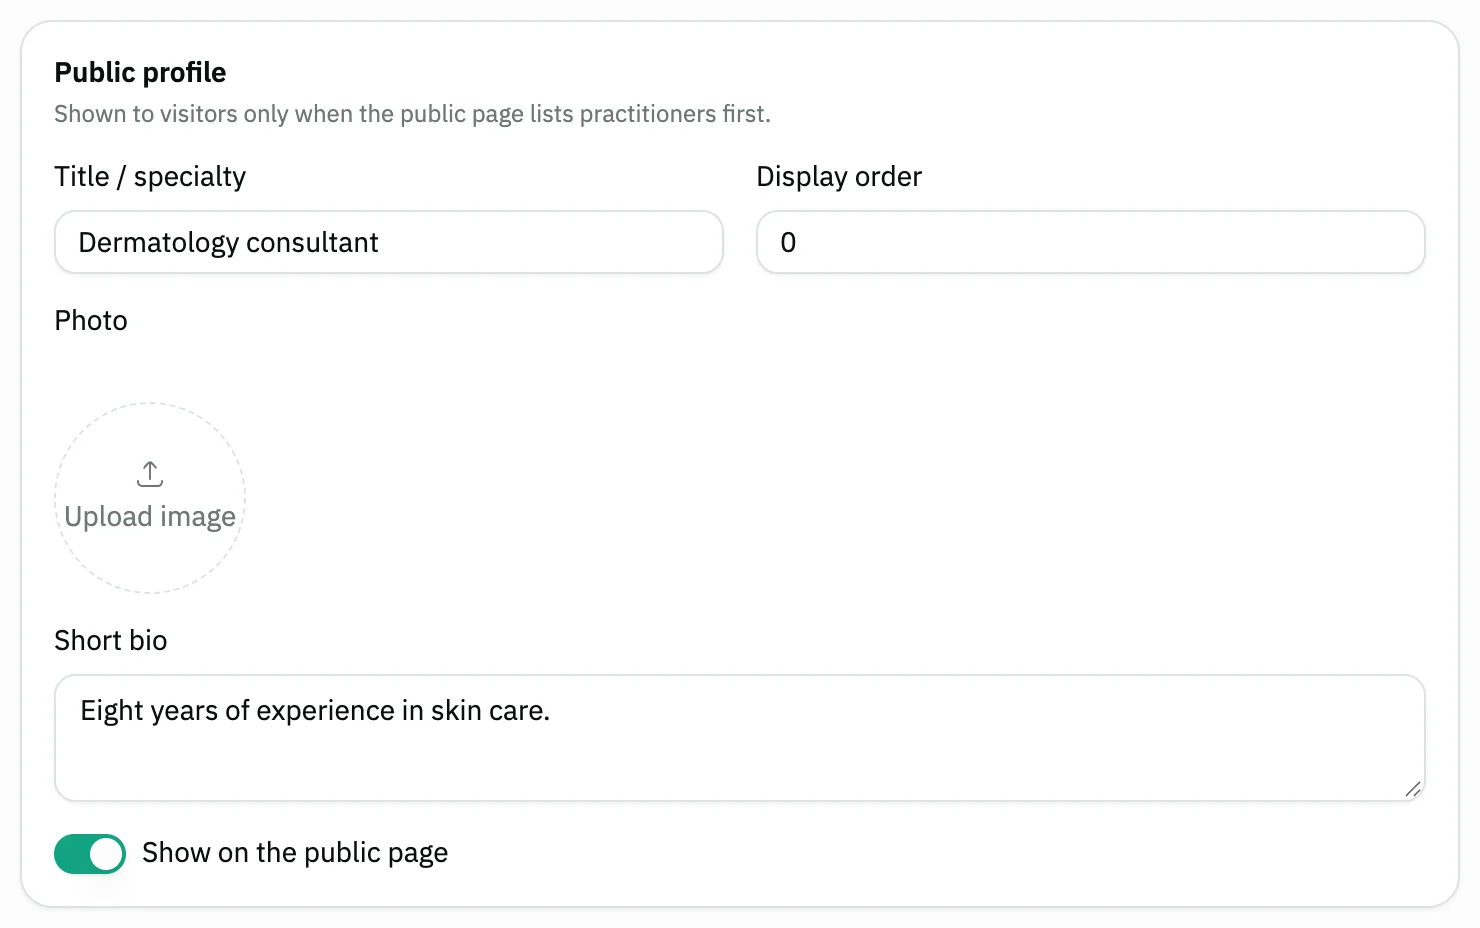
Image key - Title / specialty
- Show on the public page
Step 6: Save the resource
Press Save. The form stays open after creating so you can finish setup; then go back to the list and link it to a service.

Image key - The Save button
Messages that block saving
If saving fails, one of these messages shows next to the field. The table gives the cause and the fix.
| Message | Cause | Fix |
|---|---|---|
| «This Provider has no working hours, so it can never be booked. Add hours below, or save again to keep it as is.» | No shift was added under Working hours. | Add at least one shift with Add shift and save, or press Save again to keep it without hours. |
| «Start time must be before end time» | In one shift the end time comes before the start time. | Correct the start and end times of that shift. |
Advanced details
Each section here explains one point from the steps in depth. Every section has a fixed link you can share.
Capacity: how many people per slot
Capacity is how many people can share one slot on this resource. For group classes, the seats come from Seats per class on the service, capped at this Capacity.
Class setup is in add a bookable service.
Linking a resource to a user
When linked, that user sees only this resource's bookings. Administrators can't be linked, and one user can't be linked to more than one resource.
Create the user first in add a user if they don't exist yet.
Resource hours and bookable times
The resource's own Working hours alone decide when it is bookable. There are no separate branch opening hours; each resource has its own schedule.
If a shift starts before 6 AM and the same time in the evening falls before its end, a hint appears under it: “This shift starts at … in the morning. Did you mean evening?”. Press Yes, change to PM to fix the start in one click.
Showing a resource on the public booking page
The public profile is shown to visitors only when the public page lists practitioners first. Display order sets where the resource sits among the others.
Turn off Show on the public page to hide it from visitors. The page itself is set up in set booking settings.
Resource row actions
Click the row to edit the resource. The row menu has Working hours (opens the form at the hours), Calendar link (iCal), Edit and Delete.
Calendar link (iCal) copies a secret link you add to a phone calendar, so appointments show up and refresh on their own. Share it only with the schedule's owner.

- Calendar link (iCal)
Common questions
- How do I add a provider in the bookings software?
- Open Bookings, then Providers, and press “Add Provider”. Enter the name, choose the type, set the working hours, then press Save.
- Why are no bookable times showing?
- A resource with no working hours can't be booked, and a service with no provider shows no times. Add Working hours here, and select the provider on the service.
- Can I add a room or a machine instead of a person?
- Yes. Under Type, choose space or equipment instead of person.
- How do I make an employee see only their own bookings?
- Link their resource to their account in Linked user. They then see only that resource's bookings.
- Do I have to repeat the hours for every day?
- No. Finish one day, press Copy to all days, then change whatever differs.