
How to sell at the point of sale in Snad
On the register, type the product name in Search and tap its card to add it to the cart. Set the quantity, choose the Customer and the Payment method, then press the save button under the cart. The invoice is marked Complete and a new one opens.
In this guide5
Steps
Step 1: Find the product and add it
Search in the Search box by name, number, SKU or barcode, or switch between All products, By category and By brand. Tap the product card to add it to the cart. Details
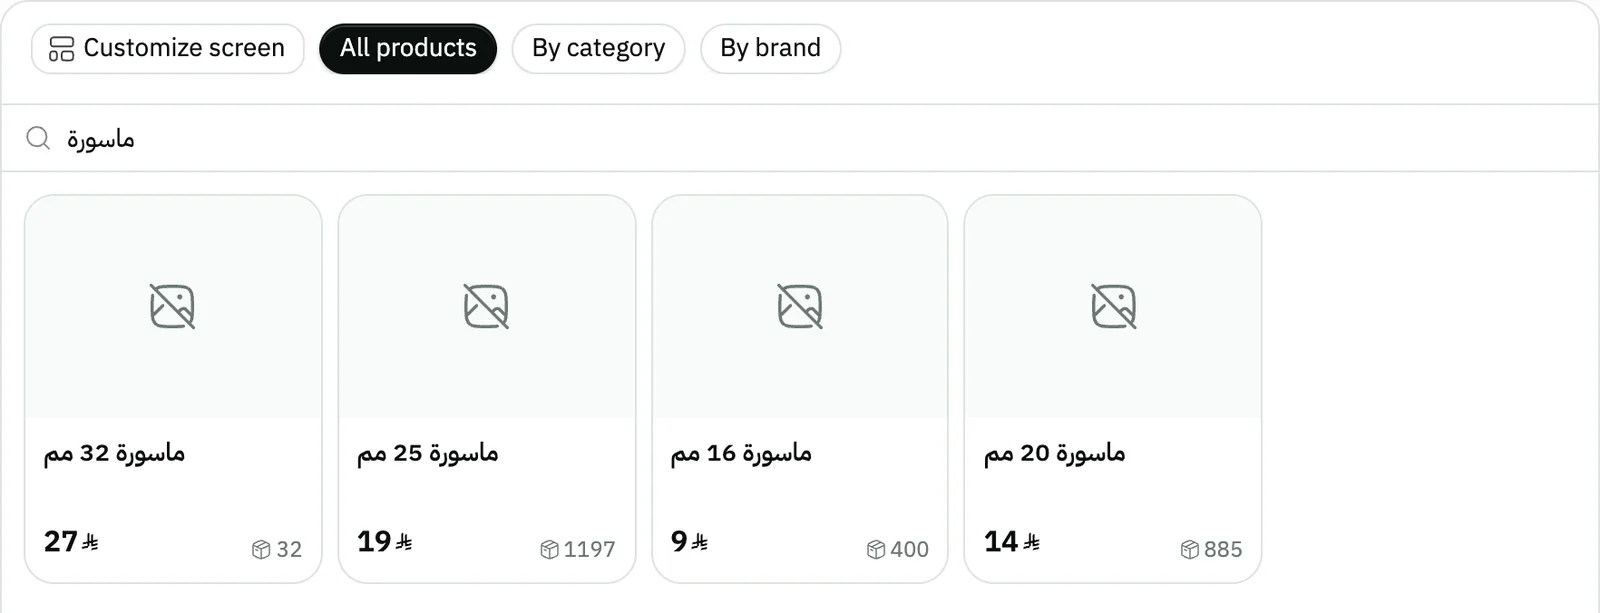
Image key - All products: the first filter button
- The Search box
- The product card
Step 2: Set the quantity in the cart
Products show under Product list in the cart. Press + or - to change the quantity, or type the number in its box. To remove a line, press the three-dots button (Item options) in its corner and choose Delete; the same menu has Product info.
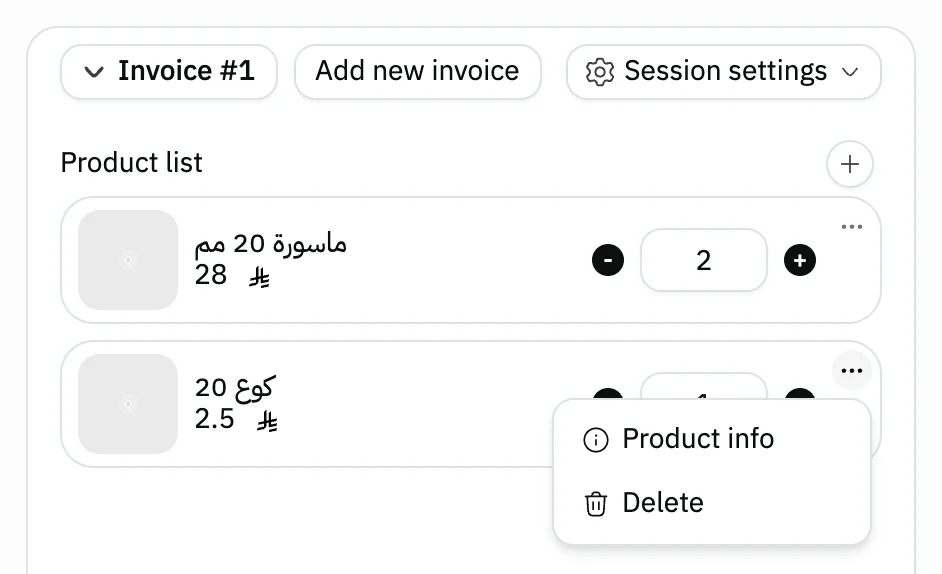
Image key - The quantity box
- The + button
- The three-dots button for the Item options menu
Step 3: Pick the customer and add a discount
Pick the Customer (add a customer) from the list under the cart. For a discount or a charge, press Discount, enter the value, then save in the window. Details
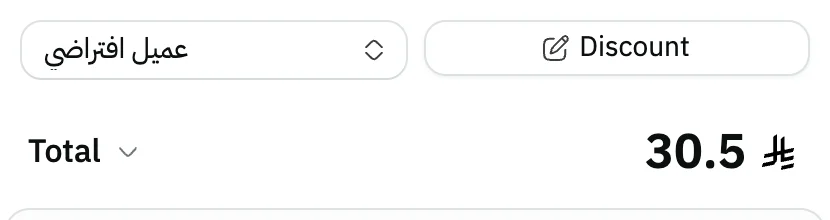
Image key - The Customer list
- The Discount button
Step 4: Choose the payment method and save
Press Payment method and pick from the list, such as Cash, Card or On credit (credit sales). If the customer pays with two or more methods, choose Split payment and type the amount for each method yourself until they add up to the total; the fields start empty and Snad does not divide the money for you. Then press the save button (the + mark), or Save & print to print the receipt (set up printing). Hover over the two small buttons to see their names: Save for the first and Save as draft for the second. Custom payment methods that you offered at the register, card or transfer kind such as Tabby and Tamara, show in the same list with your own names (custom payment methods). Details
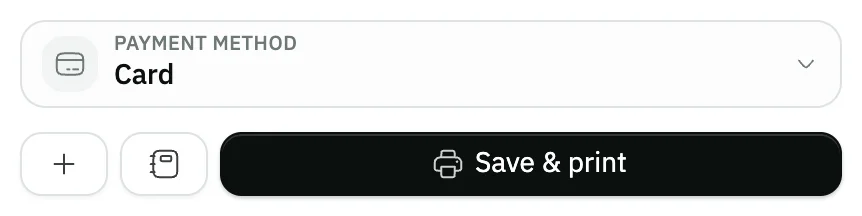
Image key - The Payment method choice
- The save button (+)
- The Save & print button
Step 5: Check the saved invoice
After saving, a new empty invoice opens. Open the Invoice list from the invoice button above the cart to see yours marked Complete. Details
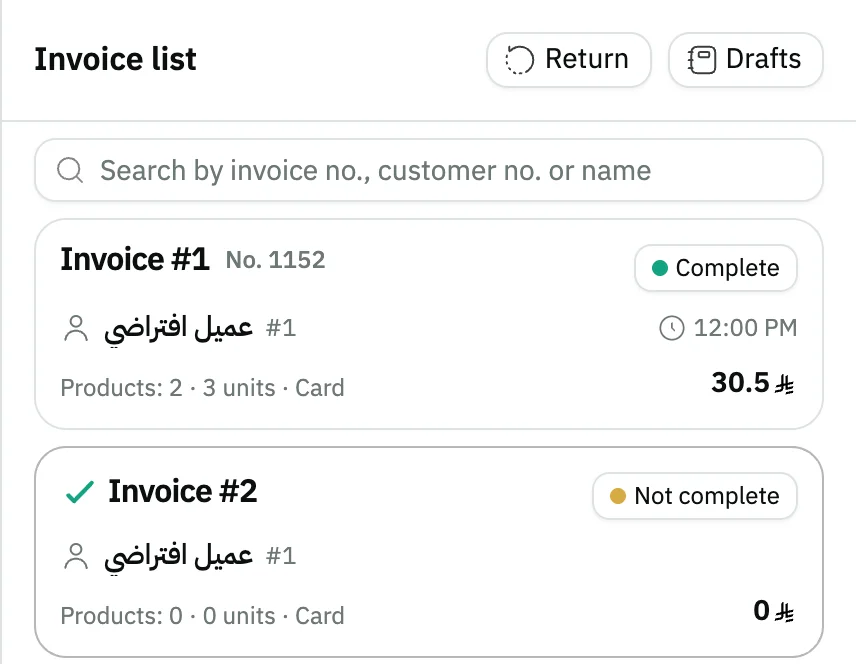
Image key - The invoice marked Complete
- The new invoice, Not complete
Messages that block saving
If saving fails, one of these messages shows next to the field. The table gives the cause and the fix.
| Message | Cause | Fix |
|---|---|---|
| «Product quantity not available» | The cart quantity is above the stock of the session's warehouse, and selling without stock is not allowed in sales settings. | Lower the quantity, or allow selling without stock in sales settings. |
| «Product price is less than the cost» | A cart line is priced below the product's cost, and selling below cost is not allowed in the settings. | Raise the price, or change the setting in sales settings. |
| «Select product» | You tried to save with an empty cart. | Add at least one product, then save. |
Advanced details
Each section here explains one point from the steps in depth. Every section has a fixed link you can share.
Customize how the register looks
At the top of the product list there is a Customize screen button, and it is also in the Session settings menu and in the command palette Ctrl + K. It opens a window with six sections: Presets, Product list, Categories and brands, Invoice summary, Product card and Screen.
Among the choices: showing products as a Grid, a List or Categories, how you move between categories and brands, the Cart position, the size of the product card, and what happens to Out-of-stock products. Totals start Brief in every preset, and you can choose Detailed. Focus mode hides the app's sidebar and top bar; to leave it, press Exit focus.
If your categories have sub-categories, the navigation follows them: in Top bar choosing a main category opens a second row with All and then its sub-categories (a third row for a sub-category's own sub-categories), in Side rail the chosen category opens its sub-categories under it, in Picture tiles the sub-category tiles follow the chosen category, and in Dropdown every category shows in tree order and can be searched by its path. Choosing a main category also shows the products of its sub-categories. The categories themselves are covered in manage product categories.
In the Categories view the root shows only the main categories, and the product count on each tile includes its sub-categories. A main category that has sub-categories opens as a folder: its first tile is “All in” followed by the category name, then the tiles of its sub-categories, and its path shows in the bar above the list. Back or Esc goes up one level. A category without sub-categories opens its products directly, as before.
Nothing on the register changes until you press Apply, and your choice stays for every later session. Restore default brings back the default layout. On a phone only the product list and product card options apply.
If the organization wants to stop changes, turn on Do not allow changes inside the session in set up the point of sale. Then the Customize screen button is not shown to anyone, and everyone sees the organization's default layout.
To see your choices on the register before you apply them, press and hold Preview: the window disappears and the register shows these choices, and when you let go the window comes back as it was. A preview saves nothing.
If you have not chosen a layout, you start with the organization's default when one is set (set up the point of sale), otherwise with the Classic preset. The pictures of categories and brands show in the categories view and in Picture tiles.
Selling on credit at the register
On credit shows in the Payment method list when you turn it on in the payment methods (sales settings). Picking it opens the Due date window: choose the day, then press Confirm. To change the date, pick On credit again.
If the customer has payment terms, the window proposes today plus those terms, and you can change it. Days before today cannot be picked.
The window shows the customer's Credit limit, Balance and Available, and warns you when the cart total is above what is available, as Snad then refuses to save it on credit. This line does not show for the default customer.
Barcodes and pinned products
If you have a barcode scanner, scan the product while the register is open and it is added to the cart with no search. The empty cart reminds you of this.
If a customer asks the price of a product, press the ⓘ Product info button on its card, or choose Product info from the Item options menu on its cart line. A window opens with its price and stock, and nothing is added to the cart until you press the add button in it.
To sell faster, pin your best sellers with the pin icon on the product card, and they show in the Pinned strip above the products. To sell several products at one price, use bundles.
Discount and extra charge
Discount opens the Price window, with the Discount percentage or Discount amount (switch with the button beside the field) and Extra charge.
The invoice's seller name is in the Session settings menu above the cart. For a user not linked to a salesman, and when there is more than one seller, the seller's name in the menu opens a list where you change the seller. The Make this the shift's seller switch is on by default. The seller cannot change on an invoice tied to a table.
The discount only works once the invoice has a salesman, and it can't exceed the salesman's discount limit (add a salesman). If your customer has a special discount, it is applied when you pick them.
The same window holds a coupon (create a discount coupon), a gift card, points and cashback for those who turned on the loyalty program.
The payment method fee on the total
If you pick a custom method whose fee the customer bears (custom payment methods), the total on the screen is the total after the fee, and a muted row under the payment names the fee and its percentage. The amount you collect is that total, and the receipt prints the fee row.
If the shop bears the fee, the total stays as it is, and the cashier sees a muted line Fee borne by the store that is not on the receipt. Split payment never carries a fee.
Closing the session adds up the customers' fees in Total payment method fees, and the expected cash does not change because of them.
Extra fields on the sale
If you define a custom field on the sales invoice (add custom fields) and it applies to the register, an Extra fields section shows folded below the payment, with a count of those filled. If no field matches a cashier sale, the section does not show.
The fields are optional and never hold back the sale: a wrong value or an empty required field does not stop saving. If a field was not saved, Snad names the fields that were not saved after the sale, and the sale itself is saved. The fields never change the invoice figures, the entry or the stock.
When the program blocks saving
The program refuses to save with The invoice cannot be sold at a loss when the invoice loses money and the setting forbids it. It asks you to Select a payment method when the invoice has none.
On an On credit sale with no date, it asks you to Enter a due date and opens the date window again.
The payment methods shown and the default one come from the POS Settings (set up the point of sale).
Several invoices and returns at the register
Press Add new invoice to start a second invoice while the first is open, and switch between them from the Invoice list. An unfinished cart is kept in your browser, so leaving the page does not lose it. For a cart you want to return to later, use drafts.
To return an invoice from the register itself, open the Invoice list and press Return at the top of the drawer, or open the command palette Ctrl + K and choose “Return from the register”. The button shows in an open session for a user allowed to refund; invoices of a closed session are returned from the invoice's card on the closed session's screen (close a POS session). The Return an invoice drawer opens: type the invoice number, the customer's phone or name, or pick from the session's invoices, set the quantities, and choose How to give the money back (POS orders).
In restaurants and cafés an Order type shows: Dine in, Takeaway or Delivery (delivery prices), with tables (manage restaurant tables) and the kitchen screen.
Save the cart as a draft and come back to it
For a cart you haven't finished, use the draft button at the bottom of the cart (the second small button, after the save button), whose tooltip reads Save as draft (Update draft when the cart was opened from a draft). It is disabled while the cart is empty, and hidden on a cart tied to a restaurant table.
After saving, the cart closes and an empty one opens so you can keep selling. Saving needs an open session.
To return, open the Invoice list and press Drafts at the top of the drawer. A drawer lists the drafts of your session's branch. Press Open on one and it is added as a new cart with its products. The warehouse and salesman come from your current session.
The drawer has a search box for the draft number, customer name or phone, and a select beside it with All, My drafts and Today. Each row shows the draft number, customer, total, a summary of its items, the seller, who saved it and the last update.
To delete a draft, press Delete on it in the drawer; it shows for the person who saved it or anyone with delete permission. The full list is under POS, then Orders: press the Drafts filter next to the other filters at the top of the table. It has a Created by filter and a status filter, and columns for status, Total, warehouse and shift.
In this list, choose Create order from the ⋯ menu on a draft's row to open it in the point of sale; it needs an open session. View in the same menu (or pressing the row) shows a read-only page with the customer, salesman, branch, warehouse, lines, estimated total and notes, with Create order and Delete and a way back to the drafts.
To print a draft, press Print receipt on it in the Drafts drawer, or from the ⋯ menu on its row in the Orders list, or on its page. Its page also has Print for an A4 sheet. Printing does not need an open session and does not change the draft. The receipt carries the draft's title and number and the line “This is a draft, not a final invoice”, has no QR code, and its amounts are estimates. Its look and contents come from draft print settings.
A draft stays after you close the session and shows in any session of its branch. It reserves no stock and is not recorded as a sale until you finish the cart and save it.
The coupon, gift card, points and cashback are not saved with the draft, and Snad warns you when you save. Apply them again after you open it. Prices and discounts stay as you saved them.
Regular invoices outside the register have drafts too (sales invoice drafts).
Common questions
- How do I sell at the POS?
- Open a session, tap the product card on the register, choose the Customer and the Payment method, and press the save button. The invoice shows in the Invoice list as Complete.
- Can I sell without an open session?
- No. The register belongs to an active session, so open one first (open a POS session). For a regular invoice use a sales invoice.
- What is the difference between Save and Save & print?
- Both record the invoice. Save & print prints the receipt after saving, while the save button (+) does not print. The receipt can carry a customer review code.
- Where do I see the session's sales?
- In the Invoice list during the session. After you close it, open it from the sessions record with View session to get the Shift summary and its invoices (close a POS session). For orders see review POS orders, and for totals sales reports.
- How do I hold a cart and come back to it later?
- Save it with the draft button under the cart, then open it later from Drafts at the top of the Invoice list drawer. A draft stays after the session closes.
- How do I remove a product I added by mistake?
- Press the three-dots button (Item options) on the product's line in the cart and choose Delete, or lower its quantity with the - button.
- How do I change how the register looks?
- Press Customize screen at the top of the product list, pick a preset or adjust the options, then press Apply. Your choice stays for later sessions (customization details).