
How to set up HR settings in Snad
To set up HR in Snad ERP, open HR and then Settings. Add job titles, departments and work schedules, set the late and absent limits and the vacation balances, then configure the Deduction policy. Each tab saves on its own.
In this guide9
Steps
Step 1: Open HR settings
In the sidebar, choose HR, then Settings. The page opens with seven tabs, from Job titles to Deduction policy. Details
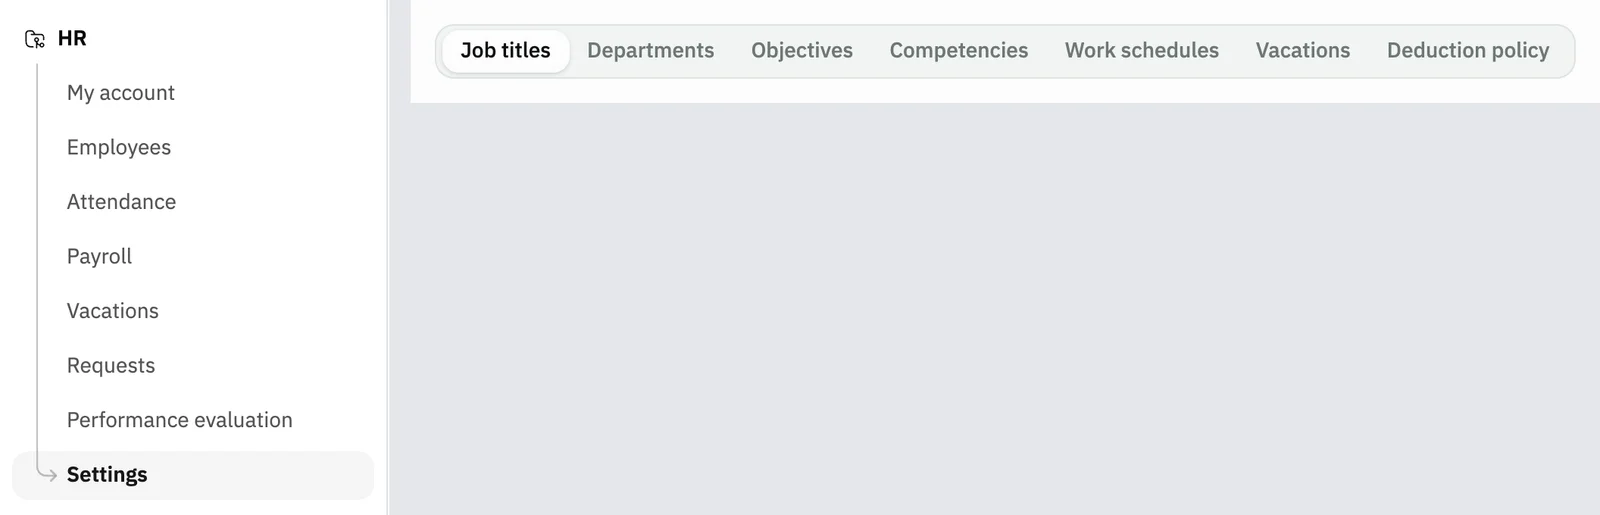
Image key - Settings in the sidebar
- The seven tabs
Step 2: Add a job title
In Job titles, press New job title. Type the Name, pick employees if you like, then press Save. The steps repeat in Departments with New department.
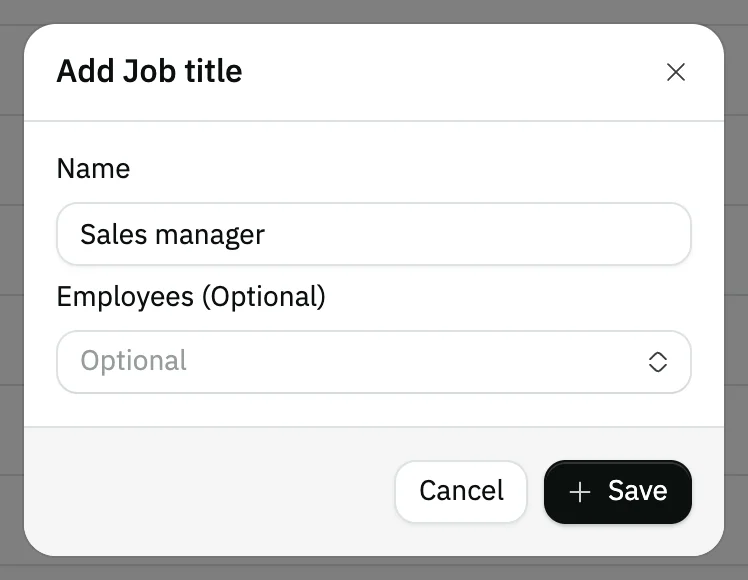
Image key - Name
- Employees, which are optional
Step 3: Set the late and absent limits
Open Work schedules. At the top are two limits in minutes: Record late after and Record absent after. Each saves as soon as you choose it. Details

Image key - Record late after
- Record absent after
- New work schedule
Step 4: Create a work schedule
Press New work schedule and the Add work schedule card opens. Type the Name, choose the Attendance type, set the First shift, and turn on the Second shift if needed. Details
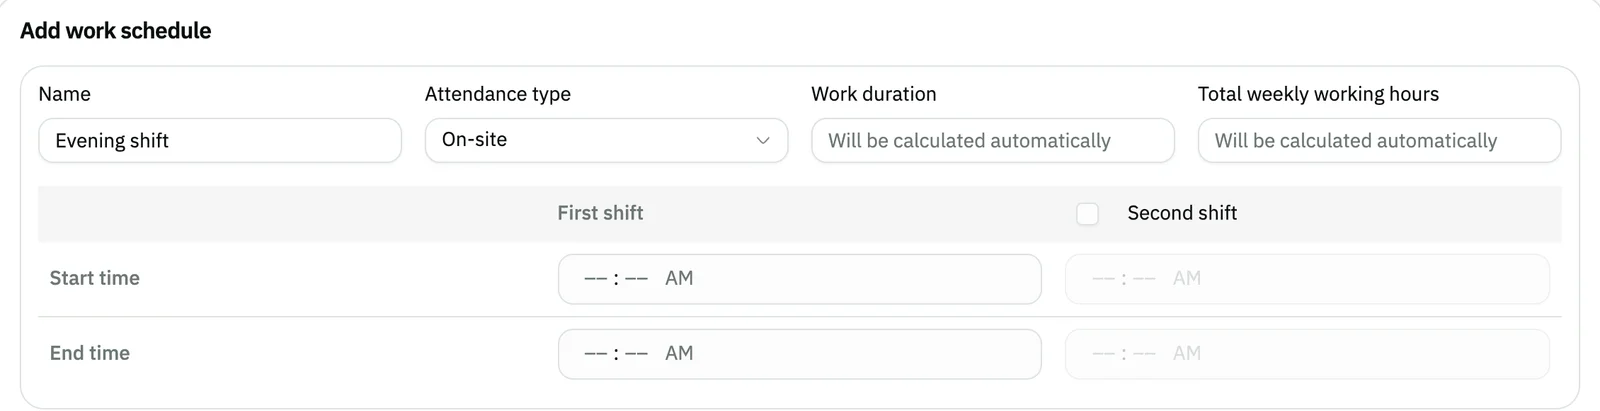
Image key - Name
- Attendance type
- First shift and Second shift
Step 5: Set verification, work days and location
Turn on Location verification and Picture verification if you want a location and a selfie at every check-in, and set the work days. For an On-site schedule, pick your place and range under Select a location, then press Save.
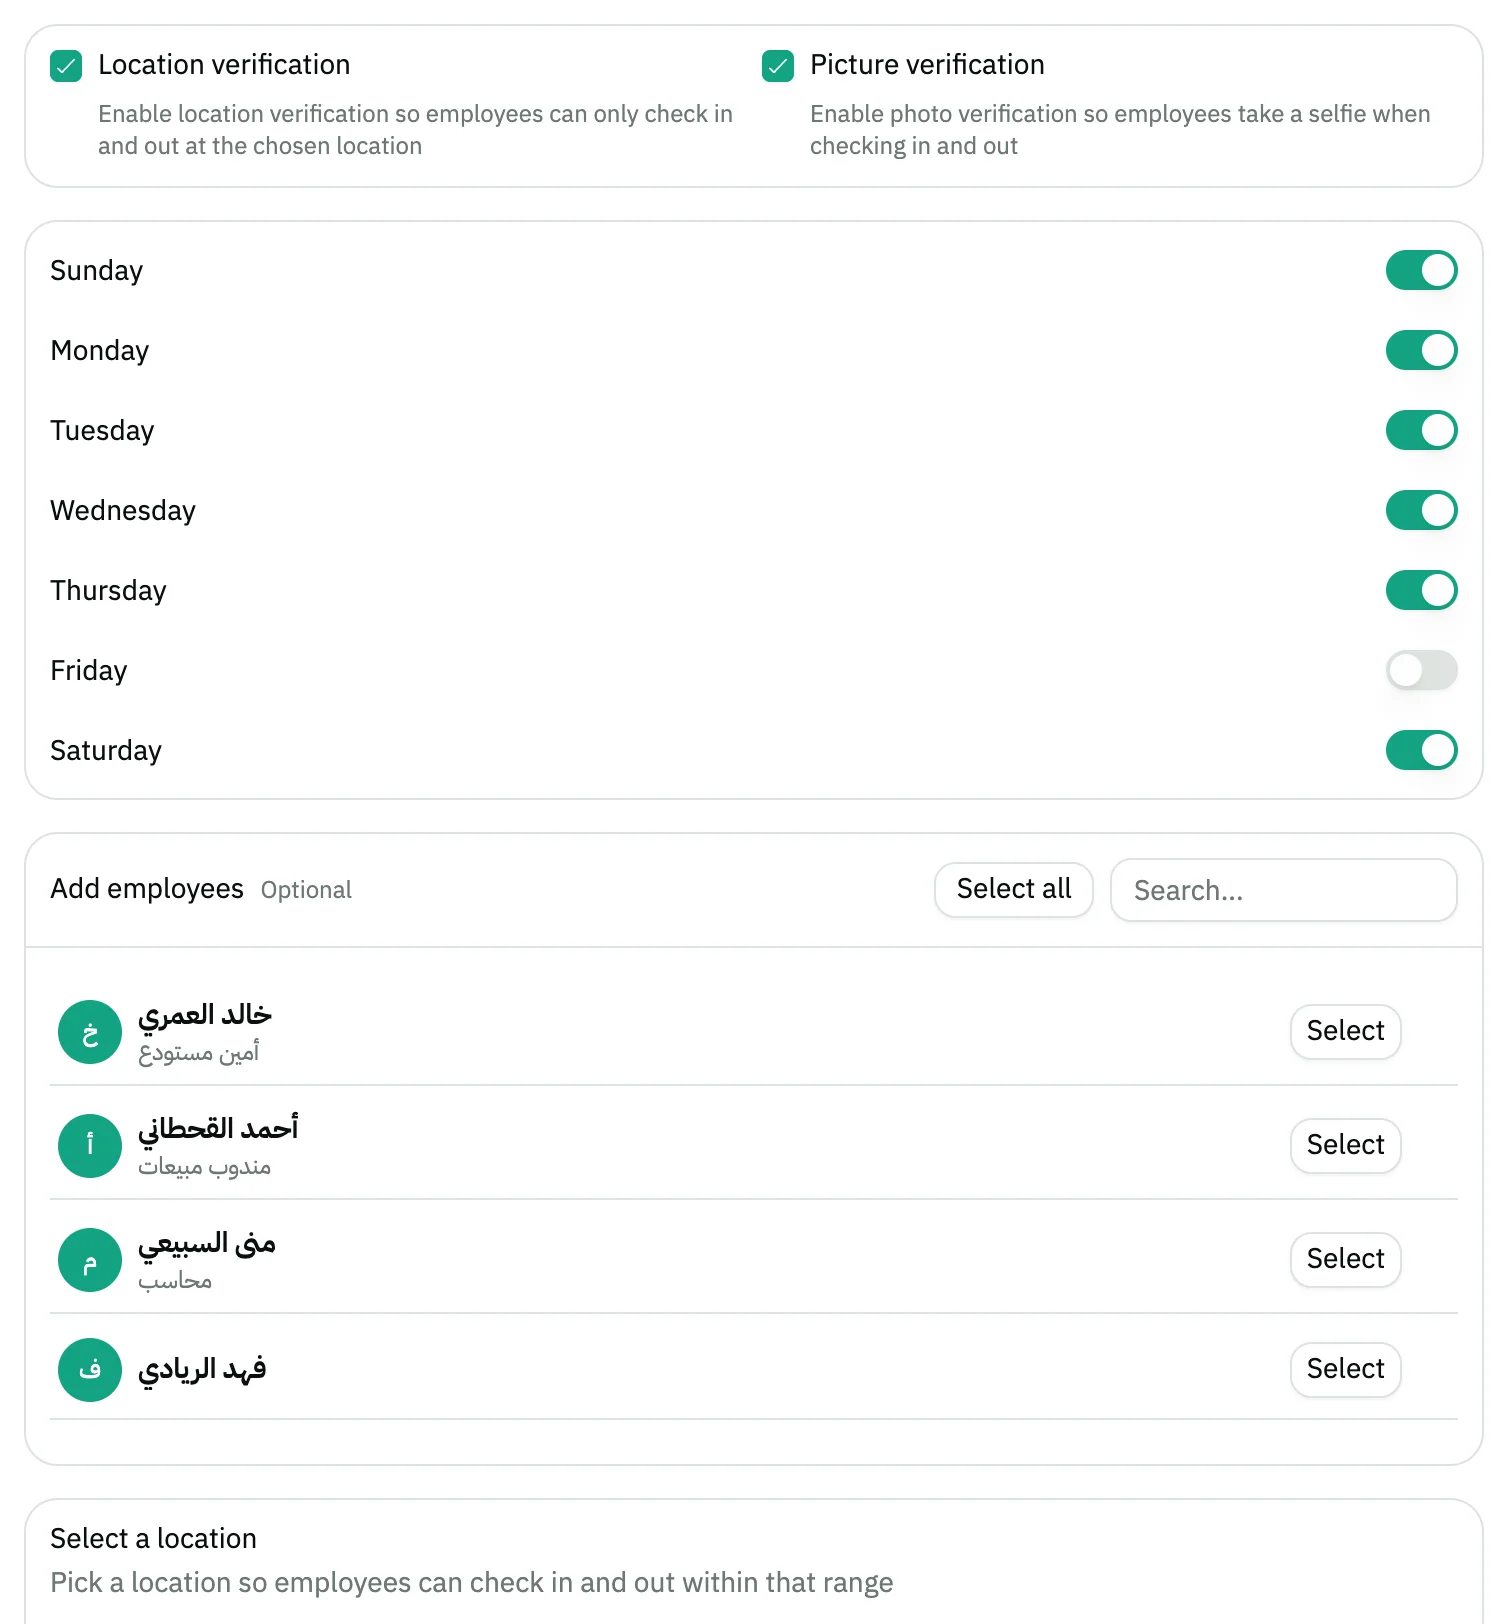
Image key - Location verification
- Picture verification
- The work days
- Select a location
Step 6: Set the vacation balances
Open Vacations. Choose the number of days for each type, from 0 to 180: Annual vacation, Sick leave, Hajj leave and more. Each value saves at once. Details
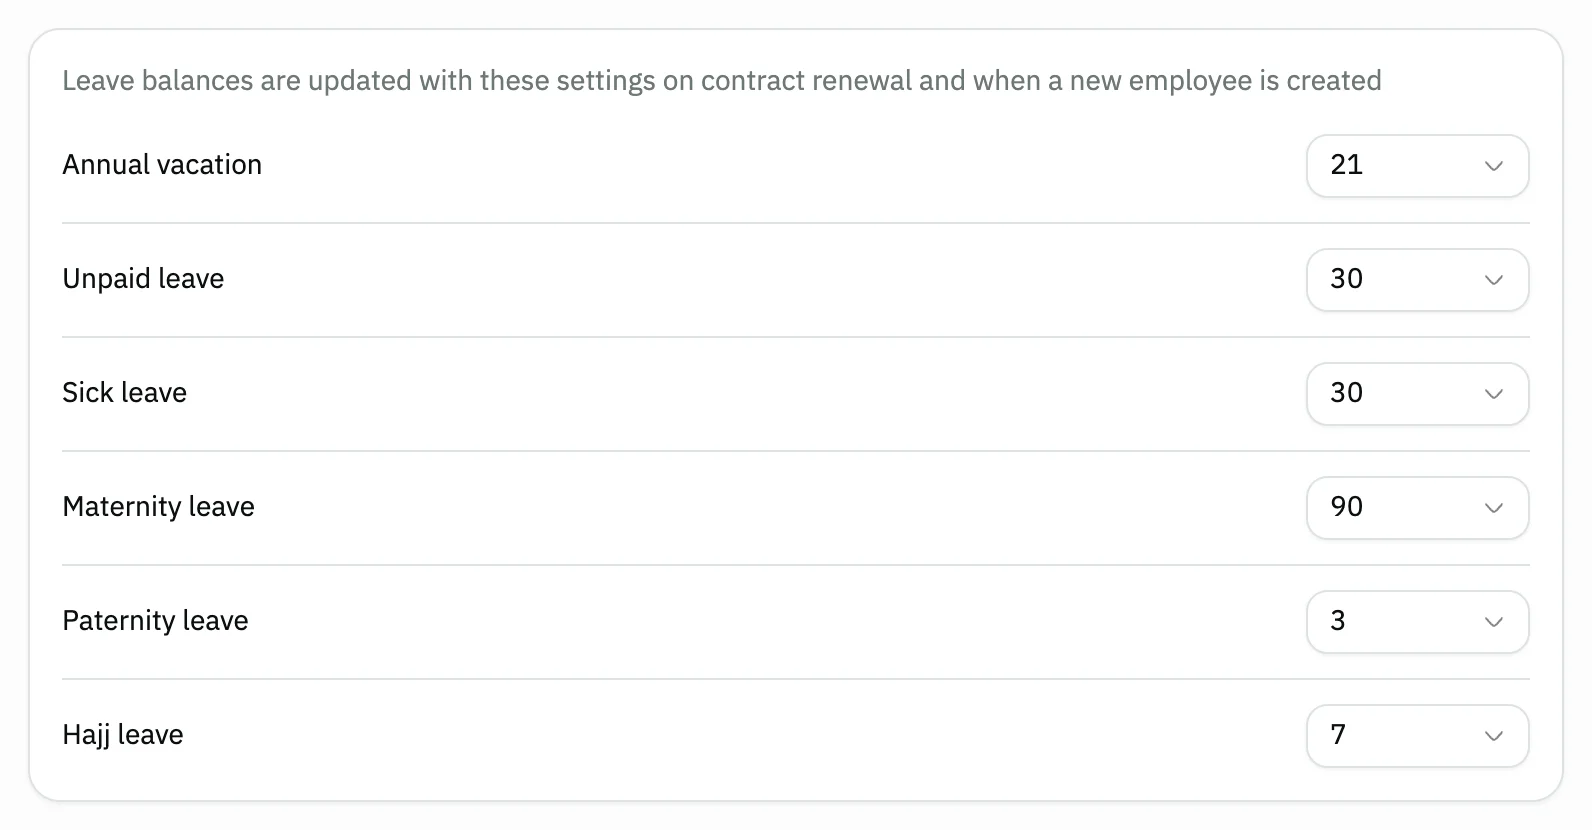
Image key - Annual vacation
- Sick leave
Step 7: Prepare objectives and competencies
In Objectives, press New objective and type the Name. In Competencies, press New competency and choose the Type: Promotion, Financial rewards, Certificate or Other.
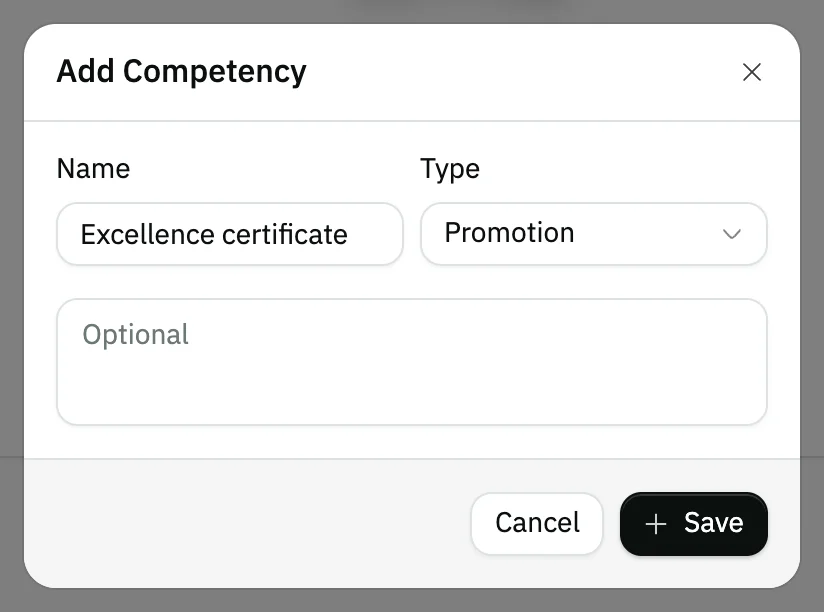
Image key - Name
- Type
Step 8: Create a deduction policy
Open Deduction policy and press Add policy. Type the Name, then choose the Pay basis, Month days, Min net salary and Apply to. Details
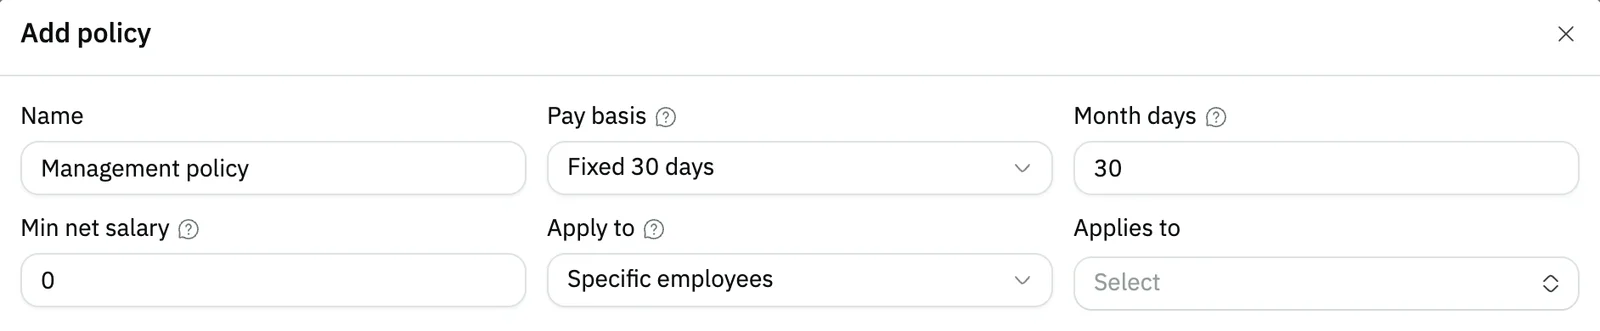
Image key - Name
- Pay basis
- Apply to
Step 9: Turn on the deduction rules
Under Deduction rules, turn on Enabled for each type you want, such as Late arrival, Absence and Overtime. Set the Rate basis and Amount, then press Save.
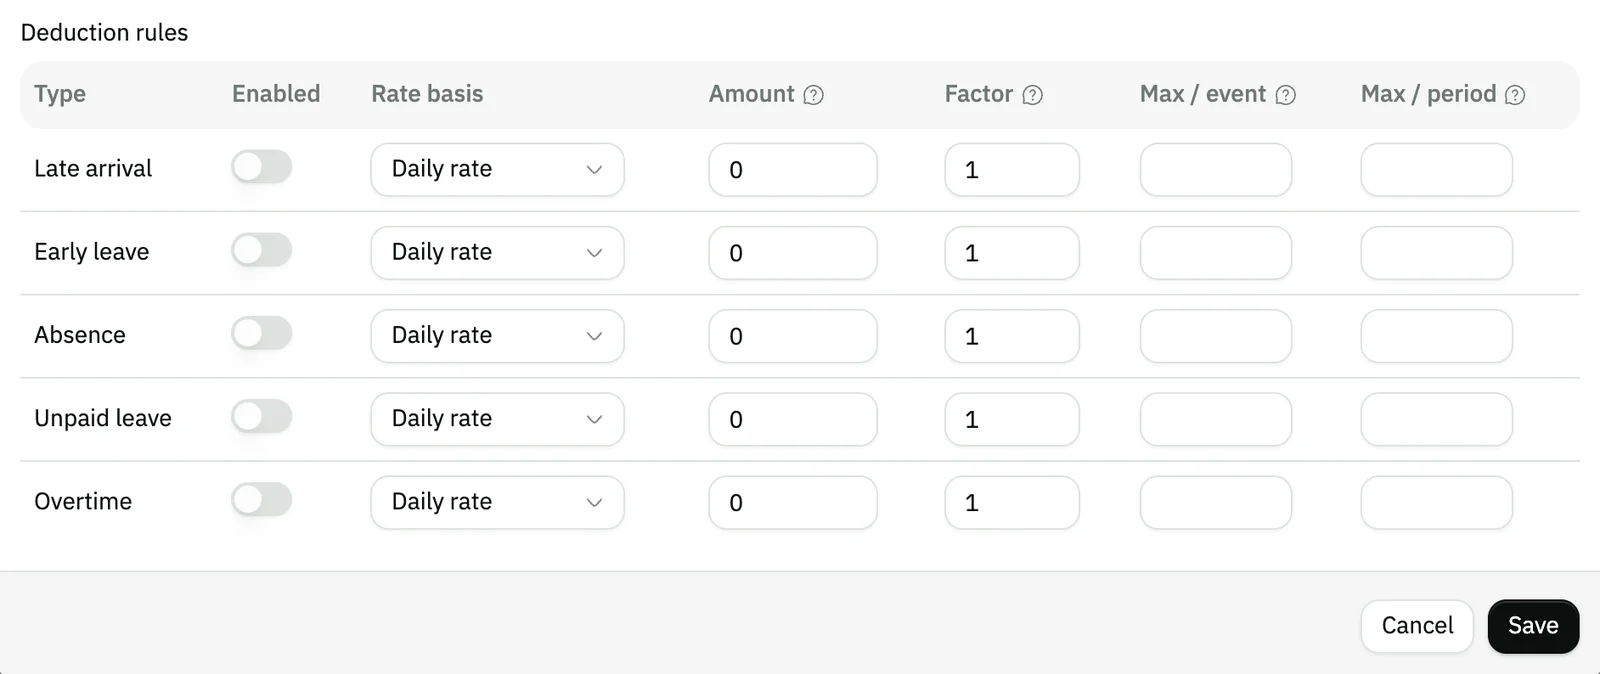
Image key - Deduction rules
- Save
Messages that block saving
If saving fails, one of these messages shows next to the field. The table gives the cause and the fix.
| Message | Cause | Fix |
|---|---|---|
| «End time must be after start time» | The start time of the shift equals its end time. | Pick an End time for the first shift that is later than its start time, then press Save. |
| «Second shift must start after the first» | The second shift starts before the first one ends, so the two overlap. | Move the Second shift start to after the first shift ends. |
| «Name is required» | You left the Name empty in the deduction policy. | Type a policy name, then press Save. |
| «Select at least one target for this scope» | Apply to starts on "Specific employees", and you left Applies to empty. | Pick the employees, departments or schedules under Applies to, or switch Apply to to the organization default. |
Advanced details
Each section here explains one point from the steps in depth. Every section has a fixed link you can share.
Who sees which tab
Each tab shows to whoever has its permission in their role, and the account admin sees them all. Deduction policy shows to those with the general settings permission.
You edit permissions in roles and permissions.
On-site and remote schedules
On-site asks for a location and a range on the map, while Remote neither asks for nor saves them. You change the location of an existing schedule from its actions menu with Update location.
Under the work days, the optional Add employees list links employees to the schedule right away.
How the location and verification affect the check-in itself is in record attendance.
When the vacation balances apply
Leave balances are updated with these settings on contract renewal and when a new employee is created (add an employee).
You record an employee's vacation itself in record an employee vacation.
Which policy applies to an employee
The most specific policy always wins: employee, then work schedule, then department, then the organization default. Min net salary is the floor that deductions cannot push the net below.
Snad applies the policy when you run payroll.
Common questions
- Do I create a work schedule before adding employees?
- Yes, every employee needs a branch and a work schedule (add an employee, import employees). Create the schedule in Work schedules first.
- Why can't I see some tabs?
- Because your role does not have that tab's permission. Ask the account admin to add it in roles and permissions.
- Does changing the two limits need a Save button?
- No. Each list saves as soon as you choose a value, and so do the Vacations balances.
- Can an employee work two shifts a day?
- Yes. Turn on the Second shift in the schedule and set its times, so that it does not start before the first one ends.
- Where are objectives and competencies used?
- In performance evaluation cycles, where you pick from them when you set up a cycle (evaluate employee performance).