
How to create a quotation in Snad
To create a quotation in Snad ERP, open Sales, then Quotation, and press Create quotation. Pick the customer, add products with Add product, and check the quantity, price and discount. Then press Save. The saved quotation page opens, where you share it with the customer or convert it to an invoice.
In this guide6
Steps
Step 1: Open the quotation screen
In the sidebar, choose Sales, then Quotation, and press Create quotation above the list.
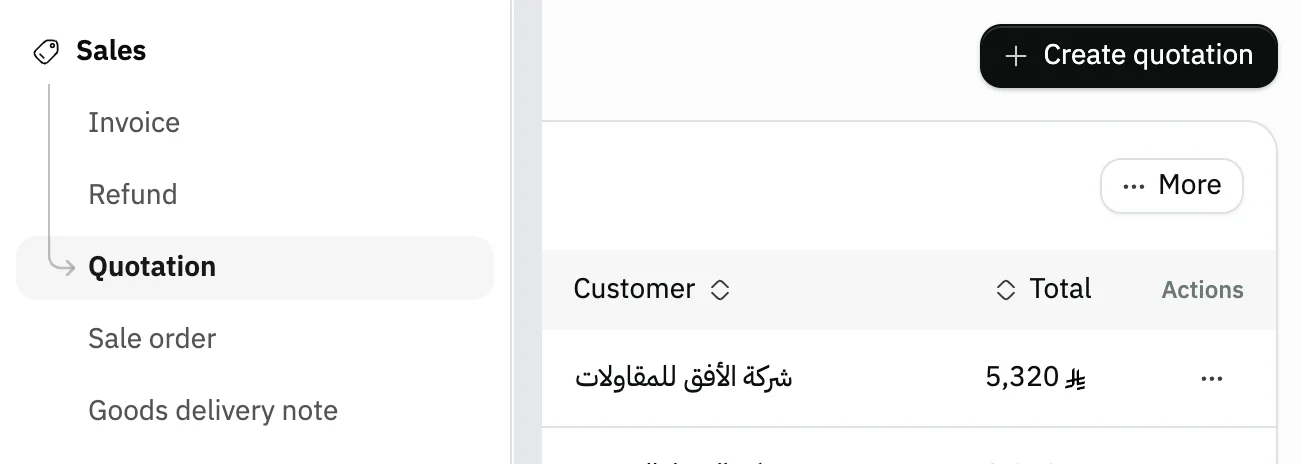
Image key - Quotation in the sidebar
- The Create quotation button
Step 2: Pick the customer and check details
Click the Customer field and pick the customer from the list, then check the Date. If the Branch, Warehouse and Salesman fields show, pick their values (branches, warehouses); they are required.
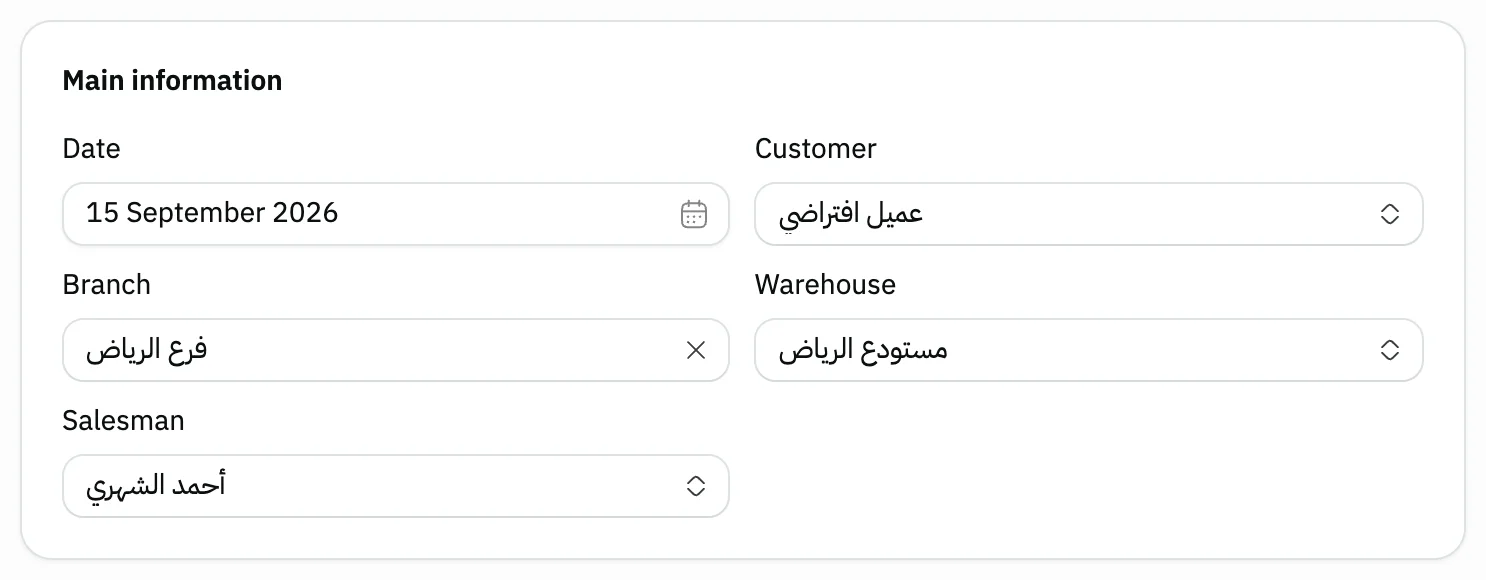
Image key - The quotation Date
- Customer
- Branch
- Warehouse
- Salesman
Step 3: Add the products
Press Add product, search by name or barcode, tick the products you need, then press Apply.
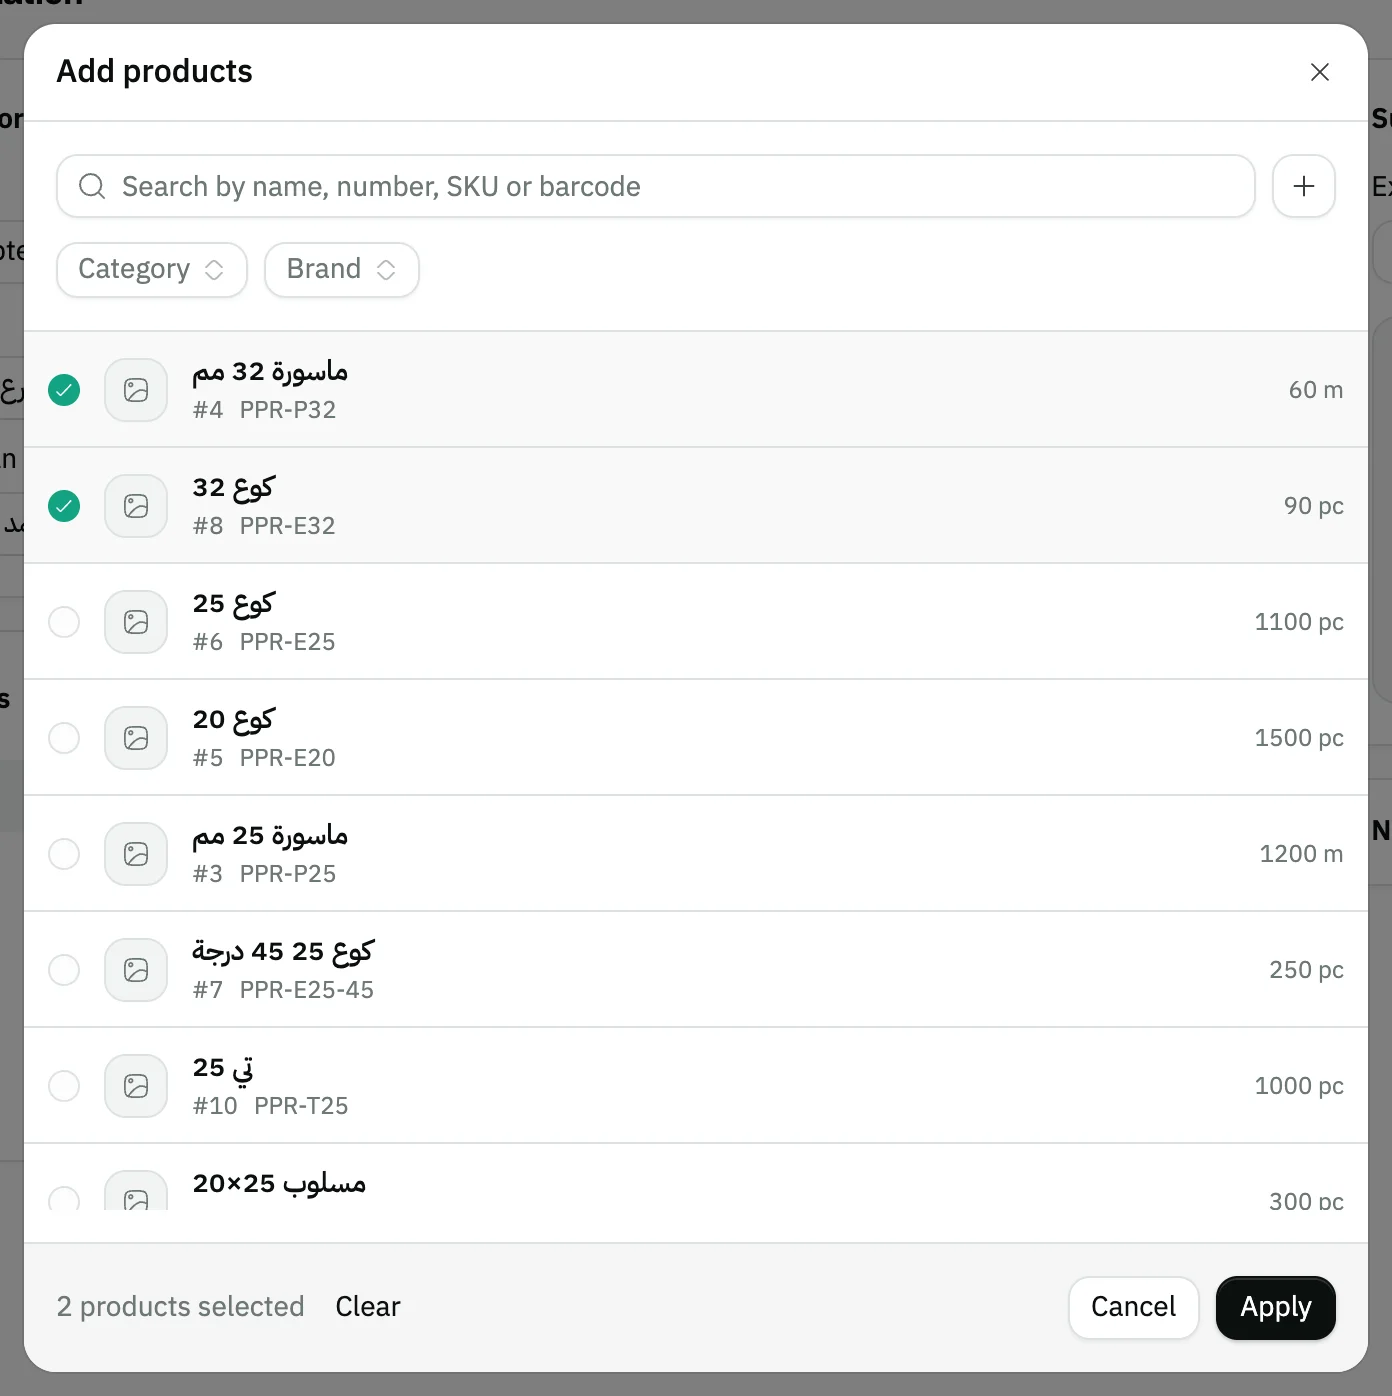
Image key - Search by name, number, SKU or barcode
- A ticked product
- The Apply button
Step 4: Set quantity and price
On each line, enter the Quantity and check the Price. A discount on one product goes in that line's Product discount. Details
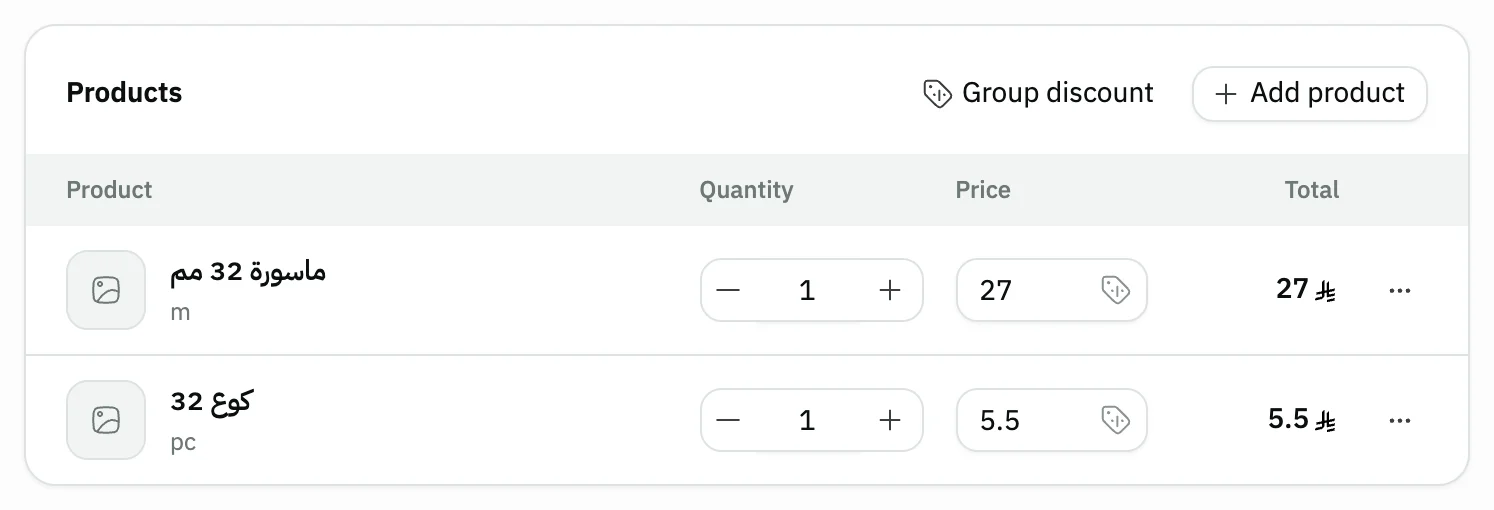
Image key - Quantity
- Price
- Line menu: product info, notes, remove
Step 5: Check the summary and reference
In the Summary, check Extra charge, Discount percentage and the total (tax setup). In Notes and attachments, add the quotation Reference if you like.
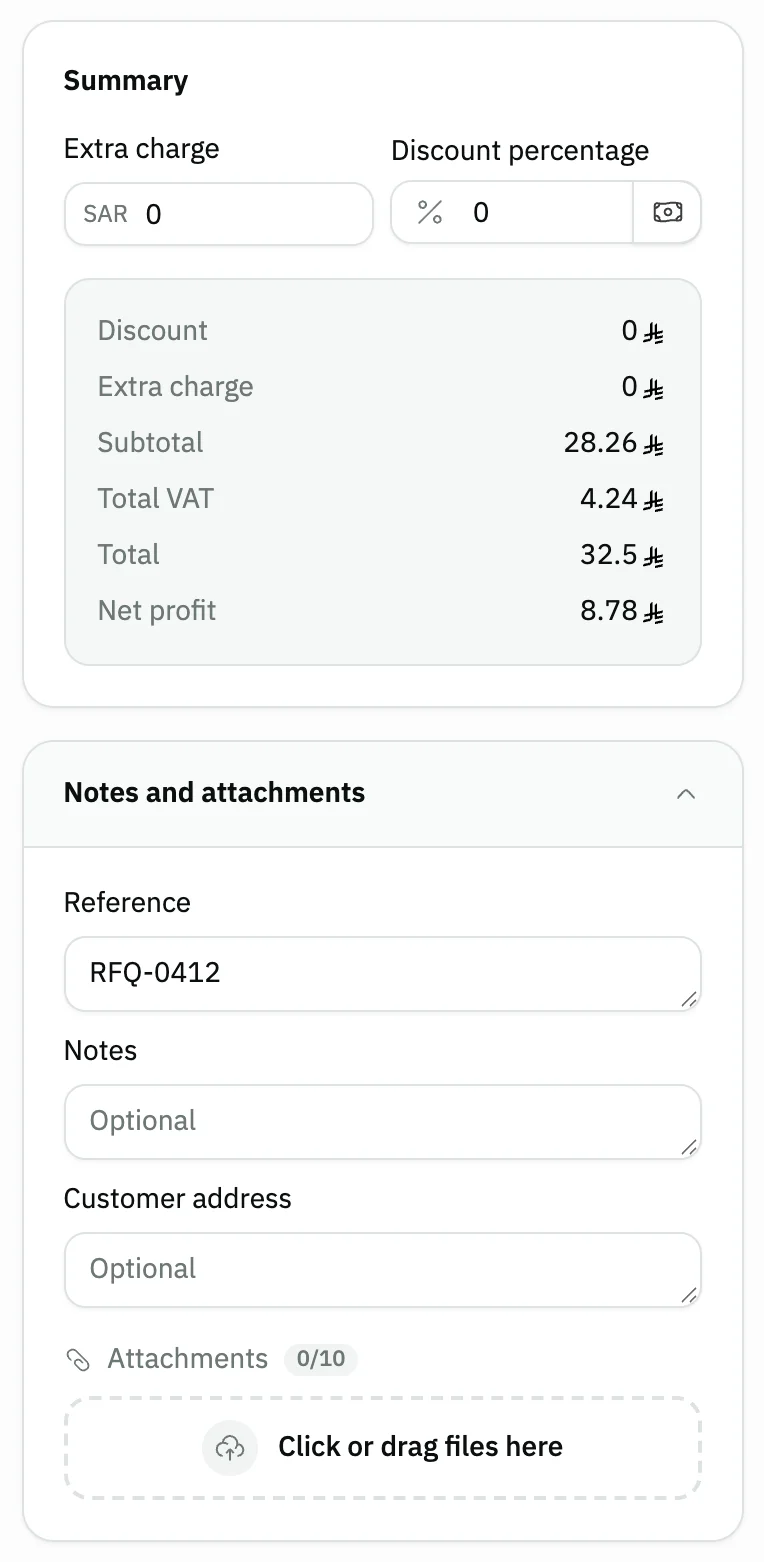
Image key - Extra charge
- Discount percentage
- Tax and total
- Reference
Step 6: Save the quotation
Press Save at the top of the form. The saved quotation page opens next. Details
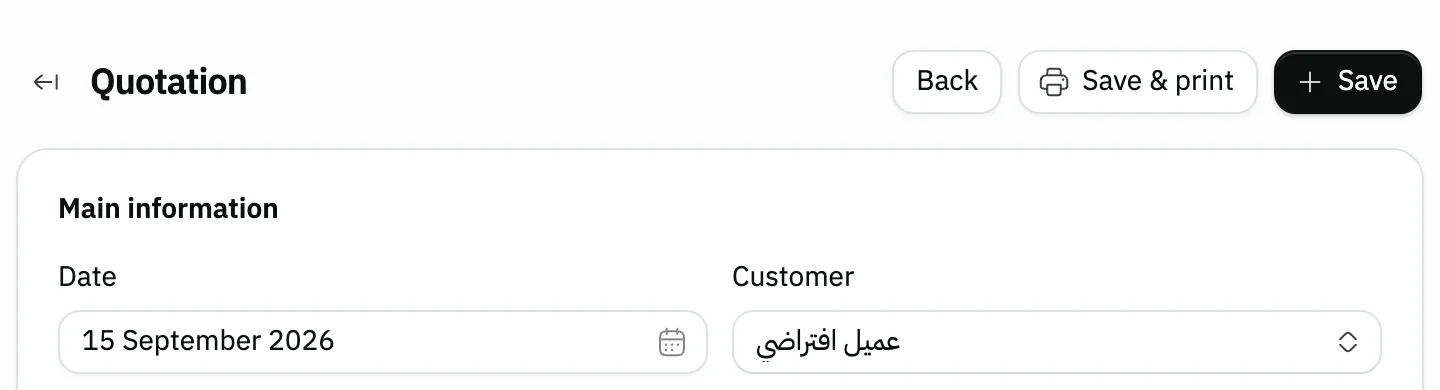
Image key - The Save button
Messages that block saving
If saving fails, one of these messages shows next to the field. The table gives the cause and the fix.
| Message | Cause | Fix |
|---|---|---|
| «Pick a product first» | The quotation has no products. | Add at least one product with Add product. |
| «Enter a price · Enter a quantity» | A line has no price or no quantity. | Fill the missing value on the flagged line. |
Advanced details
Each section here explains one point from the steps in depth. Every section has a fixed link you can share.
A discount on the whole quotation
You write the discount on the whole quotation in Discount percentage inside the Summary, and a button beside it switches it to Discount amount. It stays disabled until you pick a Salesman, and it can't exceed that salesman's discount limit (add a salesman).
If the customer has a Special discount on record, this field is filled with it when you pick the customer. To set it, see add a customer.
After saving: convert to invoice and print
On the saved quotation page you find Convert to invoice, Share and Print (print settings and the print template). Convert to invoice shows to users allowed to create invoices.
Converting opens the invoice form with the quotation's data carried over. When you save the invoice, the quotation counts as used and its convert button disappears.
If the customer accepts the quotation through the public link, a line “Quotation accepted by … on … via the public link” appears at the top of the page, and conversion stays available.
Does the customer want an order instead? Create a sale order from the same quotation instead of an invoice.
For a new quotation, type “Create a quotation for a customer” in AI Mode, and it prepares a preview you confirm (run operations with AI Mode).

- The Convert to invoice button
- The Share button
Share the quotation with a public link
Press Share and the Share document window opens with a link and a QR code. Anyone with the link can view and accept the quotation, with no login.
Turn off Link enabled to disable the link so nobody can open it, or press Generate new link and the old link stops working immediately.
Send via WhatsApp sends the link straight to the customer's phone, and Share via WhatsApp opens a chat from your own WhatsApp.
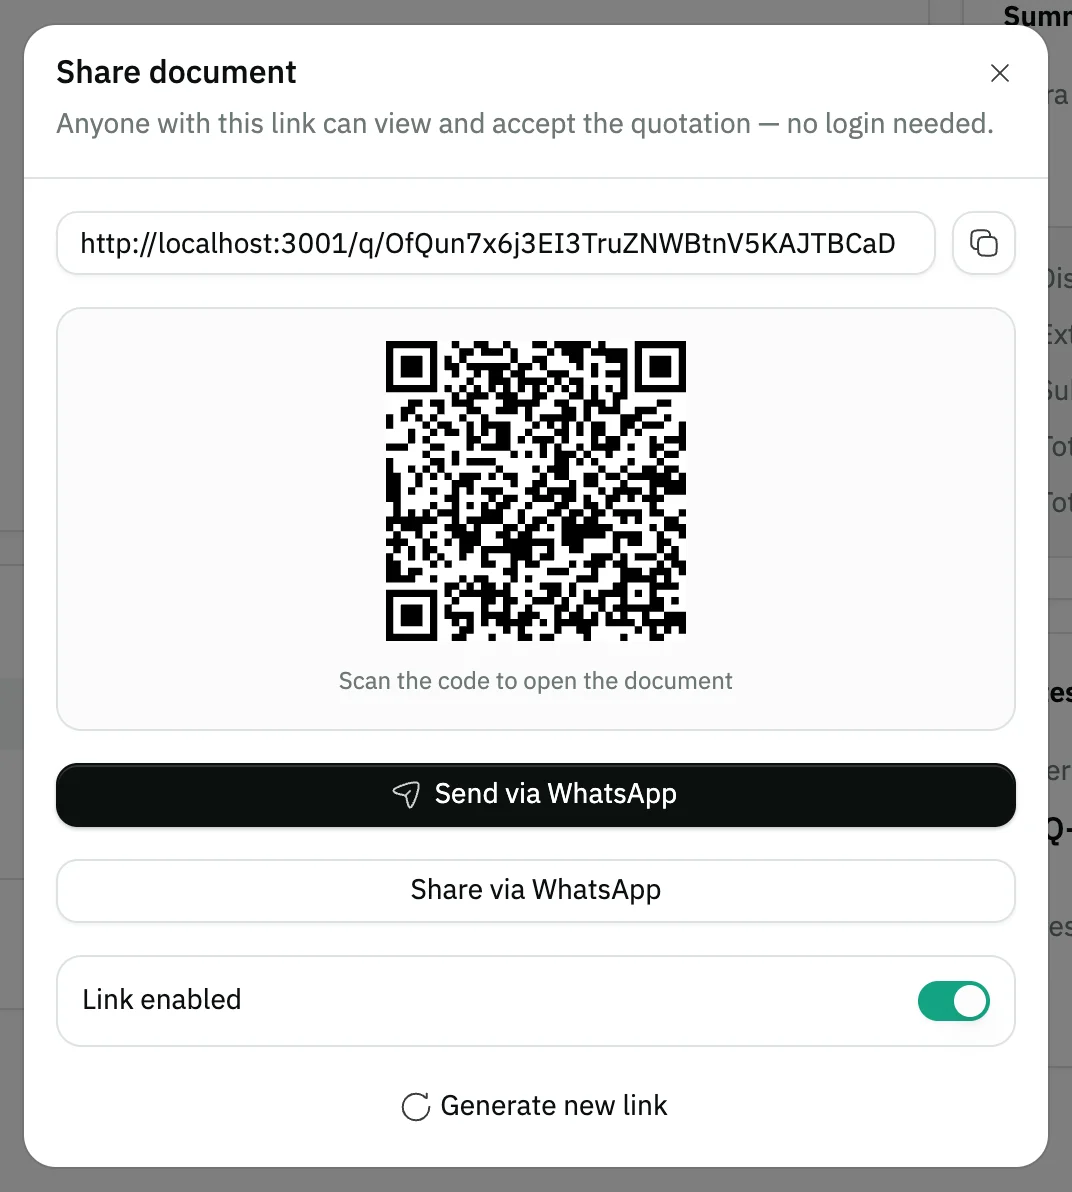
- The public link
- The Send via WhatsApp button
- The Link enabled switch
Automatic WhatsApp to the customer
After you save a new quotation, Snad tries to send it to the customer's WhatsApp automatically, if the customer has a phone number and Send quotations is on in the WhatsApp notification settings.
This runs from the send switch in sales settings; the steps are in send documents on WhatsApp.
Common questions
- How do I make a price quote for a customer in Snad?
- Open Sales, then Quotation, and press Create quotation. Pick the customer, add the products, then press Save.
- How do I send the quotation to the customer?
- On the saved quotation, press Share, then copy the link or press Send via WhatsApp. The customer can open the link and accept the quotation.
- How do I convert a quotation to an invoice?
- Open the saved quotation and press Convert to invoice. An invoice form opens with the quotation's data. Check it, then save the invoice.
- Why can't I type a discount on the quotation?
- The Discount percentage field stays disabled until you pick a Salesman, and it can't exceed that salesman's discount limit.
- Does the customer have to exist before the quotation?
- Yes, Customer is a required field. Add it from the customers page or with the Add button inside the customer field.