
How to view an account statement in Snad
To view an account statement in Snad ERP, open Reports and press Account statement in the Accounting card. Pick the Account, set the period if you need to, and the table shows the Opening balance, every entry and the Closing balance. Then print or export it.
In this guide7
Steps
Step 1: Open the report
In the sidebar, choose Reports, then press Account statement inside the Accounting card.
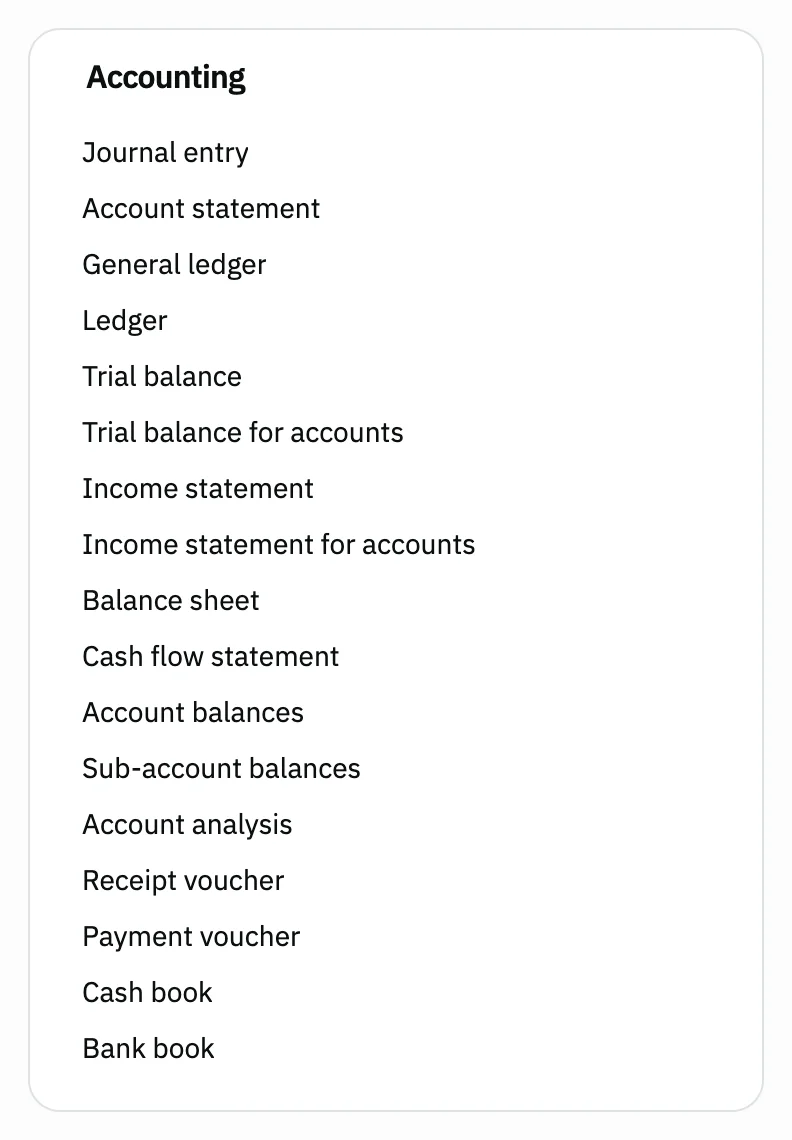
Image key - The Accounting card
- The Account statement link
Step 2: Pick the account
The screen starts with the message Select account. Press Account, search by name, then pick one account from the list. Details
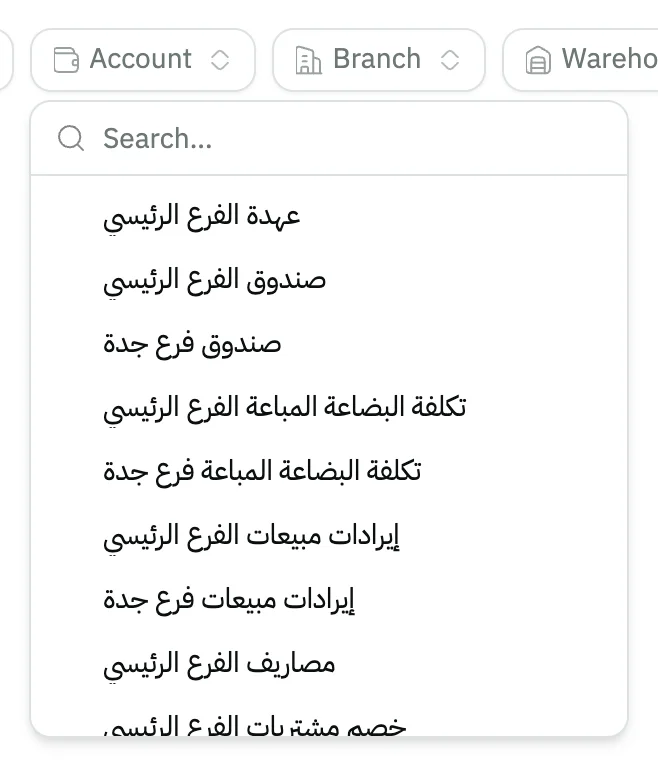
Image key - The Account button
- The account you will pick
Step 3: Set the period
Press Pick a date and choose a ready period such as This month, or select a range in the calendar. The statement refreshes right away. Details
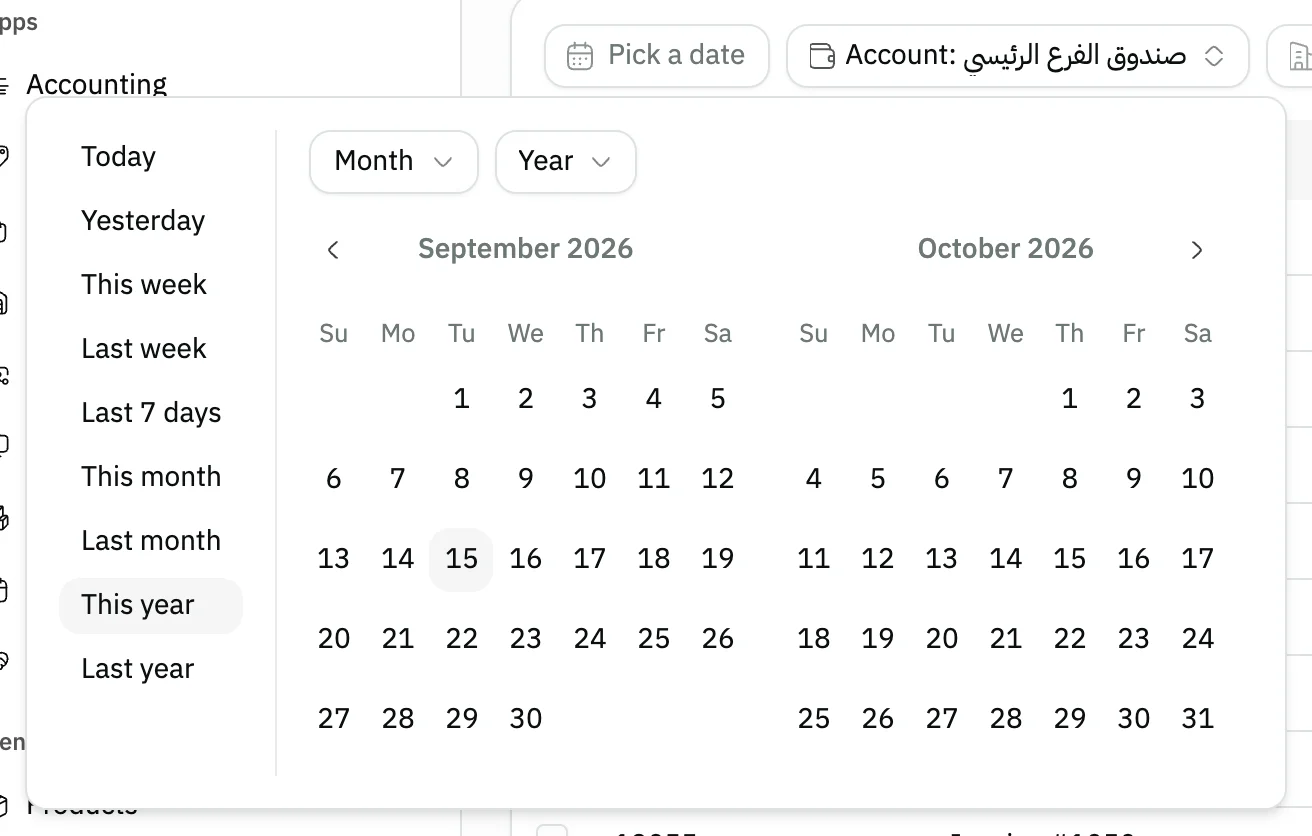
Image key - The Pick a date button
- The ready periods and the calendar
Step 4: Read the entries and balance
The table opens with the Opening balance, followed by the entries in Debit, Credit and Balance columns, and ends with the Closing balance. Details
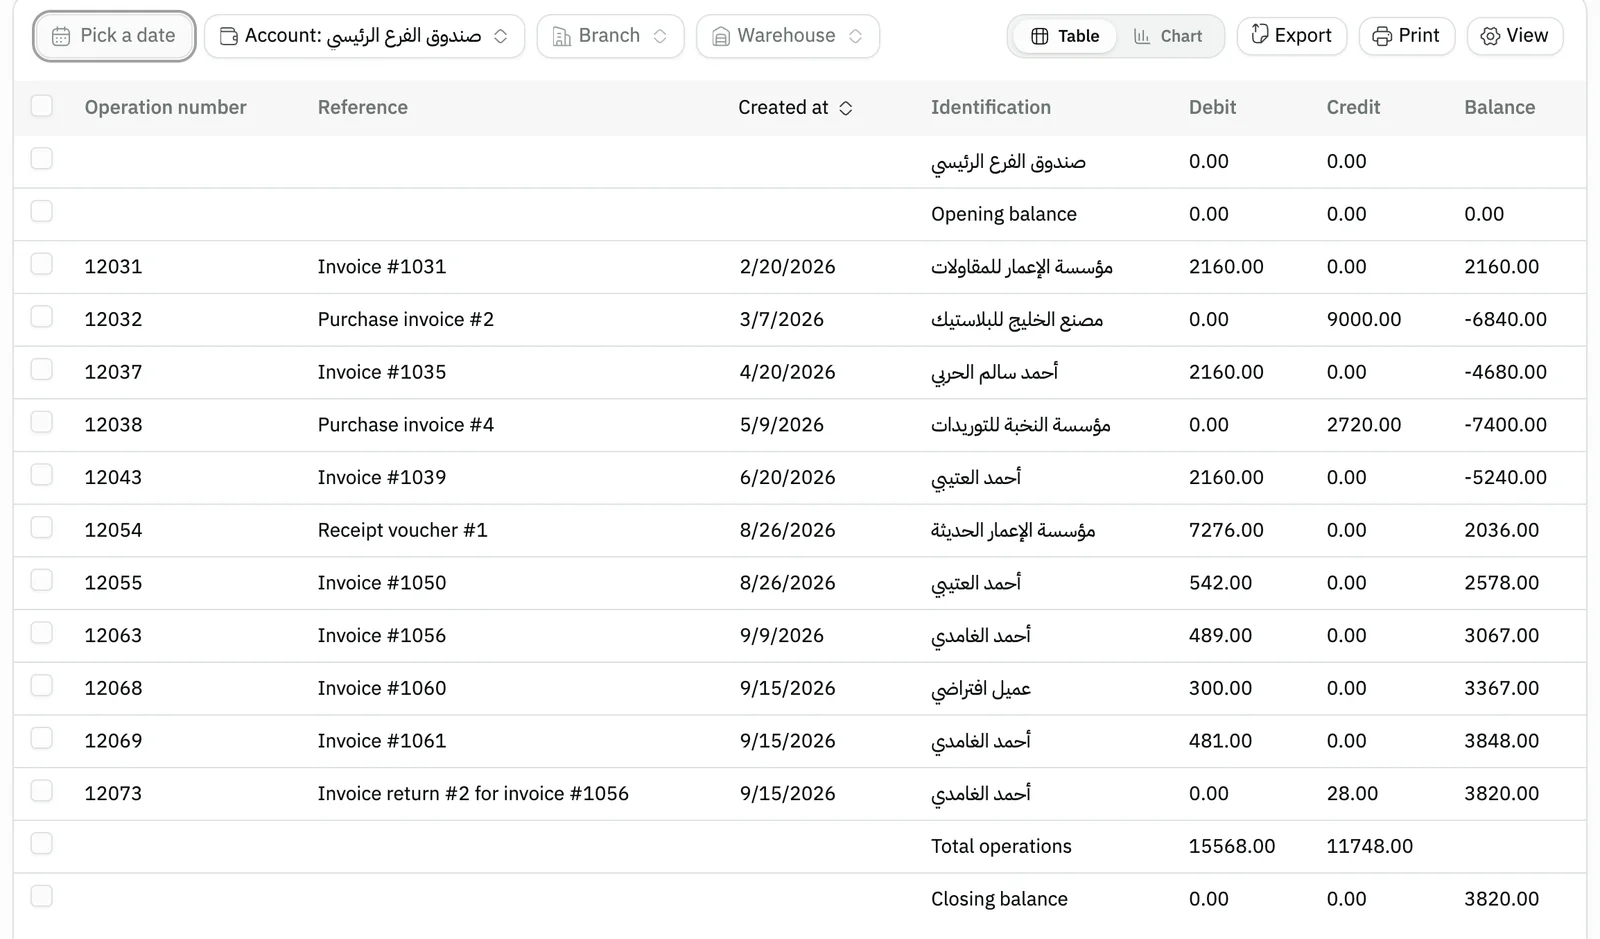
Image key - The Account button showing the chosen account
- The Opening balance row
- The Balance column
- The Closing balance row
Step 5: Open an entry's details
Press any entry in the table and a window titled Accounts affected by this transaction opens, listing every account the same transaction touched.
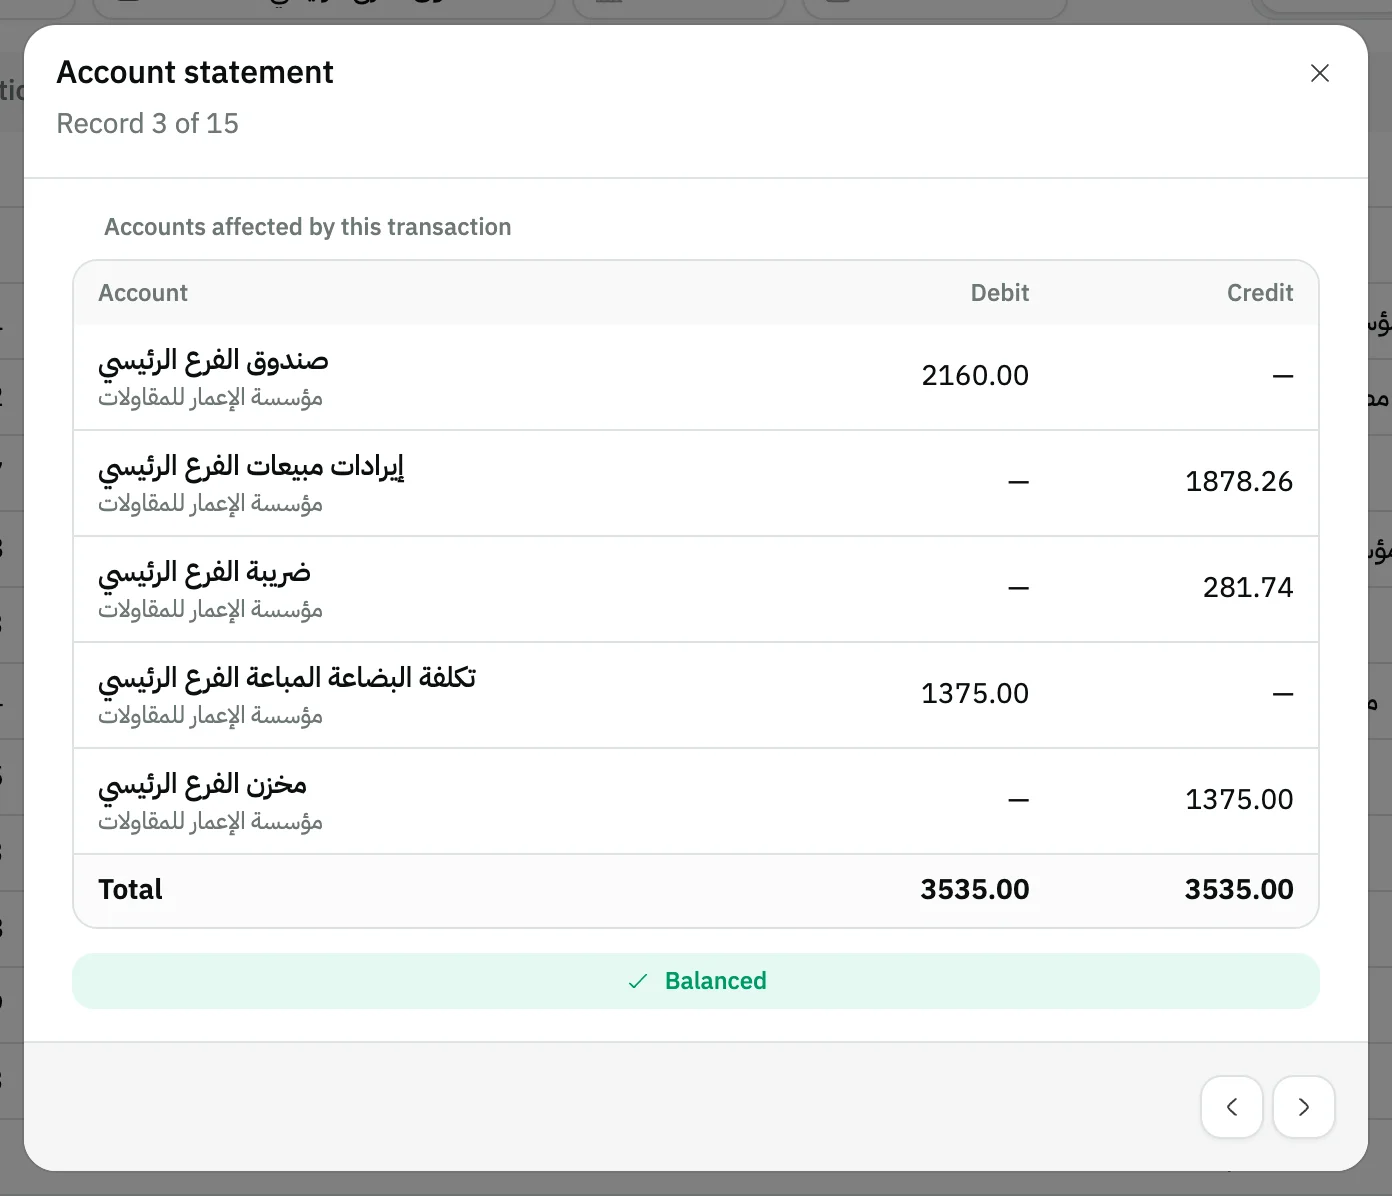
Image key - The Accounts affected by this transaction heading
Step 6: Narrow it by branch or warehouse
Optional: press Branch or Warehouse and pick a value, and the statement is worked out for those entries alone. Details
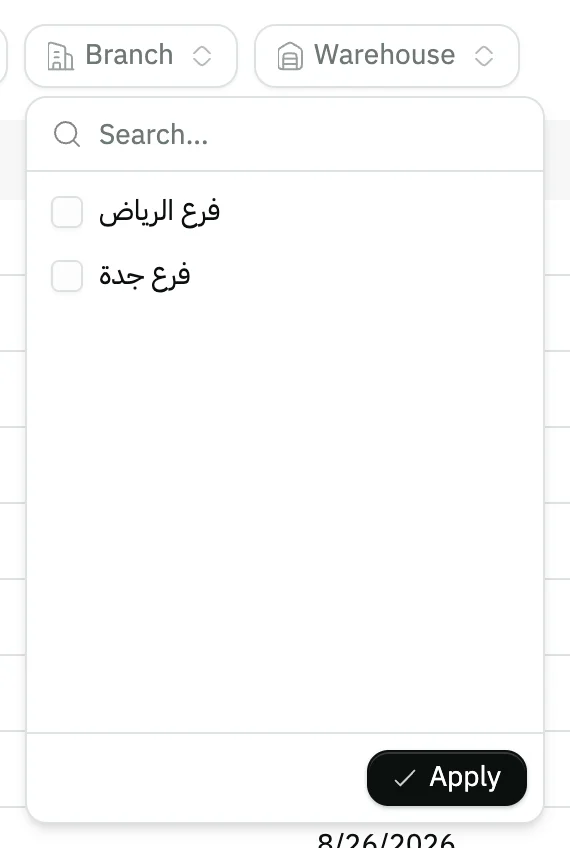
Image key - The Branch button
- The Warehouse button
Step 7: Print or export it
Press Print to print the statement. Under Export you choose Excel or CSV. The View button shows or hides columns.
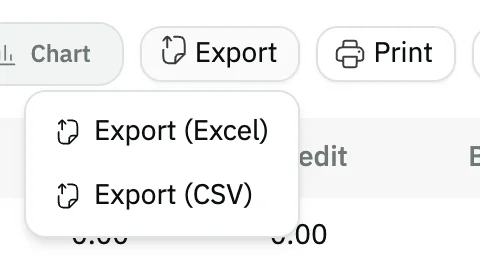
Image key - The Export button
- The Excel and CSV export formats
- The Print button
Messages that block saving
If saving fails, one of these messages shows next to the field. The table gives the cause and the fix.
| Message | Cause | Fix |
|---|
Advanced details
Each section here explains one point from the steps in depth. Every section has a fixed link you can share.
Which accounts the list shows
Only postable accounts show, the ones entries are recorded against. A parent account that groups other accounts is not in the list (chart of accounts).
The first 20 accounts show as soon as the list opens, and the rest load as you scroll. Search is optional and covers all the organization's accounts, with a loading indicator while it fetches. If loading fails, an error line appears with Retry beside it.
You pick one account at a time. Picking the same account again does not clear it, so the statement never falls back to the Select account message.
For one customer or supplier there is a dedicated statement: the customer statement and the supplier statement.
The default period
If you set no period, the statement covers the whole current financial period, from start to end.
The ready periods are Today, Yesterday, This week, Last week, This month, Last month, This year and Last year. Alt + T opens the date list (keyboard shortcuts).
How the statement adds up
Closing balance = opening balance + total Debit − total Credit for the period's entries. Snad reads these figures from the entries themselves.
The Total operations row before the last sums Debit and Credit for the whole period, not just the page on screen. The opening balance shows on the first page only.
Ten entries show per page, and you move between pages below the table. The Ledger screen shows the same entries without running balances.
Statement by branch or warehouse
When you pick a Branch or Warehouse, the whole statement is recalculated for those entries, so opening balances and totals change, not just the rows.
Entries not tied to a branch or warehouse disappear from the statement when either filter is applied (add a branch and add a warehouse).
Common questions
- How do I see the movements of one account in Snad?
- Open Reports, then Account statement, press Account and pick it. Its entries show between the Opening balance and the Closing balance.
- Why can't I find an account in the list?
- The list holds only accounts that entries are recorded against, so a parent account is missing. Search by name, or open the chart of accounts to check the account.
- Can I see the entry behind a movement?
- Yes. Press the entry in the table and the Accounts affected by this transaction window lists every account in that transaction.
- How do I print or download the statement?
- Press Print to print it. To download it, open Export and choose Excel or CSV.
- What is the difference between the account statement and the trial balance?
- The account statement covers one account and its entries, while the trial balance gathers the balances of all accounts in one table. For a picture of the balances on a given day, open the balance sheet, and for movement between two dates the income statement.